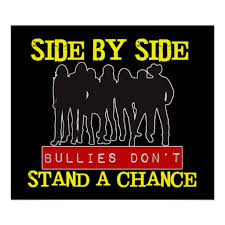
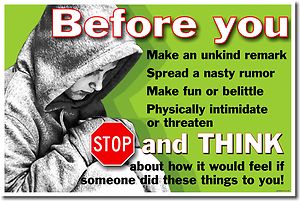
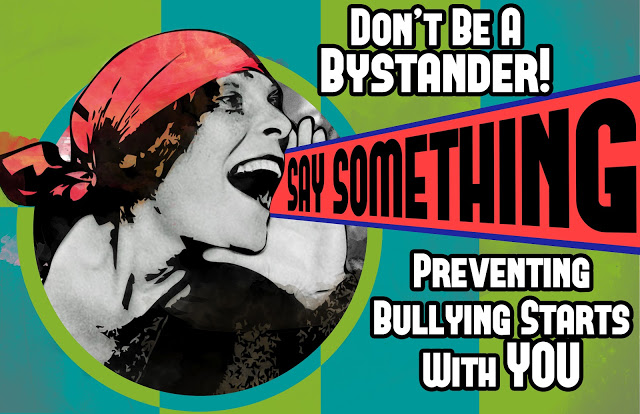
1.Create an Anti-Bullying Poster for the School
INDESIGN TIPS
You will design an 11 x 17, Anti Bullying poster for the school. We will, as a class choose the top 3 posters, submit them to administration and have them choose which anti-bullying poster will represent and be posted in and out of our school.
Themes
Violence
Dispair
Fear
Hate
Loneliness
Support
Love
Prevention
Requirements:
For EACH class, you are not prepared, I will drop your grade, by 1 full grade. If you have an "A" I will drop your grade to a "B". NO EXCEPTIONS
Preparation is essential. I will grade you on the following:
You will design an 11 x 17, Anti Bullying poster for the school. We will, as a class choose the top 3 posters, submit them to administration and have them choose which anti-bullying poster will represent and be posted in and out of our school.
Themes
Violence
Dispair
Fear
Hate
Loneliness
Support
Love
Prevention
Requirements:
- Document set up 11" W x 17" D or 17 x 11"
- You must create a work plan for this project, including dates things will happen and information of places and times, you need to do research or photography
- You must gather all the materials poster including
- Text to appear on the poster
- (Do a photo shoot) Please make arrangements and get written permission from the person(s) you are photographing, and come to me in advance and let me know your plan.
- I will not permit you to use your telephones in class, so all photos, text or info must be copied to a flash drive in advance of class. Do not send it to your Email, as computer blocks are in place that will prevent access to certain types of email accounts. I do have a card reader to help as well.
For EACH class, you are not prepared, I will drop your grade, by 1 full grade. If you have an "A" I will drop your grade to a "B". NO EXCEPTIONS
Preparation is essential. I will grade you on the following:
- The written text 20%
- The building and understanding of the InDesign file 30%
- The organization of your materials and final project 10%
- Creativity and Effort 40%
|
|
|
All Final work must be saved as PDF and saved to your folder. Please print your documents and put your name and block number on the back of pages.
2. InDesign CS6 in detail. Creating a Literary Magazine
Part 1: InDesign Demo,
I will demonstrate the use of master pages, Libraries, Paragraph styles and Character Styles
Please take notes in your sketch book!
See Assignment 9, under the Advanced Design menu (Introduction to InDesign)
INDESIGN TIPS
Part 2: Create a 6 page, 8 1/2 x 11 Literary Magazine
REQUIREMENTS:
For EACH class, you are not prepared, I will drop your grade, by 1 full grade. If you have an "A" I will drop your grade to a "B". NO EXCEPTIONS
Preparation is essential. I will grade you on the following:
I will demonstrate the use of master pages, Libraries, Paragraph styles and Character Styles
Please take notes in your sketch book!
See Assignment 9, under the Advanced Design menu (Introduction to InDesign)
INDESIGN TIPS
Part 2: Create a 6 page, 8 1/2 x 11 Literary Magazine
REQUIREMENTS:
- Magazine Name is VERITAS and must appear alone on the first page. This is the cover of the magazine
- Do detailed sketches of the style of the Headline/Title before creating the final version in Indesign
- Do detailed sketches of the style of the each page, before using Indesign
- Text columns can vary from page to page, but you must have a minimum if 2 columns per page
- Document size is 8 1/2 x 11.
- You must show rulers in your InDesign file.
- Search for poetry online and insert through out the pages. Be sure to include the poem name
- Be sure to include the authors names of each poem.
- Insert: pictures/photos/illustrations/ paintings in the InDesign file, to connect with specific poems
For EACH class, you are not prepared, I will drop your grade, by 1 full grade. If you have an "A" I will drop your grade to a "B". NO EXCEPTIONS
Preparation is essential. I will grade you on the following:
- The written text 20%
- The building and understanding of the InDesign file 30%
- The organization of your materials and final project 10%
- Creativity and Effort 40%
|
|
•WHY INDESIGN?
•WHY PHOTOSHOP
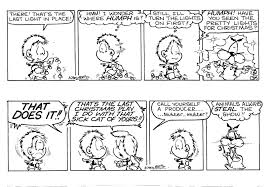
3. Halloween Celebration Flyer
|

|
It’s Halloween next week and we are having a celebration for the event. We are going to make the most of free online resources, including vectors and fonts.
See: Halloween Tutorial for helpful hints
Requirements
1. Sketches
2. InDesign
3. 11 x 8 1/2"
4. single page, no facing pages
5. Save as a PDF and print on High quality paper
Required Text
Halloween Celebration
October 31, 2013
Assembly after Block 4
Wear your costumes to school!
Step 1
So we can be efficient and specific in what we are searching for online, Draw a rough sketch of how you want the flyer to look. It doesn’t have to be anything flash, just a rough idea of the layout.
Step 2
By doing a simple keyword search on google it is easy enough to find free vectors, backgrounds and images. So based on your sketch have a look around the net for photos or vectors. I didn’t need to look any further than vectortuts, thanks to Iaroslav Lazunov’s previous vector pack I have found some images perfect for the invite. Spooky Halloween Vector Pack
Download your freebies to your project folder ready for importing later.
Step 3
Add a dark grunge background to add some depth and texture to the flyer. Again a simple search on google located this image. Of course it is free to download. Link here: Grunge Background
Step 4
We need an effective typeface, so go to DaFont.com and pick a halloween themed typeface. Download and install. Here is the link to the halloween themes: Halloween Fonts

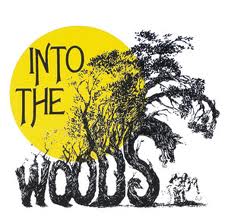
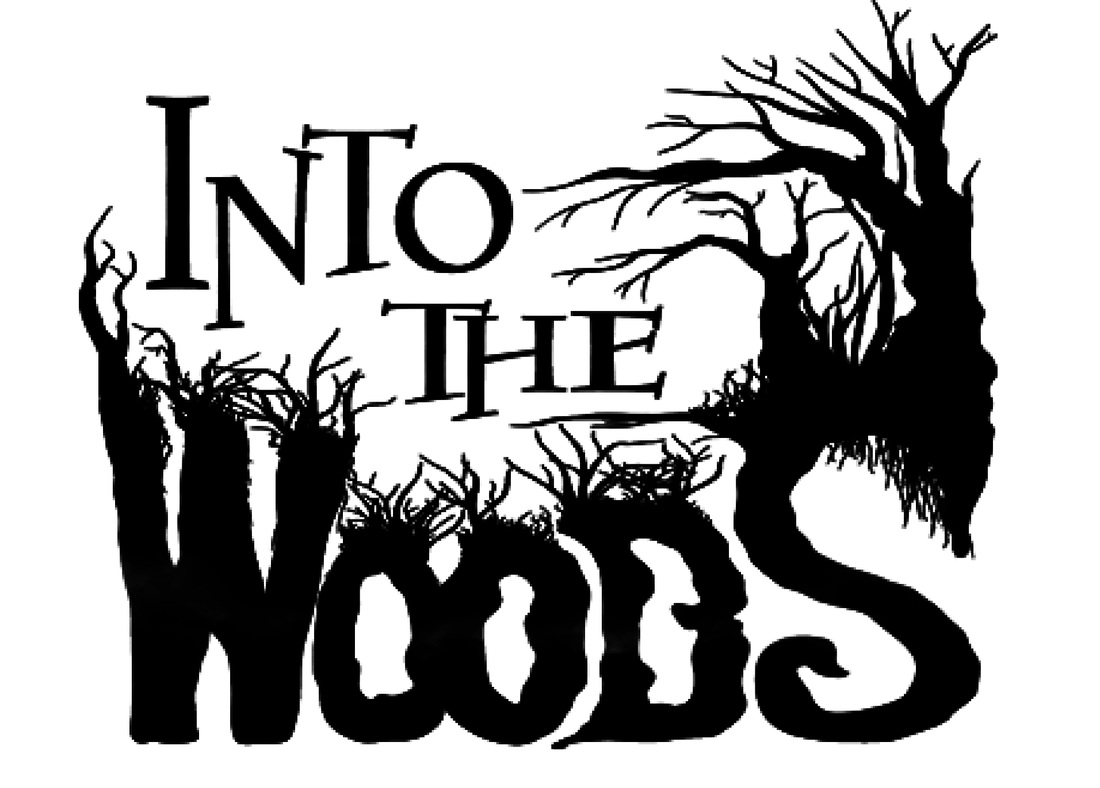
4. Into the Woods Logo design
Yes its that time again and we need a logo for our school production of "INTO THE WOODS" Go online and see if you can find the current logo for "Into the Woods" CHANGE IT!, IMPROVE IT, and make it better.
Use your knowledge of Illustrator and Photoshop and create the most beautiful logo the school, the country, the world has ever seen.
This is a contest. The winning logo will be used on all promotional materials for the show.
Signs
Programs
T-Shirts
All logos are due no later than November 1.
Use your knowledge of Illustrator and Photoshop and create the most beautiful logo the school, the country, the world has ever seen.
This is a contest. The winning logo will be used on all promotional materials for the show.
Signs
Programs
T-Shirts
All logos are due no later than November 1.
|
|
|
5. Designing the School Newspaper InDesignCS 6
You will design a 4 page newspaper about your life. The object of this newspaper is to inform friends and family of things going on in your life, and things that are important to you.
For example:
Special events.
School
Colleges
Friends
Family history
Current events
Songs and music you love
Poetry
Art
Requirements:
Preparation is essential. I will grade you on the following:
I will demonstrate the use of master pages, Libraries, Paragraph styles and Character Styles
DEMONSTRATION OF INDESIGN, Watch video
Lets watch the following videos:
http://tv.adobe.com/watch/visual-design-cs6/working-with-tools/
http://tv.adobe.com/watch/learn-indesign-cs6/creating-a-newsletter/
For example:
Special events.
School
Colleges
Friends
Family history
Current events
Songs and music you love
Poetry
Art
Requirements:
- Document set up 11 x 17
- 4 Facing pages (Total of 8 pages)
- Each page will have 3 columns of text
- Each page will have at least 3 photos or illustrations
- Each page will have a header
- Each page will have a page number
- Your first page will have a title
- You must gather all the materials needed for the newsletter, including original photos. You may NOT use your telephone to download pictures, you MUST use your flash drive. DUE NEXT CLASS
- You are required to write, edit, and proofread all text that will appear in your newsletter
- You are required to use your sketch books and and plan your newsletter before you begin actually use InDesign.
Preparation is essential. I will grade you on the following:
- The written text 20%
- The building and understanding of the InDesign file 30%
- The organization of your materials and final project 10%
- Creativity and Effort 40%
I will demonstrate the use of master pages, Libraries, Paragraph styles and Character Styles
DEMONSTRATION OF INDESIGN, Watch video
Lets watch the following videos:
http://tv.adobe.com/watch/visual-design-cs6/working-with-tools/
http://tv.adobe.com/watch/learn-indesign-cs6/creating-a-newsletter/
6. Anti Bully Rules
Design an 11 x 17 Poster of The Olweus Rules
• We will not bully others.
• We will help students who are bullied.
• We will reach out to those students who are left out.
• If we know that somebody is being bullied, we will tell an adult at school and an adult at home.
• We will not bully others.
• We will help students who are bullied.
• We will reach out to those students who are left out.
• If we know that somebody is being bullied, we will tell an adult at school and an adult at home.
7. Holiday Card Parody
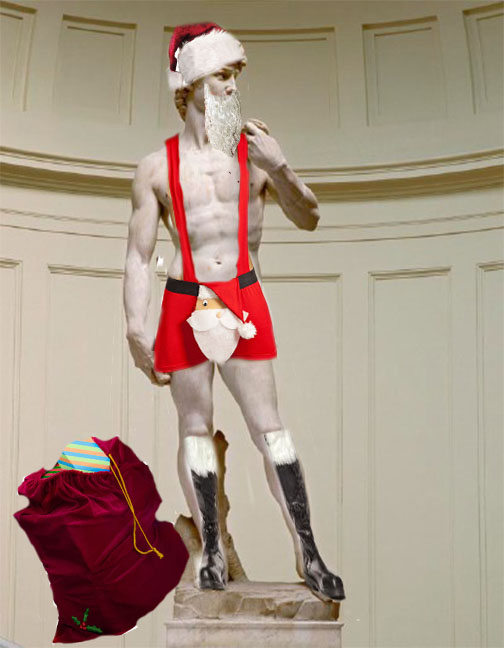
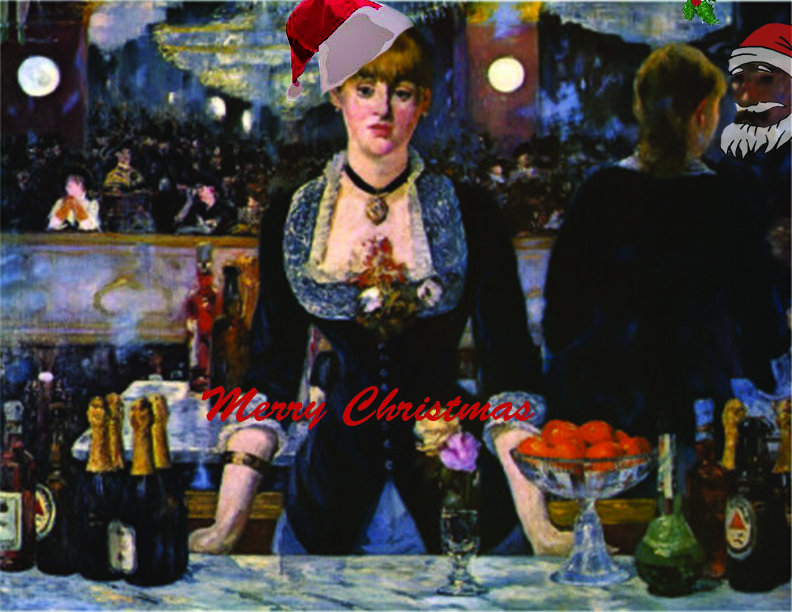
Using adobe illustrator and/or Adobe Photoshop and www.artcyclopedia.com, create ‘evidence’ that Santa has made his mark in a famous work of art. Create an illustration of hat/boots/coat and make it look like it belongs there in the work of art.
Print this in then a color print.
Specs:
Size 8.5 x 11"
Fold in Half, vertically or horizontally.
Card must have a cover and an interior quote. You will need to print each 2 times.
CMYK
Resolution 300 dpi
GRADING:
See our home page
a. Technical skills in drawing proportionate clothing, applying color and value to create a believable look. 50%
b. Insertion into painting, clean edges, cast shadows if needed.
c. Time on task.
Note: These cards will be placed on the chairs for the Christmas musical on December 20th.
Please remember, the audience is your parents.
Print this in then a color print.
Specs:
Size 8.5 x 11"
Fold in Half, vertically or horizontally.
Card must have a cover and an interior quote. You will need to print each 2 times.
- Cover side
- Interior Side
CMYK
Resolution 300 dpi
GRADING:
See our home page
a. Technical skills in drawing proportionate clothing, applying color and value to create a believable look. 50%
b. Insertion into painting, clean edges, cast shadows if needed.
c. Time on task.
Note: These cards will be placed on the chairs for the Christmas musical on December 20th.
Please remember, the audience is your parents.
|
|
8. We are Preston
You will create an 11 x 17 poster in Photoshop and/or Indesign.
The Poster will be a collage of student photos.
Requirement:
You must take 10 photos of students and bring those photos to our next class.
All photos must be saved as:
CMYK
Resolution 300dpi
Size doesn't matter
Example photos:
students serious
students laughing
students alone
students playing
students dancing
students singing
students learning
Your photos need to give a positive message about Preston Students
Examples of positive message:
Choose 1 theme only. Use only the one word you choose to represent of the school. You can add a quote or poem to you poster
The Poster will be a collage of student photos.
Requirement:
You must take 10 photos of students and bring those photos to our next class.
All photos must be saved as:
CMYK
Resolution 300dpi
Size doesn't matter
Example photos:
students serious
students laughing
students alone
students playing
students dancing
students singing
students learning
Your photos need to give a positive message about Preston Students
Examples of positive message:
- Compassion
- Community
- Integrity
- supportive
- family
- home
- love
- friendship
- considerate
- caring
Choose 1 theme only. Use only the one word you choose to represent of the school. You can add a quote or poem to you poster
9. The Bronx
You will create an 11 x 17 poster in Photoshop and/or Indesign.
About the Poster
All photos must be saved as:
CMYK
Resolution 300
11 x 17
Example photos:
CREATIVITY IS ESSENTIAL
I expect the best from you, I don't want the typical photo,
Change your camera angles.
Lie on the ground looking up
Dont settle,
Push yourself to be different
Your photos should tell a story
Dare to be different!
About the Poster
- You must take photos of business owners, Storefronts, Pedestrians, Local people,
- You can choose a partner in the class to help you take your photo, but individually you will each create a poster
- The poster will be a single image of a location, Store, Business in the Bronx, in your neighborhood.
- The photo must create a message of your neighborhood. (negative or positive)
- You must write a poem or very short story, that connects to your poster/image This will go on the poster!
- Single image, multiple images, your choice
All photos must be saved as:
CMYK
Resolution 300
11 x 17
Example photos:
- Restaurant owner
- Supermarket worker
- Bank Teller
- Person with a dog
- students dancing
- students singing
- students learning
- Graffiti
- Abandoned buildings
- Local People
- Store Fronts
- Street Scenes
- PEOPLE, PEOPLE PEOPLE
- Peoples legs
- Shopping bags
- People from behind
- People down below
CREATIVITY IS ESSENTIAL
I expect the best from you, I don't want the typical photo,
Change your camera angles.
Lie on the ground looking up
Dont settle,
Push yourself to be different
Your photos should tell a story
Dare to be different!
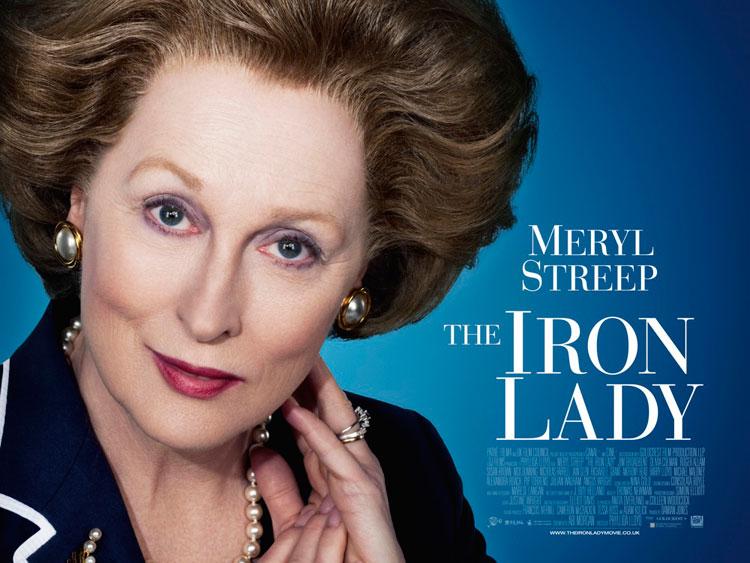
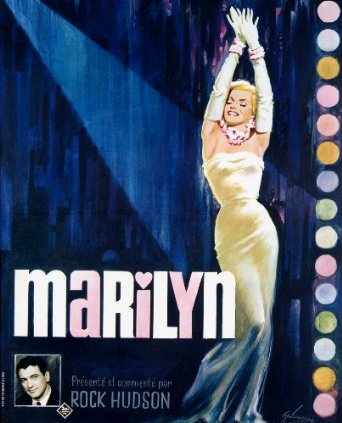
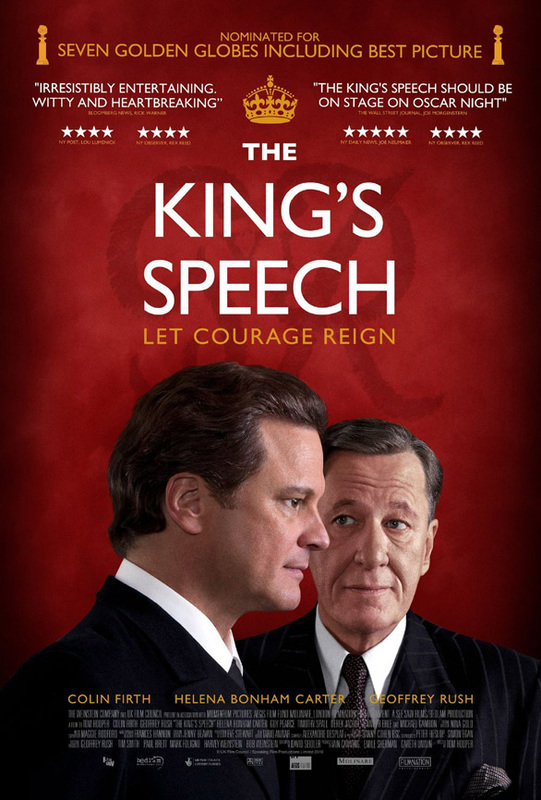
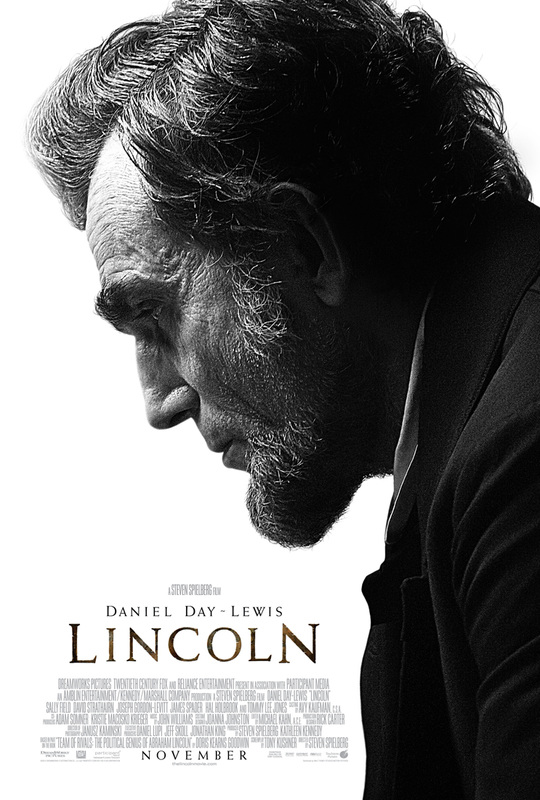
10. Book Cover Design
Lesson Summary:
Create original covers for fiction or nonfiction books. Access various technologies to combine text and graphics to demonstrate their understanding of a recently-studied work of literature. The newly-created book cover must include symbolic photographs, illustrations or graphic images that represent major plot ideas from the work.
Commentary(VERY IMPORTANT):
Do we really judge a book by its cover? This lesson requires you to demonstrate a thorough understanding of a literary work through the thoughtful design of a book cover and written literary analysis. Research the book, choose and arrange graphics and text as they create, edit and publish their information using technology.
The average reader spends no more than 7 seconds looking at book covers online. In those 7 seconds the reader will decide if they will look further into the book, and then decide if they will actually buy and read the book. It is important that you focus on the imagery for the cover. You want the reader to think! You want the reader to be interested enough in the cover to go further. You want your cover image to represent a theme or a moment in the story.
Use the following as the naming for your files:
Reference:
Review BEST BOOK COVERS
http://hudsonvalleybookdesign.weebly.com
http://www.skipprichard.com/the-best-book-covers-of-2012/
http://blog.winepresspublishing.com/2012/08/learning-from-best-sellers-non-fiction-book-cover-design-trends/
Review WORST BOOK COVERS (Try to hold back your laughter....YES, really)
http://sobadsogood.com/2012/06/15/10-worst-book-covers-in-the-history-of-literature/http://www.boredpanda.com/worst-book-covers-and-titles/
Book Cover Design:
Specs:
Choose 1 synopsis below and use that as your reference for your book Design
Slaughterhouse Five follows the story of Billy Pilgrim, optometrist and time traveler. The novel jumps through time with Billy as he lives the events of his life over and over again. In this dynamic framework, the reader sees the terrors of war, the quiet desperation of suburban life and the breakdown of the psyche through Billy's time jumping eyes. Just before he is captured as a prisoner of war, Billy experiences his first time jump. Here he sees his whole life, past, present and future, unfold. After the war, Billy returns from Europe to resume his civilian life, but does not cease moving randomly through time, witnessing his birth, his death and events in between. He is eventually abducted by aliens who experience time in much the same way as Billy except that they prefer to look only at life's more pleasant moments. Despite his family's objections, Billy tells the world of his time traveling and of his abduction, highlighting the story with a detailed account of his death.
The Scarlet Letter begins with Hester Prynne being taken from prison to be berated by the townspeople for both her adultery and for keeping her lover's name a secret. As the novel progresses, the reader realizes that Dimmesdale is Hester's lover and that Chillingworth is her husband in disguise bent on avenging his defamed honor. Hawthorne reveals the honest emotion that exists between Hester and Dimmesdale, but tempers it with the danger of their secret being revealed at the hand of Chillingworth. Dimmesdale's health deteriorates as his guilt eats away at him and eventually he reveals to the village that he is Hester's lover and Pearl's father.
To Kill a Mocking Bird The story is narrated by a young girl who goes by the name of "Scout" Finch. Scout's real name is Jean Louise, a name that is not fitting for a tomboyish, rebellious girl like Scout.Scout lives in the small Alabama town of Maycomb in the 1930s with her brother, Jem, and her widowed father, Atticus. Another presence in the house is the stern but ultimately kind-hearted African-American housekeeper named Calpurnia.
The story takes place during the depression, but the Finch family is better off than many in this small town, as Atticus is a successful and respected lawyer.
Two main themes that permeate this book are judgment and justice. Scout and Jem learn lessons about judging other people through the character of Boo Radley, a mysterious and reclusive neighbor. Early in the story, the children poke fun at Boo, but they ultimately discover his goodness.
This theme is also present in the developments surrounding the character of Tom Robinson. Robinson is a poor African-American field hand who is accused and tried for rape. In the process of defending Robinson, Atticus is able to provide evidence that the young man is innocent. Nonetheless, because of the racist nature of white society in that time and place, the young man is convicted.
Lord of the Flies opens with a plane full of British schoolboys crashing on a deserted tropical island. With no adults surviving the crash, the boys are left to themselves to try to stay alive. Immediately a sort of informal society springs up with the election of a leader and the setting down of formal objectives and rules. Initially, rescue is foremost on the collective mind, but it is not long before a power struggle ensues with Jack attempting to sway the boys to his camp. Possessing different goals and vastly different sets of ethics, the boys divide into two tribes. Eventually, Ralph’s side of reason and rationality gives way to Jack’s tribe of hunters, and the boys sink deeper and deeper into a life of violent savagery.
Diary of a Young Girl Otto Frank moved his family to Amsterdam from Frankfurt, Germany, their place of origin, once the Nazis came to power and began to enforce cruel laws enacted against the Jewish population. In Amsterdam, Otto enjoys some success as a businessman, but he keeps a close watch on the spreading power of the Nazis. When the Germans invade the Netherlands, the Frank family goes into hiding in a small area above Otto's office. They are joined by the van Daan family. Many of Otto's employees aid the hideaways as they wait and pray for an end to their terrifying ordeal. The war takes a terrible toll on Holland, and food becomes quite scarce. Starvation and crime become rampant in the small country, which only worsens the plight of the Frank family and their friends who hide with them.On the pages of her diary, Anne explores love and questions the meaning of life in a way that is quite typical of a young teen, yet quite extraordinary under the circumstances under which she lives. Her portrayal provides a stark glimpse into her extraordinary ordeal. She captivates the reader with an innocence that contrasts the stark reality of her situation.
The diary ends abruptly on August 1, 1944. There is no sign-off and no explanation, although it is known from historical records that the family was betrayed and captured by the Nazis.
Create original covers for fiction or nonfiction books. Access various technologies to combine text and graphics to demonstrate their understanding of a recently-studied work of literature. The newly-created book cover must include symbolic photographs, illustrations or graphic images that represent major plot ideas from the work.
Commentary(VERY IMPORTANT):
Do we really judge a book by its cover? This lesson requires you to demonstrate a thorough understanding of a literary work through the thoughtful design of a book cover and written literary analysis. Research the book, choose and arrange graphics and text as they create, edit and publish their information using technology.
The average reader spends no more than 7 seconds looking at book covers online. In those 7 seconds the reader will decide if they will look further into the book, and then decide if they will actually buy and read the book. It is important that you focus on the imagery for the cover. You want the reader to think! You want the reader to be interested enough in the cover to go further. You want your cover image to represent a theme or a moment in the story.
Use the following as the naming for your files:
- Final Cover: Book Cover_Student Name
- Final Photo: Book Cover_Illustration/Photo_Student Name
Reference:
Review BEST BOOK COVERS
http://hudsonvalleybookdesign.weebly.com
http://www.skipprichard.com/the-best-book-covers-of-2012/
http://blog.winepresspublishing.com/2012/08/learning-from-best-sellers-non-fiction-book-cover-design-trends/
Review WORST BOOK COVERS (Try to hold back your laughter....YES, really)
http://sobadsogood.com/2012/06/15/10-worst-book-covers-in-the-history-of-literature/http://www.boredpanda.com/worst-book-covers-and-titles/
Book Cover Design:
- Choose a book and read and the summary of the book below. (you must use the books listed below, if you really want to use another book, it must be a classic, and you must write a synopsis of that book for me to review and approve)
- Create at least 4 rough thumbnails in your sketch book. This will be reviewed and graded according to our Rubrik
- Create 1 detailed large thumbnail. Please include as much detail as possible. Including color ideas, Imagery, and fonts. This will be reviewed and graded according to our Rubrik
- Build your Book design in Adobe InDesign. (no need to use master pages or paragraph styles.)
- Research imagery and create the cover image in Adobe Photoshop
- Find an appropriate font that represents the Era of the book. (NOT COMIC SANS!!!!)
Specs:
- Trim- Adobe InDesign 6” x 9”
- Set document up as CMYK (Cyan, Magenta, Yellow, and Black)
- Using the ruler guides create Margins are .25” all around
- Using the ruler guides create a bleed of are .125”
- Cover must include: Title and Author.
- Use examples of other books to determine placement of copy, but take creative chances and try something different.
Choose 1 synopsis below and use that as your reference for your book Design
Slaughterhouse Five follows the story of Billy Pilgrim, optometrist and time traveler. The novel jumps through time with Billy as he lives the events of his life over and over again. In this dynamic framework, the reader sees the terrors of war, the quiet desperation of suburban life and the breakdown of the psyche through Billy's time jumping eyes. Just before he is captured as a prisoner of war, Billy experiences his first time jump. Here he sees his whole life, past, present and future, unfold. After the war, Billy returns from Europe to resume his civilian life, but does not cease moving randomly through time, witnessing his birth, his death and events in between. He is eventually abducted by aliens who experience time in much the same way as Billy except that they prefer to look only at life's more pleasant moments. Despite his family's objections, Billy tells the world of his time traveling and of his abduction, highlighting the story with a detailed account of his death.
The Scarlet Letter begins with Hester Prynne being taken from prison to be berated by the townspeople for both her adultery and for keeping her lover's name a secret. As the novel progresses, the reader realizes that Dimmesdale is Hester's lover and that Chillingworth is her husband in disguise bent on avenging his defamed honor. Hawthorne reveals the honest emotion that exists between Hester and Dimmesdale, but tempers it with the danger of their secret being revealed at the hand of Chillingworth. Dimmesdale's health deteriorates as his guilt eats away at him and eventually he reveals to the village that he is Hester's lover and Pearl's father.
To Kill a Mocking Bird The story is narrated by a young girl who goes by the name of "Scout" Finch. Scout's real name is Jean Louise, a name that is not fitting for a tomboyish, rebellious girl like Scout.Scout lives in the small Alabama town of Maycomb in the 1930s with her brother, Jem, and her widowed father, Atticus. Another presence in the house is the stern but ultimately kind-hearted African-American housekeeper named Calpurnia.
The story takes place during the depression, but the Finch family is better off than many in this small town, as Atticus is a successful and respected lawyer.
Two main themes that permeate this book are judgment and justice. Scout and Jem learn lessons about judging other people through the character of Boo Radley, a mysterious and reclusive neighbor. Early in the story, the children poke fun at Boo, but they ultimately discover his goodness.
This theme is also present in the developments surrounding the character of Tom Robinson. Robinson is a poor African-American field hand who is accused and tried for rape. In the process of defending Robinson, Atticus is able to provide evidence that the young man is innocent. Nonetheless, because of the racist nature of white society in that time and place, the young man is convicted.
Lord of the Flies opens with a plane full of British schoolboys crashing on a deserted tropical island. With no adults surviving the crash, the boys are left to themselves to try to stay alive. Immediately a sort of informal society springs up with the election of a leader and the setting down of formal objectives and rules. Initially, rescue is foremost on the collective mind, but it is not long before a power struggle ensues with Jack attempting to sway the boys to his camp. Possessing different goals and vastly different sets of ethics, the boys divide into two tribes. Eventually, Ralph’s side of reason and rationality gives way to Jack’s tribe of hunters, and the boys sink deeper and deeper into a life of violent savagery.
Diary of a Young Girl Otto Frank moved his family to Amsterdam from Frankfurt, Germany, their place of origin, once the Nazis came to power and began to enforce cruel laws enacted against the Jewish population. In Amsterdam, Otto enjoys some success as a businessman, but he keeps a close watch on the spreading power of the Nazis. When the Germans invade the Netherlands, the Frank family goes into hiding in a small area above Otto's office. They are joined by the van Daan family. Many of Otto's employees aid the hideaways as they wait and pray for an end to their terrifying ordeal. The war takes a terrible toll on Holland, and food becomes quite scarce. Starvation and crime become rampant in the small country, which only worsens the plight of the Frank family and their friends who hide with them.On the pages of her diary, Anne explores love and questions the meaning of life in a way that is quite typical of a young teen, yet quite extraordinary under the circumstances under which she lives. Her portrayal provides a stark glimpse into her extraordinary ordeal. She captivates the reader with an innocence that contrasts the stark reality of her situation.
The diary ends abruptly on August 1, 1944. There is no sign-off and no explanation, although it is known from historical records that the family was betrayed and captured by the Nazis.
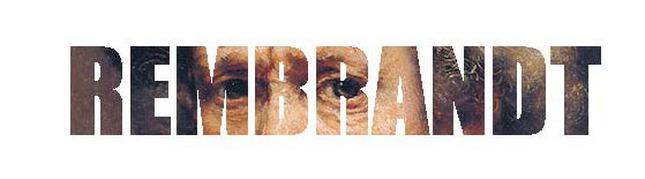
11. Adobe Illustrator: Art and Artists
Contemporary and Historical artist have styles that make their work recognizable to the public. The artist Andy Warhols paintings differ in style dramatically with the style of Rembrandt.
PLAN
1. You are to choose 3 well known artists. Go to " the Museum of Modern art" website or "The Metropolitan museum of Art" website and research the artists that interest you.
2. Find a symbolic painting by that artist and combine with a font that represents that time period.
3. Type the artist name in Adobe illustrator. Be sure to use a font that represents the time period
4. You will use the clipping mask feature in Adobe illustrator and merge the images into the words
See Demo!
12. Adobe Photoshop Practice: Using the Healing Brush tool.
http://www.photoshopessentials.com/photo-editing/spot-healing-brush/
Usng the healing brush tool is essential when you want to delete or remove skin blemishes. It can also be used in similar way to the cloning tool(rubberstamp). Go to the above link and do the tutorial
1. Find a photo of a person with facial skin problems
2. Save the original and duplicate. This way we can compare the before and after images.
3. Save both as flattened jpegs in the final folder.
The Spot Healing Brush was first introduced in Photoshop CS2 and, like the other two healing tools (the standard Healing Brush and the Patch Tool), it’s essentially a texture replacement tool, meaning that it tries to create a seamless repair by replacing damaged or unwanted texture from one area in an image with good texture from another area, without changing the problem area’s original color or brightness values. What makes the Spot Healing Brush so amazing and fast is that it does this with almost no effort from us!
13. Adobe Photoshop Practice: Reshape Images with
content-aware Scale
http://www.photoshopessentials.com/photo-editing/content-aware-scale-cs6/
1. Find a photo that includes a beach, people and a beautiful cloud filled sky,
2. Go to the above link and do this tutorial (Obviously, your photo will differ from this tutorial, but use their photo as the example for yours).
3. Save the original and duplicate. This way we can compare the before and after images.
4. Save both as flattened jpegs in the final folder.
In this Photo Retouch tutorial, you will learn how the Content-Aware Scale feature, first introduced in Photoshop CS4, can help you transform and reshape images from one aspect ratio to another without distorting, or "squishing", our main subject and other important details in the image. The usual way to change a photo’s aspect ratio is to simply crop it using the Crop Tool, but that often means throwing away parts of the image we wanted to keep. With Content-Aware Scale, there’s no need to crop anything away because Photoshop can move people and objects closer together (or further apart) almost like magic so everything fits within the new shape!
How does it work? With the Content-Aware Scale command selected, Photoshop will examine your photo and try to figure out, often with amazing accuracy, which areas are important (like your main subject) and which are not, and will do its best to protect the important areas as you’re reshaping the image. Content-Aware Scale can be a powerful and time-saving feature when it works, but (there’s always a "but") the problem is that it doesn’t always work. In fact, it really depends on the image you’re using. In general, Content-Aware Scale works best with photos that contain large areas of low image detail (blue skies, open fields, calm waters, and so on). The reason is that for Photoshop to be able to move two areas of an image closer together, it needs to squish and compress the area between them. If the area between them contains too much image detail of its own, things can quickly turn into a jumbled mess. If, on the other hand, the area between them contains low amounts of detail, like a sky or open field, then it’s easier for Photoshop to push those pixels together with fewer noticeable problems, giving you much better results.
14. Create a Restaurant menu for an Ethnic Restaurant
You will create an 8 ½ x 11" Menu using Adobe Indesign. The restaurant is a high class restaurant service high end food. The patrons are mostly tourists visiting NYC.
Requirements:
1. View menus online of Ethnic restaurants
2. Your Menu must include photos. i.e.: the Restaurant, Food examples, illustrations.
3. Your menu must include: Lunch, Dinner, Desserts, Appetizers, Drinks, Prices, Locations, Restaurant Name.
4. All foods must have simple descriptions included, next to the name of the food
5. The document is 4 pages. Page 1: cover, Page 2: Menus, Page 3: Menus, Page 4: Menus and last page.
6. Do your research, and collect the examples in your folders
7. Remember Type and imagery must work together ( I will be paying extra attention to your use of typography)
8. I must approve the preliminary sketches in your sketch book, of the cover before you start your design on the computer.
9. I suggest you write your menu text in WORD, before you place it in Indesign.
15. Women in History Month-Poster Design
Lesson Summary:
You will design an 11 x 17” poster using Adobe Photoshop
You will choose a famous Woman who has made a significant contribution to the USA
Activities:
STEP 1.
Research the person you choose and write a paragraph describing the life and the contributions this person has made.
STEP 2.
Finding writing or a poem or a quote this person has made and uses this as the copy/text for the poster the name of the person as well as their lifetime must appear on the poster. For example:
Emilia Earhart 1912-1968
STEP 3.
Use your sketchbook to create 4 completely different thumbnails ideas. You must use your sketchbook paper; Copier paper will not be accepted.
This will be graded according to our Rubric
STEP 4. REQUIREMENTS
Using the knowledge you have learned using photoshop and illustrator, you must use:
1. Layers in Adobe Photoshop
2. An image in type (see 14. Art and Artists)
3. Reshape images with Content Aware tool (See 16. Content Aware tool)
4. Multiple images of the same person
5. Poetry or a famous Quote by the person you choose
7. Name of the person
8. Birth and Death date
REMEMBER!
In the Layers Palette you can change the opacity of that layer and make them transparent. Be creative as possible. I expect you to be working quietly for each day of the project.
I will not accept projects that are thrown together in 1 day. You have 3 classes for this project to be completed
Be Sure you work is saved everyday on your flash drive. I will no longer accept excuses that your work was l
16. Design a Cityscape
1. Using photoshop, you will create a cityscape, You will create a City Skyline.
2. You will further explore the use of photoshop, layers, layer masks, and effects
PROCESS
You will research Cityscapes from all around the world.
Rome
New York
London
Sydney
Shanghai
San Francisco
Moscow
Using everyday objects found online, you will then create a surrealistic cityscape For example:
Shoe boxes stacked on top of each other can be a skyscraper
Messy towels can be water or clouds in the sky
Plastic bottles can be buildings
An Orange can be the sun in the sky.
All items must look like a building or a structure
REQUIREMENTS
11 X 17 Photoshop Document
CMYK
Resolution is 300.
Each structure must be on a separate layer.
Each building must be made out of several objects
I will not accept projects that are thrown together in 1 day. You have 2 classes for this project to be completed

17. Take a Walk in My Shoes
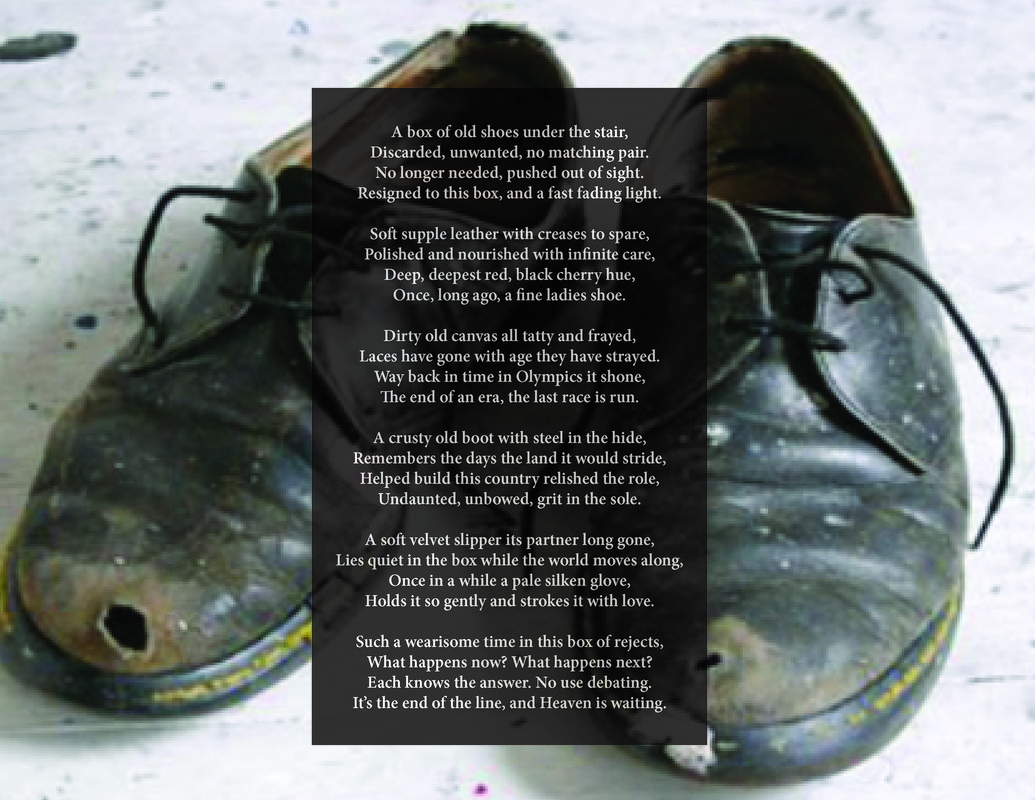
1. Bring in a pair of old shoes. Shoes that have a history. Maybe your grandmothers shoes. Maybe Your fathers old sneakers.
2. Take an unusual photo of those shoes. From high above? Underneath? From a distance?
3. Insert the photo into an 8 ½ x 11 InDesign document
4. Write a poem that tells the story of your shoes.
5. Find a creative way to combine the poem with the shoes.
After saving your photo to your folder. Open in Photoshop
Save the image as a CMYK 300 resolution jpeg.
Use the type tool to add text to the picture
Save final image as a pdf in the FINAL folder
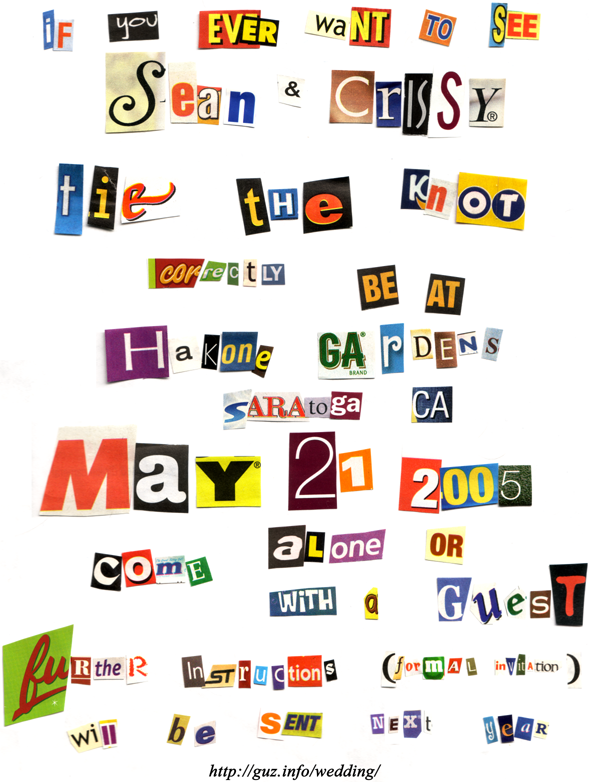
18. Design a Ransom Note/Blackmail letter, but be funny.

Using cut out letters from internet magazines or newspapers etc. You will design and write a ransom note. You will cut and paste the letters to an 8 1/2 x 11 Photoshop document. Creativity is essential. Put your words on curves, or around shapes. Use a different style of type for each letter. Use san serif fonts and serif fonts.Don't just do the "typical" ransom note. "As I am sure you have all seen many times in your life"
Required: Use Photoshop or InDesign
1.Size is 8 1/2 x 11
2. Cut out letters from Magazine and newspapers or personal photos
3. Minimum number of words: 15
4. Resolution is 300 (photoshop)
5. CMYK (photoshop)
6. .125" bleed (InDesign)
Required: Use Photoshop or InDesign
1.Size is 8 1/2 x 11
2. Cut out letters from Magazine and newspapers or personal photos
3. Minimum number of words: 15
4. Resolution is 300 (photoshop)
5. CMYK (photoshop)
6. .125" bleed (InDesign)

Ideas:
Make it a wedding invitation A party invitation A doctors appointment A class project due date A sweet 16 party A Birth Announcement A school Event. Remember: This is a blackmail / ransom note, so it must sound threatening. Definitely keep a sense of humor. |
|
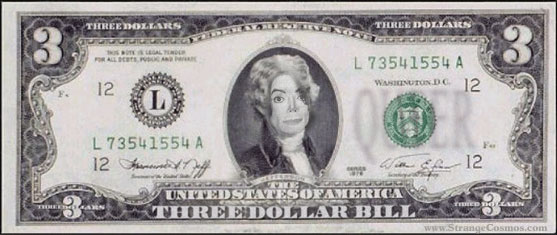
19. Create the new $3.00 bill. Front and Back
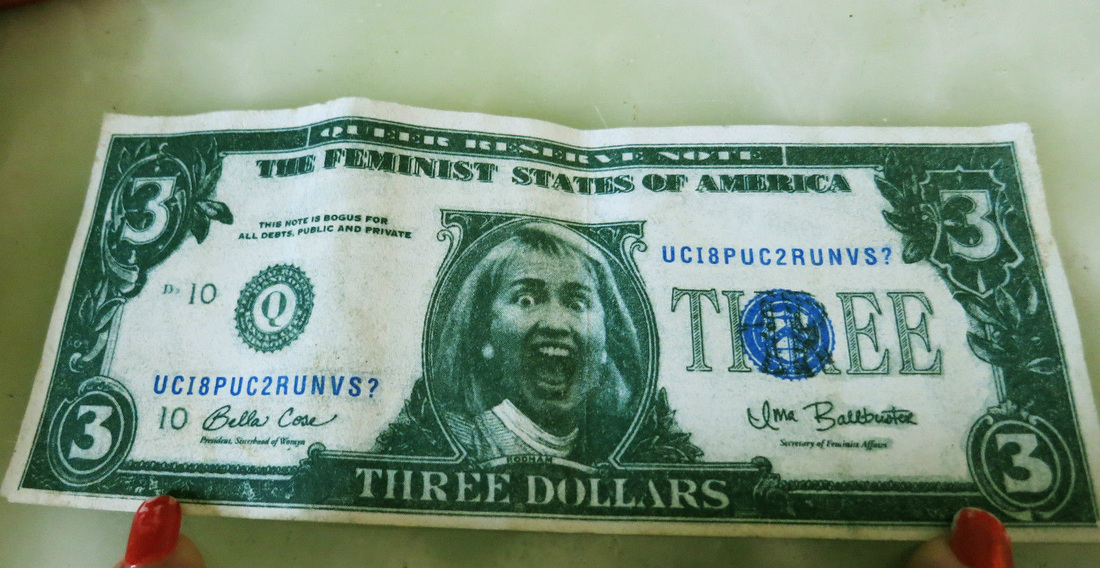
You will create the new $3.00 bill that will be released in 2015.
Using Photoshop, and InDesign and Illustrator, you will create the new bill. You will find images of people places or things and create the front and back of the new $3.00 bill.
1. Be sure the new bill represents your point of view about society.
2. Make a statement with the new bill.
3. Look a bills from other countries for ideas or for the overall look of the bill
4. Be funny or serious, its your choice
5. Do your research.
This is further exploration in the use of layer masks , filters, colors, typography.
Requirements:
1. Detailed sketches (with color, imagery and typography)
2. The study and use of typography
3. Collect samples for your ideas and save in your folders
4. Do not begin working in photoshop, indesign, etc. with my approval of your sketches.
5. Final bill will be printed out and front and back will be glued together
6. Size is determined by actual bill size.
7. Resolution is 300
8. CMYK
WE WILL PRINT!
|
|
20. Create an 8 panel comic strip About you.
- Design cartoon versions of yourself & your friends, but tell a story
- Put your friends in hilarious comics where anything can happen
- Show how you’re feeling with your cartoon
- BECOME A CARTOON CHARACTER
- STAR IN YOUR OWN COMICS
- Create an avatar of you and your friends
- RESEARCH, RESEARCH RESEARCH.
REQUIREMENTS
- You will create an 8 panel comic strip, using web images or creating your own images.
- You will need to draw or create the people in your comic strip.
- You can use photos of you and your friends
- Use Adobe illustrator or Adobe photoshop to create your panels
- The panels must look cartoony, but you can use actual photos of people
- Your comic strip must tell a story,
- Thought bubbles and dialogue bubbles are required
- Description or Story Tale must be underneath the Panels
- You must use color!
SIZING REQUIREMENTS
1. Each panel is 3" x 3" (8 panels) total
2. Document set up is 17" x 11"
3. Two rows of 4 panels. ¼" space between panels 2 inch space from the base of the top panels to the top of the bottom panels See below for basic set up.
21. Create an Animal out of letters
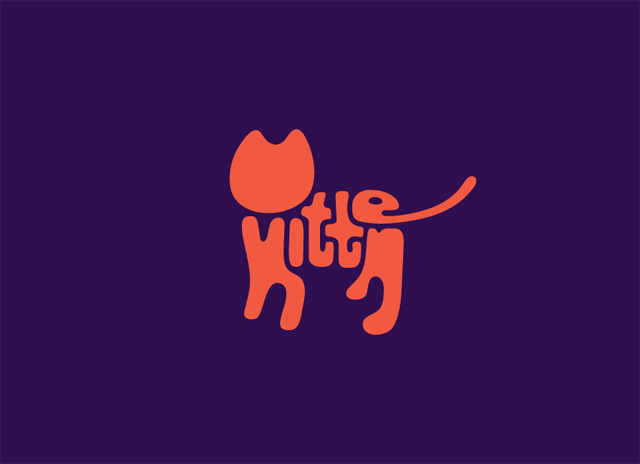
Using your knowledge of creating paths in Adobe illustrator. And converting type into outlines in Adobe Illustrator, You will create an animal based on the shapes of the letters
1, Find an image of animal and place into a New 8.5 x 11 Adobe Illustrator document
2. Place the image on a new layer and lock the layer
3. Choose a font to use and type the name of the animal
4. Convert font into outlines, and stretch and distort the font until it matches the size and shape of the animal you have chosen
Requirements
Document size is 8.5 x 11
2 Colors only, Image is one color background is 2nd color
Use Animal profile only
Final images should match style of image shown

|

|
22. Movie About My Life: Poster Design.
Imagine yourself in a Movie about You. You will decide upon a title for the movie, the actors in it, and a basic plot - and use the Internet, cameras, and Photoshop to design the promotional movie poster,
Research, Research Research!! Look at traditional movie posters online to inspire your creativity. Don't settle. Don't take the easy way out. Prove to me you care about your work.
- Include credits
- Graphics
- A release date
- Plot summary
- Critic review and a slogan.
Requirements 1.
1. All images must be edited in Adobe Photoshop
2. saved as a 300 dpi,
3. saved as CMYK
4. saved as a photoshop document (.psd)
Requirements 2.
The final poster will be built in InDesign
1. Size is 11 x 17
2. Use separate layers for images
3. Use separate layers for type
Standard Rubric applies, but use and understanding of typography, imagery and composition will also be graded.
|
|
|

|
|
|
23. Veritas Magazine FINAL
STEP 1
A. Find or create an image that Represents “Journey of Life”
B. Search for the following images and place in a folder labeled VERITAS (FINAL)
1. TAKE A WALK IN MY SHOES pick one that is nails the assignment. (ePUB) Samantha Marrero
2. SEPARATED AT BIRTH - Yoga on the moon, Lion King, Shark (ADVANCED GD) Jolaade Okanlawon
3. TYPE ANIMALS - Rabbit, giraffe ( EPUB) Daniele Agate
4. ARCHITECTURE - Junk Food Skyline( EPUB) Danielle Agate
5. 2 ANIMALS INTO 1 - bunky and koala-tiger ( BASIC GD) Janel Cruz
6. WOMEN IN HISTORY - Bessie Coleman aviator (ALL) Samantha Marrero
7. POWER OF ADS - Silence Cuts Deep, Don't be your own Killer (cigarette gun) (ADVANCED GD) Janel Cruz
8. POP ART - Girl with scarf and a white necklace ( EPUB) Jolaade Okanlawon
9. BOOK COVERS - KESEY - One Flew (old building), Mockingbird - water color with title on branches (ALL) Janel Cruz