|
|
|
|
|
|
Welcome to Freshman Computing
TOPICS
1. Introduction to Computer Hardware
a. Parts of the computer
b. Purpose
c. Care of the computer
2. Windows Basics
a. How are storage devices named?
b. ‘My Computer’ screen
c. Creating folders
d. Searching
3. Microsoft Word
a. Creating a professional paper
i. Margins, fonts, line spacing, paragraph settings
ii. Printing options
iii. Saving your document
b. Tables and Graphics
i. How a table is in a document ii. Inserting graphics and clip art
ii. Text wrapping
iii. Sizing vs. cropping
4. Microsoft Excel
a. Creating a spreadsheet
b. Formatting a spreadsheet
c. Basic formulas & Calculations
d. Graphs
e. Printing & Saving
5. Internet
a. Researching on the internet
i. Search engines
ii. Reliable websites
iii. Favorites & history
b. Internet Safety – Keeping yourself safe on the Internet
i. Social networking sites
1. Privacy issues
2. Future ramifications of posts
3. Deleting your accounts
ii. Cyber bullying
1. What cyber bullying is
2. Its effects on people
3. Prevention
c. Plagiarism & Copyright issues i. Ethical issues
i. Intellectual Property
Grading Policy
Grades:
Quizzes 30%
Homework 20%
Projects 30%
Participation & Attendance 20%
Quizzes: A quiz will be given after the completion of a topic. It will cover the class notes discussed and handouts. Some quizzes may require the use of the computer. Make‐ups will be given upon return.
Homework: There will be some assignments that will require you to do some work at home. All homework will be due on the date specified. These assignments will be essential to the completion of class assignments.
Projects: Computer assignments will be given during class time designated as "LABTIME". These assignments will deal with the topics being discussed. A grade will be given for each of these assignments. You will be required to save all assignment on your folder; some will need to be printed as well.
Participation: You are expected to be following the class lectures and demonstrations or to be working on the class assignment. No student should be investigating the workings of the machine during class time.
THERE IS NO EATING OR DRINKING (EXCEPT WATER) IN THE COMPUTER ROOMS.
ALL SCHOOL RULES ARE IN EFFECT.
IMPORTANT: Excessive absence, EVEN If all missed work is made up, will AFFECT your grade.
Contact Info:
Phone: 718‐863‐9134
Email: gedelstein@prestonhs.org
Website: www.graphicdesignatprestonhs.weebly.com/index.html
PLEASE READ! Very Important
What is a computer?
A computer is an automatic, electronic, data-processing machine that takes in facts and figures known asdata, and then processes or organizes it in some useful way. Afterwards it outputs, or displays, the results for you to see as information. Keep in mind that data is not information but rather information is derived from accurate data that are entered into a computer. Only after processing, is data transformed into information which is then used for decision making.
When talking about computers, there are two terms which must be correctly distinguished, hardware and software. Hardware is all the parts of a computer that can be seen and touched. Hardware includes the internal components that we do not usually see unless we open up our machine. Software is all of the instructions that a computer uses to do what you ask it to do. Pieces of software are often called programs and an operating system is a suite of programs that help all the other programs run. Think of software as the power behind the hardware. Without software your computer is useless. Likewise, without hardware the software can't exist. Computers do not think for themselves so they need software, which is made to manipulate the computer's hardware in such a way that you, the user, can understand.
A calculator is a simple computer. It is not as complex or versatile as your net book, laptop or desktop computer though. It acquires information as series of key presses and computes the result which is displayed on a small screen. Since calculators are faster than humans this creates utility in the form of time saved. They can also repeat processes much more easily than humans can.
Many people mistakenly think that the part of the computer that normally displays pictures and text is the computer. This is usually not true. That part is called the monitor. The computer is usually a box . Also, you may call the whole assembly of all the hardware (the computer and the monitor, for example) the computer. Occasionally though, the computer and monitor are built together, for example, certain Apple computers.
There are different types of monitors. One of these is the one already shown. It is called a CRT monitor. It takes more power than the other popular kind, calledLCDs . However, CRT monitors work faster, which makes them better for fast games because the movement will blur less. LCDs are thinner than CRTs, but they are generally more expensive.
Monitors are only one way the computer can output information for you to see. Another popular output device is called a printer . Printers are used to put data on paper. This is called hard copy, what monitors show is called soft copy. Computers can also output sounds through speakers; this is also soft copy.
There are also different kinds of input hardware. The two most important of which are the mouse and the keyboard. A mouse is used to move the cursor (or arrow) around the screen (monitor display). A keyboard is used to enter (type) letters, numbers, and other symbols into a computer.
Computers store all data in binary code, which is a number system that only uses ones and zeros. One digit in binary code is called a bit, eight bits is called abyte. A byte is the amount of space one letter takes up. One thing to bear in mind is that all the extra detail about how the letter looks must also be stored in binary code and so word processor documents use more space than one byte per letter.
There are many different kinds of computers. The ones that most people use are called Personal Computers (PCs). Desktop PCs are computers that you don't move around; they generally are a box with a monitor attached. Smaller, portable, computers that are about the size of a briefcase are called laptops or notebooks. There are also computers that are around the same size, but they have a special screen: Text (letters and numbers) is written directly on the screen, these are called Tablet PCs. They also do not require a mouse; the mouse gestures and clicks are done right on the screen with your finger, or a Stylus. Personal Digital Assistants (PDAs) are computers so small that you can hold them in one hand. They generally also have a Touch Screen, like the Tablets. Notebooks, PDAs, and most Tablets have batteries so that you can use them where there is no power. These batteries generally last for about three to four hours before needing to be recharged. They use LCD screens because LCDs are thinner and take less power, so the batteries will last longer, and so that they are not, say, a foot thick. There are also much more powerful computers called mainframes that can be as big as a room or a house! This is what, say, Google and Wikimedia run their websites off of.
Operating Systems and Controls
Table of Contents
Software
Software is the set of instructions that tell a computer what it needs to do.
There are two kinds of software: the System Software which includes the Operating System and Applications Software.
Operating System
Abbreviated OS, the Operating System is the resource manager which transforms sectors, bytes, interrupts and ports into files, folders, processes, and the user-interfaces with which you can interact. Examples include: Microsoft Windows (XP, Vista, or 7), any flavor of Linux, and Mac OS X (An apple version of Unix).
Applications Software
Also called user programs, pieces of applications software do the specific things you want.
The Operating System runs the computer and the Applications Software. It makes sure that the Hardware and the Applications Software understand each other. This makes it the most important piece of software on the computer. The Operating System also comes with utilities. These are pieces of Applications Software that mostly deal with managing data. You can also buy Third Party utilities, which means a different company made them than made the Operating System.
Utilities Programs that manage, repair, and optimize data on a computer. A basic set comes with every OS.
Applications Software does the specific things you want the computer to do, Whereas the Operating System is general instructions to the computer for controlling the Hardware, Applications Software is specific instructions that work together with the Operating System to do work for you.
There are as many different kinds of Applications Software as there are things you could want to do with a computer, however the most common are word processing, spreadsheet, presentation, and database software and all computer games. Word processing software is used to create documents, which are formatted pages of text, such as letters, memos, reports or essays. Spreadsheet software organizes data, usually numbers, into columns and rows. It is used mostly for accounting and has many features for doing mathematical operations. Presentation software is used to make virtual (or, simulated) slide shows and usually have all sorts of exciting features for animations and sounds that you just can’t do in a normal slide show. Database software is an advanced way of organizing complicated information in simple formats. A database is your electronic filing cabinet.
Most computers come pre-installed with an OS called Microsoft® Windows®. Most OS's and programs have the same features whether they use Windows or not, but all computers running Windows will have these features with these names. The thing we did in the last chapter with the box that comes up when you turn on your computer is called logging in. The screen you see after logging in is called the Desktop. Most things on a computer are named after things in real life, and they are usually used similarly too. Just like a real desktop the desktop on a computer is where you go to access all your data. However, a real desktop has a flat horizontal surface.
You can replace the Operating System with another whether or not your system gets a virus. The most common replacement Operating System is called Linux. It is free to download and install and software for it is freely available via the Internet.
Desktop The desktop is the area that appears right after logging in. It contains a background picture (wallpaper),icons and the taskbar.
On the desktop are pictures with text labels under them, these pictures are called icons because they represent something else. If you move or get rid of an icon, all that means is that you have to access what they represent a different way, you haven’t gotten rid of the application software the icon is representing. Icons usually represent programs, but sometimes they represent collections of data. Double-clicking (clicking twice in rapid succession) on one of these icons will open whatever it represents, the text tells you what it represents.
Icons A tiny picture that represents a program, folder, or program function.
There is a bar that is usually at the bottom of the desktop, however it may also be on any other side. If you cannot see it, then move the cursor to the edge where it is and it will come up. It is called the task-bar.
Taskbar The taskbar is the bar along one side of the desktop. It is used for launching programs or opening the window of an open program.
Along the main part of the task-bar is a list of all open programs, clicking on one element of this list will put that program’s window (the box that a program is viewed in) on top of all other open windows. Over on one side of the task-bar is a clock; beside the clock are a bunch of icons that represent open ‘invisible’ programs. These are programs that are always running and do things ‘behind the scenes’. This area is called the system tray. On the main part of the task-bar there is sometimes a small group of icons, this is called the quick-launch bar. Clicking on one of these icons opens whatever it represents.
System Tray The system tray holds icons for programs currently running ‘behind-the-scenes’.
On the opposite side of the task-bar from the clock and the system tray is a button. A button (or command button) is just like a real button, when it is pushed (clicked) it does something. Some buttons have text on them that say what they do, and some have icons representing what they do. Some have both.
(Command) Buttons Buttons do something when you click on them. They may be labeled by text, an icon, or both.
The quick-launch icons are also buttons. Some buttons are raised to look like real buttons and some only raise up when you hover (put the cursor on top of) them. The button on the other side of the start-bar from the clock and system tray is called the start-button. When you click the start-button it opens the start-menu. The start-menu has icons for more programs and data collections, although it is usually programs.
Start button The Start button is a button that opens the start-menu.
Start menu The Start menu contains icons for all installed programs and data collections, usually for programs.
The icons that are on the desktop, the quick-launch bar, and the start-menu are usually shortcuts. On the desktop shortcuts are often indicated by a small symbol on top of the icon (). Shortcuts are what I meant earlier when I said ‘if you move or get rid of an icon, all that means is that you have to access what they represent a different way, you haven’t gotten rid of the actual thing’. Icons represent all data collections and programs even if they are not shortcuts, however normally the ones on the desktop and in the start-menu are shortcuts.
Shortcuts Icons that are only links to the things those icons represent.
The difference between icons and shortcuts is important so be sure you understand it. An icon is any picture that is meant to convey what something is. The icon on the start-button represents the fact that it is a major part of Windows, which is why it is a Windows logo. Shortcuts are a link to a program or data collection; the icon on a shortcut represents whatever the shortcut opens, however the same icon would be on the real thing as well. A Venn Diagram can maybe better show this, see Figure 2.2.
You open whatever is linked to by each shortcut on the start-menu by clicking on it. If any icon has a right-arrow beside it, then hovering over it or clicking on it will make a sub-menu (a menu inside a menu) come out with more shortcuts on it.
Everything we just talked about is part of the Windows interface. An interface is just anything that goes between two or more things. This interface goes between you and the computer, you could also say that the Operating System is the interface between the hardware and software.
Interface An interface, just as the name suggests, is anything that acts as or creates a medium of interaction or communication between multiple things. Auser-interface is the means of interaction between (you)the user and the computer.
There are some standard things that are on most user-interfaces. We have already talked about one, buttons. These things are called controls. Below is a table of some of the more common controls, starting with buttons:
Name of control and pictureDescription(Command) Button Buttons (also called command buttons) do something when clicked.Check box A check box turns something on or off. There is a check in the box if it is on, to change it click on it.Text box Also called edit boxes, these boxes let you type text in them.Radio buttonAlso called option buttons, these boxes come in groups, you can only pick one per group.List boxThese boxes contain lists of things: you can select one.Combo boxAlso called drop-down boxes, these boxes are like text boxes, but they have a button on the side that, when clicked, brings up a list of things that you can pick from.Spin buttonThese buttons increase or decrease numerical values by one when the up or down arrow half is clicked.Scroll barClick on the arrows at the top and bottom of these bars to move the screen, you can also drag the box that is on the bar.LabelOften overlooked, labels don’t do anything, but they sit near other controls with text in them to tell you what those things are.You can get a basic description of what any control does by hovering your mouse over it. A little thing with text will pop up. This is called a tool-tip (or a ToolTip).
Besides these there are also menus. Menus all operate the same way as the start-menu. Some of them are found at the tops of programs. These are calledmain-menus or simply menus. Other menus are opened by right-clicking (pushing the right mouse button over something). These are called popup-menus.
The DesktopThere are no 'real' layers though; you can’t peel off the wallpaper and see the Desktop! However there are ‘virtual’ layers, arranged with the Desktop on the bottom. What you see behind the icons on the Desktop is called the wallpaper, whereas the whole thing is the Desktop, not just the picture/colour that you see behind the icons. Application windows are layered on top.
You can add shortcuts to your Desktop in a number of ways. The most common way is to right-click on the desktop, which brings up the popup-menu. On the popup-menu there should be a sub-menu labelled ‘New’, hover over this. When the sub-menu pops out find the item labelled ‘Shortcut’ and click it. A dialogue-box will come up asking you where the program or data collection is found. Later we will get into how to form something to type in the box, however it is easier to just click the button beside labelled ‘Browse...’.
The Browse button is a standard button that you will see often, clicking it always brings up a dialogue-box in which you can select programs and data collections. Select the program or data collection you want to make a shortcut to and click the button labelled ‘OK’. The OK button is also a standard button on dialogue-boxes that you click to tell it that you are done filling in information and it can use that data now. ‘OK’ is usually paired with ‘Cancel’, ‘Cancel’ closes the dialogue-box without doing anything.
When you have selected the correct program or data collection click the button marked ‘Next >’. The Next button is, again, a standard button that tells the dialogue box you are done this step and to go on to the next step in the process. It usually comes with the Back button to go to the previous step. This dialogue-box also has a Cancel button. After you have clicked ‘Next’ the dialogue-box comes up with a text-box asking what you want the text under the icon to be for this shortcut. When you have typed what you want into the box click ‘Finish’, another standard button.
NOTE: The true name of these buttons is above in bold. However it is common computer shorthand to say Click ‘OK’ instead of Click the OK button. We will be using this shorthand in this book.
If you do not like the text under a shortcut, you can change it. There are three primary ways to do this. The first one is to click on the shortcut, selecting it, and then push the ‘F2’ key on your keyboard. The text will become a text-box that you can type in to change what it says. The second way is to right-click on the shortcut, bringing up its popup-menu, and select ‘Rename’ from the popup-menu. The same thing will happen. Another way to cause it to happen is to select the icon and then click on it. Do not double-click! That will open whatever it links to, select it and then click.
If you want to change the icon (picture) one your shortcut, bring up its popup-menu and select ‘Properties’. Across the top of the window, just below the bar with the ‘X’ button on it (the title bar), there are a bunch of tabs, click the one labelled ‘Shortcut’. Then, click the button labelled ‘Change Icon…’, in the dialogue-box that comes up select the new icon that you want, or click ‘Browse’ to find more files with icons. In this same window where the ‘Change Icon’ button is, there is a text-box labelled ‘Target:’. It is the same as the box with a Browse button on the first step of adding a shortcut to the Desktop, only there is no browse button. That it what you change if you want the shortcut to link to something else.
You can also move or sort icons on the Desktop. To sort them right-click on the Desktop and hover over the sub-menu called ‘Arrange Icons By’. Then click on the way you want them sorted. If you want them automatically sorted make sure the ‘Auto Arrange’ option is checked (you can check or uncheck it by clicking on it). If you have Auto Arrange off, you can put the icons wherever you want them. Click on one and don’t let the button go back up. Move the cursor over to where you want the icon to be and it will move right along with it. When you have it where you want it, let go of the mouse button. This is called dragging-and-dropping.
If you want to take an icon off the desktop there are three major ways to do it. You can select the icon you want to remove and push the ‘Delete’ key on your keyboard. A dialogue-box will come up, click ‘Yes’. You can also drag-and-drop the icon onto the recycle bin, which is an icon on the Desktop labelled exactly that. Or you can right-click on the icon and click ‘Delete’. The same dialogue-box will come up for you to click ‘Yes’ on. If you did it by accident you can click ‘No’ and it won’t remove the icon.
There are other settings you can change on the Desktop. To access them right-click on the Desktop and select ‘Properties’ from the popup-menu. To change the wallpaper select the tab labelled ‘Wallpaper’ or ‘Desktop’. To change what picture is displayed for wallpaper select it from the list or if it is not in the list click ‘Browse…’. There is a combo box from which you can select whether to stretch, tile (repeat by picture with itself together likes tiles), or centre the picture. If you just want a colour for your wallpaper, then select ‘(None)’ from the list. Sometimes there is a combo-type box to select the colour right there and sometimes you have to change it under the ‘Appearance’ tab.
You can also change the Screen-Saver. The Screen-Saver is a program that shows up after your computer has not been used for so long so that the monitor will not get wrecked (which can happen if the same picture is displayed on it for hours at a time). To change the Screen-Saver click the tab labelled ‘Screen-Saver’. There will be a combo box that lists all the Screen-Savers on your computer. After you have selected the one you want you can change how long the computer waits before bringing it up in the text box with a spin button that is below the combo box.
You can also change the colour scheme of all the controls in almost all programs. Click the ‘Appearance’ tab. There is one or more combo boxes on this page that allow you to select different combinations of default colour schemes. On this same page, or sometimes you have to click ‘Advanced’ to get there, are other settings. You can select an element from one combo box, and then change it’s colour and how its text looks. You can try experimenting with this if you want, just be sure to save your current settings so you can change back (which some versions of windows don’t allow, so don’t worry then). You do this by clicking the ‘Save As…’ button and typing the name you want to call the colour scheme.
There is one final tab common to most versions of Windows. It is the ‘Settings’ tab. It is not recommended to change settings in this tab unless you know what you are doing. Some games will give errors when you try to start them like ‘256 colours required’ or ‘This program needs 640 × 480 to run’. This is where you set those. There is a combo box here, selecting a different option from this box changes the number of colours your computer can display. More colours mean more quality. There is also a slider labelled ‘Screen resolution’. It increases or decreases the size of everything displayed on your monitor. The larger the numbers, the smaller things are, and the smaller things are the more you can fit. When this is set to make things smaller, some programs (or you can manually) change their stuff so that it looks the same size, allowing them to have more quality in display.
File Systems
Table of Contents
Before we get into anything else we need a basic understanding of how a computer stores data. Inside the computer box there are many different pieces of hardware used for storing data. One of these is the memory. A Computer’s memory is where it stores the data that is currently in use. So, for example, when you have a letter open and are looking at or working on it the computer stores it in memory. All the software currently running is stored in memory too. This kind of memory is called RAM (Random-Access Memory). Random-access means that any part of the information may be read or changed randomly, the computer does not have to look through all the data in order so that it can find the right piece. There is another kind of memory called ROM (Read-Only Memory). Read-only means that the data on it cannot be changed. ROM is used to store basic information that every computer needs.
Random-access memory RAM is used to store the data the computer is currently using.
Read-only memory ROM is used to store the basic information that every computer needs.
When a computer is turned off, everything in RAM is erased. Because this would cause you to lose your work all the time, diskswere created. Disks are round flat objects, but in computer slang they are pieces of data storage hardware that do not need electricity to keep the data stored. There are other things that do this that are not disks, however the things inside of all things called disks are round and flat, so that is how the term came to be. All disks need to be in another piece of hardware that acts as an interface between them and the rest of the computer called a drive.
There are two main kinds of disks: Magnetic and Optical. Magnetic disks are the old kind and are slowly being replaced. They store data by aligning little pieces of metal inside differently using a magnet. Because of the way they store data magnetic disks can be erased or completely destroyed by magnets, heat, and dust. The two most popular forms of magnetic disks are Hard Disks and Floppy Disks. Hard disks are stored permanently inside their drive, which is normally installed into the computer box where you cannot see any part of it. Hard Disks can store a lot of data, and are used to store most of the information on computers. Floppy disks are small disks that you can pop in and out of their drive. All you can see of their drive is a slit in the computer box with a button and a light. You can put in different disks and then take them out and give them to someone so that you can transfer data between your computers.
Hard disks Hard disks are used to store most of the data on a computer, and can store more than anything else can.
Floppy disks Floppy disks are used to transfer data between computers, but are very small.
Optical disks The most popular kind of optical disk is the Compact Disc (CD). CDs can still be put into and taken out of their drive, making them good for buying programs on, and nowadays for transferring data. Normal CDs that you buy with programs on them are CD-ROMs. They are called that because, like ROM, they are read-only. You can also get CD-Rs and CD-RWs, which are not read-only and are not erasable and erasable, respectively. Unlike floppy disks that can store only 1.44 megabytes (MB, that’s 1 048 576 bytes, usually we estimate that it is one million), CDs can store around 700MB! And, because CDs store their information with variations in the shape of the disk that reflects a laser differently they cannot be damaged as easily. However, you should still never touch the shiny surface of the CD. Digital Versatile Discs (DVDs) are another kind of Optical disc that work identically to CDs, however they can store much more information and transfer it at much higher speeds. There is also a new format coming in from Japan that is smaller and faster than DVDs and stores much more information! Today you can also get memory cards that are called flash memory or, more properly, EEPROMs. These are cards that operate just like ROM that isn’t read-only, so they don’t lose their information when the power is cut.
Compact Discs CDs are the most popular form of optical discs.
Digital Versatile Discs Sometimes called Digital Video Discs because of their extensive use in video, DVDs can store more than CDs.
All data on a computer is stored in collections called files and folders. A file is the most basic collection of data on a computer. A file can store the instructions for a single program, or the data for a single letter. Folders are collections of files. So a file is like a piece of paper and you put it in a folder.
Files Files are the most basic data collections, they store the data for a single thing.
Folders Also called directories, folders are collections of files.
It is very necessary to sort files properly into folders so that you can find them again. Many people have had to redo entire projects because they lost their file by putting it into the wrong folder. Most files are named with two parts. The first part of the filename is a description of the file. After this comes a ‘.’ followed by the second part. The second part of a filename is called the extension. Extensions are often three letters long and they tell you what kind of file it is. For example ‘exe’ files (files with an extension of ‘exe’) are programs. ‘Doc’ files are Microsoft Word documents.
Besides saving (taking a file you have open in a program and writing it from memory onto a disk) there are many other file operations. These can all be done using the same program. This program is a utility called a file manager. There is a file manager that comes with Windows called Windows Explorer, or sometimes just Explorer. To open Explorer go to ‘Start->Programs->Windows Explorer’ or Right Click Start, Click Explore, and the Directory should show. Yet in Windows XP, You go ‘Start->All Programs->Accessories->Windows Explorer’.
NOTE: This is a standard computer notation for menus. When you see something that goes ‘M1->M2->...’ or sometimes ‘M1 > M2 > ...’ it means that you are to open the menu item M1 and then open the sub-menu M2 etc. and the final item is the menu item to click on. Obviously, ‘Start’ is the start-menu.
Sometimes Explorer will start you off looking at your ‘My Documents’ folder, and sometimes it will start you off looking at drive C (C:).
Don’t worry if your window doesn’t look exactly like this. Since this is our first screenshot, let’s make sure we know what were talking about. (1) is the title bar and (2) is the main menu. Below the menu is the toolbar. (3) is the icon representing a folder and (5) is the icon representing a file. (4) is the icon representing a hard disk, also called hard drive, because the disks and the drive are in one, sealed, box, (this one is called ‘C:’, all drives have a letter). (6) is what you click to view sub-folders. So, if there isn’t a tree (the part in the circle) below your hard drive (which should be the icon in the left-hand pane, the part in the square, and should have a name followed by ‘(C:)’ as seen above with (4)) then click the ‘+’ (6) beside it. This is a lot of new stuff so it may be a little bit confusing.
Now we have a tree open below our hard drive showing us all the folders that are directly in the root of the hard drive. Now should be a good time to look at the standard conventions for drives and paths. As you can see above, the drive letter is always is brackets after the name of a drive. The first (or only) floppy drive is almost always ‘A:’. If you have a second floppy drive it will be ‘B:’. Your first hard drive is ‘C:’ and your CD drive is ‘D:’. If you have more hard drives the other drives change accordingly (i.e. if you have a second hard drive that is ‘D:’ and your CD drive will become ‘E:’). You can have folders inside folders as well as files, and the drive itself acts like a folder. So if you wanted to designate a file called ‘Letter.rtf’ that is in the folder ‘My Documents’ and that folder is found in the root of the hard drive ‘C:’, you separate the elements with a back-slash ‘\’ and come up with ‘C:\My Documents\Letter.rtf’.
Now navigate to your ‘My Documents’ directory. It should be found at ‘C:\My Documents’ or ‘C:\Documents and Settings\[Your Name]\My Documents’.
NOTE: Navigate means to make it so you are looking at that in your file manager. For example to navigate to ‘C:\My Documents’ you would open the tree on ‘C:’ like we did before (or by double-clicking on it in the right-hand pane). Then you would click the icon that is labeled ‘My Documents’, or double-click on this icon in the right-hand pane (that is, the part in the octagon).
Now, to open a file in its program, double-click on its icon in the right-hand pane. To delete (remove) files is the same as removing shortcuts from the desktop. If you accidentally delete a file you wanted, open the Recycle Bin (double-click on its desktop icon) right-click on the file and select ‘restore’ from the popup-menu. If you want to permanently get rid of all files in the Recycle Bin, right-click on the Recycle Bin and select ‘Empty Recycle Bin’ from the popup-menu. Deleting or restoring folders works the same way.
If you are going to sort your files properly into folders, you need to know how to create them. To create a folder, navigate to the folder you want the new folder in. Then, right-click on a blank area of the right-hand pane to bring up the popup-menu. Then select ‘New->Folder’ from the menu. Type the name of the folder and press ‘Enter’. To arrange file in folders, you also need to be able to copy and move both files and folders. Moving means that the file or folder goes to the new location and is no longer in the old location. To move a file or folder, simply drag-and-drop the file or folder from where it is in the right-hand pane on top of the folder where you want it to be in either the right or left-hand pane. Copying means that the file or folder stays where it is, and a duplicate is created in the new location. To copy a file or folder you right-drag-and-drop (that is, drag-and-drop by holding down the right mouse button instead of the left one) from its old location on top of the new one. A popup-menu will come up asking if you want to copy, move, or create a shortcut to the file or folder. If you want to copy, select ‘Copy Here’.
If you want to search the whole computer for a specific file or folder there are two possible ways to do it. Some versions of Windows Explorer have a button on the toolbar that says ‘Find’, click on this. In all versions of Windows you can go to ‘Start->Find->Files or Folders’ or ‘Start->Search’. Some versions of the search have extra features to make it easier that it displays first. To bypass these click ‘All files and folders’. If your version came up with text boxes right away you don’t have to do this. Once the text boxes are up you can select what drive or folder to search from the combo box. The topmost text box is where you type all or part of the filename. You can also create wildcard searches. To do this you type letters that are in the filename along with symbols called wildcards. The wildcards are ‘*’ and ‘?’. ‘*’ represents an infinite number of characters or nothing. ‘?’ represents exactly one character. So ‘?ello.doc’ would find ‘Hello.doc’ and ‘jello.doc’. ‘Si*.*’ would find all files that start with ‘Si’.
Finally there are file properties. Different kinds of files have different properties and different versions of Windows can have different kinds of properties allowed. You can experiment with these if you want. To open the properties for any file, right-click on it and select ‘Properties’. In the window that comes up you can change all the properties of the file that can be changed. In this window it also shows the name and location of the file and its size in bytes, kilobytes (KB, 1 024 bytes, usually estimated at 1 000 bytes), or megabytes. It also shows the attributes, the most commonly used and useful of which is the read-only attribute. When you check the read-only check box and click OK, Windows won’t let any program change the file. If you uncheck the box Windows will let programs change it again.
Concepts and Settings Table of Contents
We’ve been moving extremely fast and covering a lot of potentially new and confusing material, so let’s take a second to review (some of you may remember this better if you try thinking about the pictures in brackets instead of the words):
Now we’re moving forward again. The next big centre to tackle in Windows is the Control Panel (CP). The Control Panel is where you change almost all the main things in Windows. “But didn’t we change a lot of things, like the wallpaper and colours and screensaver, without going through there?” Yes, but we took a shortcut. Go to ‘Start->Settings->Control Panel’ or ‘Start->Control Panel’ (it may come up with a window or be a sub-menu), then double-click (click if it’s a sub-menu) on ‘Display’. There it is; the box that we used to change the wallpaper, screensaver, and colours
NOTE: Your Control Panel may come up looking totally different and you may be lost. If there is no icon in your control panel called ‘Display’ then your computer is running in a ‘User Friendly’ mode. To switch out of it into the ‘normal’ view, look at the left-hand side of the Control Panel window and find the option called ‘Switch to classic view’ and click this. If you can’t find it, look at Appendix A.
So now we’ve reached the main control centre of Windows, what’s the first thing? How about a severe warning? The options in the Control Panel are necessary and useful, however do not change anything unless you understand it and know what you are doing. Blindly changing any setting can wreck havoc with your computer.
Now, on to the next item. Desktop themes! We have already changed the way Windows looks, however Desktop Themes (or just Themes) are designed to make it easier. Navigate to ‘Start->Settings->Control Panel->Desktop Themes’ or ‘Start->Control Panel->Display’. These two versions of Desktop Themes are implemented very differently. If you have a ‘Desktop Themes’ item on your Control Panel, the double click on this icon. In the window that opens, you can select a theme from the drop down box near the top. In the centre area, the different items will change to show you what that Theme looks like. There are two buttons in the top right-hand corner of the window that allow you to preview the Screen Saver, sounds, and cursors. The check boxes below these buttons are for selecting which parts of the Theme to apply. So if you only want, say, the wallpaper from one Theme and everything else from another, then you would uncheck everything except for ‘Desktop wallpaper’.
If you don’t have a ‘Desktop Themes’ item on your Control Panel, then Desktop Themes for you are integrated into the Display box. Go to the tab labelled ‘Themes’ and select the one you want from the ‘Theme:’ combo box. Just as with the other version there is an area below that will show a preview of what the wallpaper, colours, and some of the icons will be changed to. Click ‘Apply’ or ‘OK’ to change your settings to those determined by the Theme.
Now to get to something really useful, installing and uninstalling programs! Most programs nowadays come on one or more CDs. You put the CD (or the first CD) in the drive and it auto-starts (automatically runs the installation program). You follow the instructions, answer the questions, and voila! Your program is ready to use. Sometimes, however, this does not work, and what if you want to remove a program? So, navigate to the Control Panel and open ‘Add/Remove Programs’ or ‘Add or Remove Programs’. No matter what your version of Windows, a list will be displayed of most of the programs on your computer. To remove a program (uninstall it), click on it in the list and then click ‘Add/Remove’ or ‘Change/Remove’ and answer the questions, if there are any. To add (install) a new program make sure that its CD or Floppy disk is in the drive and then click ‘Install…’ or ‘Add New Programs’ and answer the questions.
Okay, that was easy, wasn’t it? All automated and simple. Now remember back to Chapter 1 when we logged on to the computer. Some computers don’t have a password to log on: some never show the box. Some computers can be set up to have multiple usernames and passwords (accounts) so that you can log into different desktops. How can we set all this up? From the Control Panel, of course! Open ‘Passwords’ or ‘User Accounts’ on your Control Panel. These two work very differently, and they are both presented below.
If your computer has the ‘Users’ item, then you have to check something before you can change the accounts. Open the Control Panel item called ‘Passwords’. In the window that pops up, click the ‘User Profiles’ tab (profile is another word for account). There are two radio buttons here. Click the first one if you want to have only one account on the computer, click the second one if you want to have multiple accounts. Then use the check boxes at the bottom to specify what things can be customised on each account. It is recommended to check all of these.
Once you have enabled using multiple accounts, it becomes easy to create a new account. To create a new account, just type in a different name and password when you start the computer. Windows will automatically create the new account with that username and password to be used every time you log on with them.
If your computer has the ‘User Accounts’ item then you have a much easier way to change all of these options. To create a new desktop click ‘Create a new account’. The computer will ask you what you want to call the new account, this is the username. Click ‘Next’. The computer will then ask you if you want this to be a ‘Computer administrator’ or ‘Limited’ account. It is recommended to run most desktops as limited accounts, however there are some programs that do not function well this way. There are also many things you cannot do from a limited account (like create a new account, so if the instructions in this paragraph don’t work for you, then it is because you have a limited account). Click ‘Create Account’ and you have a new desktop of that type under that name!
To change an account in ‘User Accounts’, click on it in the list at the bottom of the window. The window will then give you the list of options of what you can change. You can change the account name by clicking on the first option. You can also change the password by clicking the second option or you can make your account password-less with the third option. To change the picture representing the account you use the fourth option. You change the account type from administrator to limited and vice-versa with the fifth option, and you assign a ‘.NET Passport’ to the account with the fifth option. All of these options save the last one should be self-explanatory. The final option will be discussed when we discuss the Internet. If you have multiple desktops on your computer and the account selected is not the account that is currently logged on, then there appears a sixth option ‘Delete the account’. This options starts a wizard to remove the user from the computer.
You can change the ‘Welcome screen’ (which is the log-on screen variation that fills the whole screen talked about in Chapter 1) to the normal log-on box. To do this select ‘Change the way users log on or off’ from the main ‘User Accounts’ screen. Then uncheck ‘Use the Welcome screen’ and click ‘Apply Options’.
All right, was that a lot of stuff or what? Now for some concepts, first of all, viruses, hackers,crackers, scanners, and firewalls. You may have heard some of these terms before. Viruses are what people often like to blame (wrongly) for computer problems. Computer viruses work much the same way as normal ones. They ‘infect’ a computer by getting their files on its hard disk. They then begin to copy themselves all over the computer and onto anything that might carry them to another computer, such as floppy disks and emails (more on emails when we talk about the Internet). They also do damage while they are on the computer. Many viruses do annoying things, like playing a song or slowing the computer down, however some of them delete files and erase crucial data. Therefore many people get Virus Scanners. There are some major benefits to scanners. The biggest one being that they will destroy many (and maybe all) of the viruses on your computer. Their disadvantages are that they must be updated regularly, and they slow your computer down. They also give a false sense of security, making you think you are well protected when they may have missed something.
Crackers are people who break into computers. Sometimes they do it for fun, sometimes for profit, sometimes to show off. They often touch nothing. Sometimes they will take data or erase it. They tend to prefer government or corporate targets and seldom do serious hackers target normal people. However, to protect against the theft of data, many people run firewalls. Firewalls are pieces of software that identify hacker-like things and cut them off, providing a huge measure of protection for the home user. A similar term, hacker, is often used to refer to crackers, however the term hacker more properly refers to someone who knows how to exploit a computer system for beneficial purposes.
We’re almost done, now for error messages. Error messages do not always indicate an error (or at least, not what you call error messages). Many so-called error messages are simply the program asking for more information. The first thing to do when you see an error message is to read it. Many computer experts may seem to violate this rule: that is often because they recognise common messages and know what they say without reading it. Below is a list of common error message buttons and what they usually do:
Button label What it doesOKConfirms the operation and shuts the boxYesIt performs the operation the message box says it is going toNoIt does not perform the operation the message box says it is going toCancelStops the operation and shuts the box (any data is lost)AbortIt stops the operation you were trying to doRetryTries again giving to time to make changesIgnoreCancels an error message.Most error boxes have icons beside them to indicate their nature as well:
Icon What it meansThe computer have some information for you.The computer is warning you that there may be something you forgot to do or did wrong.There has been a major computer error.Computers can break. Things can go wrong, viruses can destroy information, and the person using the computer can do something wrong. To protect your data just in case this happens it is necessary to back it up. Backing up is making a second copy of data. If you are changing something and do not want to lose the original you can create a second copy on the hard drive to work with, this is a back up. However to protect your data in the case of major computer error it is necessary to back it up off of the hard drive. The most common way to do this is to put all of your data on CDs or DVDs.
Networks and the Internet Table of Contents
We have now covered all the basic concepts using a computer. In this chapter we are going to cover the concepts related to networking and using the Internet.
A network is a way of connecting two or more computers together so that they can share peripherals (hardware like printers) and data. The most common form of network uses Ethernet. Ethernet is a system of data transfer that uses two different kinds of wire, the older one being like a cable television wire and the newer one being like telephone wire. The newer one is faster and uses an end called RJ-45, which looks like a fat telephone cable end. Normally, computers are plugged into a hub, or switch using an internal piece of hardware called an Ethernet card or simply a network card and one of these cables. Then they can all communicate with each other.
Once the computers can communicate, each item (i.e. printer or folder) that needs to be accessed on the network must beshared, allowing it to be visible to the other computers. Any shared item may be blocked off from general use by a password. One of the other benefits of networks is email (electronic mail). Email allows users to send messages and files to each other. When a new message is received it goes into the users inbox for storage until it is read, so that a user may receive mail while away from the computer.
Ethernet networks create what is called Local Area Networks (LANs). This means that they are used within one area (i.e. a house or business building) and that is it. All the computers in that area may be connected, but no one else. This can be a problem depending on what you want to do, and a larger network could open up immense possibilities. Enter the Internet. In 1957, just after the USSR launched Sputnik, the American government created ARPA, a scientific research branch for the military. In 1969 ARPA decided to attempt the creation of a national computer network for communications by the military. They did not want to use any standard system, however, not just because of the distance, but because of the fear of nuclear attack. They wanted a network where there was not central hub that could be taken out, but where all remaining parts would function if any other part were destroyed.
After their success, the idea spread. Different government and educational institutions started connecting into the network. Because they all used the sameprotocol (a set of rules that computers use to communicate, in this case TCP/IP) and the same wires that carried telephone across the country as soon as they plugged in it was the same network. Soon different institutions were creating their own servers (computers that store information meant to be accessed on a network). By 1989 there were more than 100 000 servers on what was becoming known as ‘the Internet’. After the Cold War the American government no longer needed a specifically protected portion of this network they had started for their own and the Internet became completely public domain.
In 1990 Tim Berners-Lee invented a protocol based on TCP/IP that could work with it on the Internet and was more flexible. Soon after this, the NCSA (National Centre for Supercomputing Applications) developed Mosaic, a graphical interface for this protocol called the World Wide Web (WWW).
The rest of this chapter is going to be spent looking at the WWW (or ‘the Web’). To view Web pages (the electronic documents with pictures and formatted text that you view on the Web) you need to have a Web browser. The two most popular browsers are Mozilla Firefox and Internet Explorer. You can use either one or any other Web browser. If you are not sure what you have, then you will still have Internet Explorer, it comes with Windows.
To do anything online (on the Internet), you must first connect to the Internet. If you don’t know how, see Appendix B. After you have connected to the Internet, open your Web browser. Every computer connected to the Internet has an address, called an IP address to identify it. This is a number like ‘207.194.50.216’. To have to remember something like that to access a web page would be a pain, so Domain Names were created. Domain names are names that you can type in the location bar (more on this below) in your browser. The name is then sent to a server on the Internet called a DNS (Domain Name Service) server that then returns the correct IP address.
You should be connected to the Internet and have your browser open. (You may not have access to the Internet where you live. Your teacher will provide a substitute.) First we should identify the parts of a browser so that we know what we’re talking about. Figure 6.1 is a picture of Internet Explorer. If your browser looks a little different, that is okay.
The location bar can also be called the address bar, and it is where you type the URL (Universal Resource Locator or Uniform Resource Locator), which is laid out as follows:
http://home.golden.net/~psweber/The protocol nameThe domain nameThe folder and/or file name on the serverAfter you type the URL press the Enter key and you web browser will take you to the page. The first button on the toolbar is the ‘Back’ button. It does the same thing as the ‘< Back’ button that we saw before, it goes to the previous screen you were looking at. In this case, the previous web page you were at. The back arrow on the button is a universal icon. Universal icons are ones that are always used to represent the same function. This is different from a program icon like on your desktop or from an icon that only occurs in one program. Even the ‘< Back’ button has a back arrow, that’s what the ‘<’ is for. Note that universal icons do not always look exactly the same (i.e. the arrow can look different, as long as it points left).
A universal icon also identifies the next button on the toolbar, the ‘Next’ button. If you push the back button, then you can go forwards again by pushing this button. The next button on the toolbar has two universal icons used together. A sheet of paper represents a file. An ‘X’ represents stop. So the sheet of paper with an ‘X’ on it represents stop loading the file, which is what this button does. Some web browsers have just and ‘X’ or have a red stoplight on this button. They mean the same thing, stop.
Two icons are also used on the next toolbar button. The paper means the same thing, and the arrows going around mean refresh or reload. This is actually typically a Microsoft icon, although some other companies also use it. The reload button in Netscape as a bent up-arrow, signifying looking at the server again. This button forces the web browser to look at the server and download all the data for a web page again. This is primarily used for when the cache (the place where a web browser stores web pages on your hard drive for quicker access) has an old version of the page that the web browser is displaying and you want to see the newest version of the page.
The next two buttons on the toolbar are the last ones with universal icons. They have a house, and a magnifying glass. A house represents ‘home’ and this button takes you to your home page. A home page is a web page that you have set up for your browser to take you to when it first starts or when you click this button. The magnifying class represents ‘search’ and this button will take you to a web page from which to search the Internet.
There is one more thing you need to know about if you are going to be using web pages, hyperlinks. Hyperlinks (one is labelled in the picture above) can be either text or pictures. When they are text they are often a different colour and underlined. When you click on them they take you to a different web page. The text ones are a different colour once you have been to the web page they point to. Some text hyperlinks are formatted differently, though, and many hyperlinks are pictures. How can you know if something is a hyperlink? Hover your cursor over it and if it is a hyperlink your cursor will turn into a hand, and usually the URL that the hyperlink (or just link) points to will be displayed in the status bar.
The web is very useful for getting information this way, but what if you don’t know the URL you need? That is why search engines were created. There are more than 10 billion web pages on the Internet, not all of them are catalogued in all search engines and when you search for something you will tend to get pages that have nothing to do with what you want. However there are some ways to improve your search results.
Go to a search engine. They all work much the same but if you don’t know of one go to http://www.google.com. In the text box you can type keywords (words that have something to do with what you want to find). Some search engines have more advanced features that you can explore on your own, but all of them support Boolean operators. The two most useful for web searches are AND and OR. It is best to type them in all caps. AND tells the search engine that the things on both sides must be in the web page (they may be in its text or in its META tags). OR tells the search engine that one or the other must be in the web page. So typing ‘boats AND models’ will look for all pages containing both words, whereas ‘boats OR models’ will find any page with either word. You can also use NOT, ‘boats NOT Titanic’ returns everything containing ‘boats’ that does not contain ‘Titanic’
You can do more complicated strings too, like ‘boats AND models OR ships AND kits’ which finds all pages containing both ‘boats’ and ‘models’ or both ‘ships’ and ‘kits’. You can also do something like this, ‘boats OR ships AND models OR kits’ which finds anything containing the word ‘boats’ or ‘ships’ along with either ‘models’ or ‘kits’.
Email, Chat-rooms, and IM Table of Contents
Email was already partially explained when we talked about networks. The Internet is often called a ‘network of networks’ but it still has many of the things a network has. One of those things is the ability to do email. The problem with email over the Internet is that it would be impossible to list every person on the Internet in one place, have it current with their names, have those names be unique, and still have it be useful. Since this is the way email on LANs works there needed to be a better addressing system. Email addresses on the Internet work with domain names, but not with URLs. All email addresses go by the format ‘[email protected]’. Thus ‘[email protected]’ is the email address for the person who signed up with Yahoo! Canada for an email address under the username of ‘julia’. ‘[email protected]’ is what happens when a name was already taken and someone else wants it.
Email typically operates on two sub-protocols of TCP/IP, SMTP and POP3. SMTP is used for sending email, and POP3 is used fordownloading (taking off the Internet and putting on your computer) email. Many different email programs exist. Three of the most popular are Qualcomm Eudora, Microsoft Outlook, and Windows Mail. Another popular way to access email is through a web page interface. There are many differences between all the major programs, however there are some things that are standard.
You can create and email, usually by clicking on a button or link labeled ‘new message’. The universal icon for an email message (or just for email) is an envelope and the universal icon for ‘new’ is a star. So there may be an icon of an envelope with a star or something like that. Remember to use tool-tips to find out what buttons with no labels are called. You type one (or more than one separated by a comma) email address in the box labeled ‘To:’. The ‘From:’ box is filled in automatically, and then there are ‘Cc:’ and ‘Bcc:’. You can put email addresses in them and the email will be copied to them so that they can see it was copied or so that they cannot, respectively. You then type the text for your message into the big text box at the bottom.
If you are connected to the Internet when you click the ‘Send’ button (or other similar button) on the email it will go immediately. If you are not (or if the button is called ‘Queue’) then the messages go into you Outbox until you check your mail. To check your email (that is, to download new messages and send the ones in the outbox) click the ‘Check Mail’, ‘Send and Receive’ or other similar button. A progress bar will appear in the status bar or a window will come up with one so that you can know when it is finished. All new messages go into your Inbox, unless you have filters set up (we will not be discussing filters in this book). You can then move them into other mailboxes that you have created by drag-and-drop. (To create a new mailbox there should be a ‘Create new mailbox’ on the menu or on a popup-menu for the Inbox.)
Some emails have attachments, these are files that are in the email that you can open and/or save. The universal icon for attachments is a paper clip. You can attach file to you emails by clicking the ‘Attach’ or similar button. You can open files in email that you receive by either clicking on their icon at the end of an email, or double clicking on it in the ‘Attachments:’ spot at the top, depending on your program.
Email is very useful, but what if you want to talk to someone directly? So chat-rooms were invented. Chat-rooms are found on web pages all over the place, some are public, and some you need a membership for. Once you are in, to use it is simple. There is (usually) as list of the nicknames (or handles, fake names people use on the Internet) somewhere on the page, and when you sign in you give it the one you use. You type something in a text box at the bottom and press either the ‘Enter’ key or the ‘Send’ or ‘Say’ button and your messages is visible to everyone in the chat-room in the text box above, including yourself. IRC chatwas designed to go a step further. You need a program for it and it has a few more features (like the ability to ‘whisper’ to only one person in the room).
IM (Instant Messaging) was designed for one-on-one or conferencing, much like telephones. Everyone has a unique nickname or number that you must know in order to contact them with a message, send them a file, or do a real-time chat, depending on what your program supports. You add people to your contact list orbuddy list and then if you are online, the program notifies you when they are too. Then you can send them messages, chat with messages, or do other things.
Some IM programs also let you send them messages when they are offline that they will get when they come online. Something like email, but it works faster. You can also usually invite other people on your list into an existing chat (or messaging) session so that you can have a little chat room with only people you want. There are new features coming out for computers all the time. Many IM programs now let you talk with the people while chatting or even see them! The biggest advantage over telephones? You can talk to anyone in the world for any length of time without paying more than your monthly Internet bill. No long-distance charges!
Appendices Switching the Control Panel to Classic View Table of Contents
First click on the Start button on the lower left corner, then click on Control Panel on the right-hand side of the menu that pops up (if using the Classic Start Menu layout, click on Settings and then on Control Panel). When the window opens click on Switch to Classic View in the left column of the same window.
Connecting to the Internet Table of Contents
You may access an Internet connection that is already set up by any of the following means, and then you may right-drag it somewhere to create a shortcut. Navigate to ‘Start->Programs->Accessories->Communications->Dial-up networking’ or to ‘Start->All Programs->Accessories->Communications->Netowork Connections’ or to ‘Start->Connect To’. Depending on your version of Windows one or more of these methods may not work, but one of them, at least, will.
To create a new dial-up connection to the Internet (that is, not a high-speed connection) navigate to one of the three places above (if it is the last one click on ‘Show all connections’). Then there will be either an icon that says ‘Make New Connection’ or an item on the left-hand side labeled ‘Create a new connection’. Open the one that your computer has and follow the instructions. If it is called ‘Create a new connection’ you can also create a high-speed connection in there.
1. Introduction to Computer Hardware
a. Parts of the computer
b. Purpose
c. Care of the computer
2. Windows Basics
a. How are storage devices named?
b. ‘My Computer’ screen
c. Creating folders
d. Searching
3. Microsoft Word
a. Creating a professional paper
i. Margins, fonts, line spacing, paragraph settings
ii. Printing options
iii. Saving your document
b. Tables and Graphics
i. How a table is in a document ii. Inserting graphics and clip art
ii. Text wrapping
iii. Sizing vs. cropping
4. Microsoft Excel
a. Creating a spreadsheet
b. Formatting a spreadsheet
c. Basic formulas & Calculations
d. Graphs
e. Printing & Saving
5. Internet
a. Researching on the internet
i. Search engines
ii. Reliable websites
iii. Favorites & history
b. Internet Safety – Keeping yourself safe on the Internet
i. Social networking sites
1. Privacy issues
2. Future ramifications of posts
3. Deleting your accounts
ii. Cyber bullying
1. What cyber bullying is
2. Its effects on people
3. Prevention
c. Plagiarism & Copyright issues i. Ethical issues
i. Intellectual Property
Grading Policy
Grades:
Quizzes 30%
Homework 20%
Projects 30%
Participation & Attendance 20%
Quizzes: A quiz will be given after the completion of a topic. It will cover the class notes discussed and handouts. Some quizzes may require the use of the computer. Make‐ups will be given upon return.
Homework: There will be some assignments that will require you to do some work at home. All homework will be due on the date specified. These assignments will be essential to the completion of class assignments.
Projects: Computer assignments will be given during class time designated as "LABTIME". These assignments will deal with the topics being discussed. A grade will be given for each of these assignments. You will be required to save all assignment on your folder; some will need to be printed as well.
Participation: You are expected to be following the class lectures and demonstrations or to be working on the class assignment. No student should be investigating the workings of the machine during class time.
THERE IS NO EATING OR DRINKING (EXCEPT WATER) IN THE COMPUTER ROOMS.
ALL SCHOOL RULES ARE IN EFFECT.
IMPORTANT: Excessive absence, EVEN If all missed work is made up, will AFFECT your grade.
Contact Info:
Phone: 718‐863‐9134
Email: gedelstein@prestonhs.org
Website: www.graphicdesignatprestonhs.weebly.com/index.html
PLEASE READ! Very Important
What is a computer?
A computer is an automatic, electronic, data-processing machine that takes in facts and figures known asdata, and then processes or organizes it in some useful way. Afterwards it outputs, or displays, the results for you to see as information. Keep in mind that data is not information but rather information is derived from accurate data that are entered into a computer. Only after processing, is data transformed into information which is then used for decision making.
When talking about computers, there are two terms which must be correctly distinguished, hardware and software. Hardware is all the parts of a computer that can be seen and touched. Hardware includes the internal components that we do not usually see unless we open up our machine. Software is all of the instructions that a computer uses to do what you ask it to do. Pieces of software are often called programs and an operating system is a suite of programs that help all the other programs run. Think of software as the power behind the hardware. Without software your computer is useless. Likewise, without hardware the software can't exist. Computers do not think for themselves so they need software, which is made to manipulate the computer's hardware in such a way that you, the user, can understand.
A calculator is a simple computer. It is not as complex or versatile as your net book, laptop or desktop computer though. It acquires information as series of key presses and computes the result which is displayed on a small screen. Since calculators are faster than humans this creates utility in the form of time saved. They can also repeat processes much more easily than humans can.
Many people mistakenly think that the part of the computer that normally displays pictures and text is the computer. This is usually not true. That part is called the monitor. The computer is usually a box . Also, you may call the whole assembly of all the hardware (the computer and the monitor, for example) the computer. Occasionally though, the computer and monitor are built together, for example, certain Apple computers.
There are different types of monitors. One of these is the one already shown. It is called a CRT monitor. It takes more power than the other popular kind, calledLCDs . However, CRT monitors work faster, which makes them better for fast games because the movement will blur less. LCDs are thinner than CRTs, but they are generally more expensive.
Monitors are only one way the computer can output information for you to see. Another popular output device is called a printer . Printers are used to put data on paper. This is called hard copy, what monitors show is called soft copy. Computers can also output sounds through speakers; this is also soft copy.
There are also different kinds of input hardware. The two most important of which are the mouse and the keyboard. A mouse is used to move the cursor (or arrow) around the screen (monitor display). A keyboard is used to enter (type) letters, numbers, and other symbols into a computer.
Computers store all data in binary code, which is a number system that only uses ones and zeros. One digit in binary code is called a bit, eight bits is called abyte. A byte is the amount of space one letter takes up. One thing to bear in mind is that all the extra detail about how the letter looks must also be stored in binary code and so word processor documents use more space than one byte per letter.
There are many different kinds of computers. The ones that most people use are called Personal Computers (PCs). Desktop PCs are computers that you don't move around; they generally are a box with a monitor attached. Smaller, portable, computers that are about the size of a briefcase are called laptops or notebooks. There are also computers that are around the same size, but they have a special screen: Text (letters and numbers) is written directly on the screen, these are called Tablet PCs. They also do not require a mouse; the mouse gestures and clicks are done right on the screen with your finger, or a Stylus. Personal Digital Assistants (PDAs) are computers so small that you can hold them in one hand. They generally also have a Touch Screen, like the Tablets. Notebooks, PDAs, and most Tablets have batteries so that you can use them where there is no power. These batteries generally last for about three to four hours before needing to be recharged. They use LCD screens because LCDs are thinner and take less power, so the batteries will last longer, and so that they are not, say, a foot thick. There are also much more powerful computers called mainframes that can be as big as a room or a house! This is what, say, Google and Wikimedia run their websites off of.
Operating Systems and Controls
Table of Contents
- Computers and Peripherals
- Operating Systems and Controls
- The Desktop
- File Systems
- Concepts and Settings
- Networks and the Internet
- Email, Chat-rooms, and IM
- Appendices
Software
Software is the set of instructions that tell a computer what it needs to do.
There are two kinds of software: the System Software which includes the Operating System and Applications Software.
Operating System
Abbreviated OS, the Operating System is the resource manager which transforms sectors, bytes, interrupts and ports into files, folders, processes, and the user-interfaces with which you can interact. Examples include: Microsoft Windows (XP, Vista, or 7), any flavor of Linux, and Mac OS X (An apple version of Unix).
Applications Software
Also called user programs, pieces of applications software do the specific things you want.
The Operating System runs the computer and the Applications Software. It makes sure that the Hardware and the Applications Software understand each other. This makes it the most important piece of software on the computer. The Operating System also comes with utilities. These are pieces of Applications Software that mostly deal with managing data. You can also buy Third Party utilities, which means a different company made them than made the Operating System.
Utilities Programs that manage, repair, and optimize data on a computer. A basic set comes with every OS.
Applications Software does the specific things you want the computer to do, Whereas the Operating System is general instructions to the computer for controlling the Hardware, Applications Software is specific instructions that work together with the Operating System to do work for you.
There are as many different kinds of Applications Software as there are things you could want to do with a computer, however the most common are word processing, spreadsheet, presentation, and database software and all computer games. Word processing software is used to create documents, which are formatted pages of text, such as letters, memos, reports or essays. Spreadsheet software organizes data, usually numbers, into columns and rows. It is used mostly for accounting and has many features for doing mathematical operations. Presentation software is used to make virtual (or, simulated) slide shows and usually have all sorts of exciting features for animations and sounds that you just can’t do in a normal slide show. Database software is an advanced way of organizing complicated information in simple formats. A database is your electronic filing cabinet.
Most computers come pre-installed with an OS called Microsoft® Windows®. Most OS's and programs have the same features whether they use Windows or not, but all computers running Windows will have these features with these names. The thing we did in the last chapter with the box that comes up when you turn on your computer is called logging in. The screen you see after logging in is called the Desktop. Most things on a computer are named after things in real life, and they are usually used similarly too. Just like a real desktop the desktop on a computer is where you go to access all your data. However, a real desktop has a flat horizontal surface.
You can replace the Operating System with another whether or not your system gets a virus. The most common replacement Operating System is called Linux. It is free to download and install and software for it is freely available via the Internet.
Desktop The desktop is the area that appears right after logging in. It contains a background picture (wallpaper),icons and the taskbar.
On the desktop are pictures with text labels under them, these pictures are called icons because they represent something else. If you move or get rid of an icon, all that means is that you have to access what they represent a different way, you haven’t gotten rid of the application software the icon is representing. Icons usually represent programs, but sometimes they represent collections of data. Double-clicking (clicking twice in rapid succession) on one of these icons will open whatever it represents, the text tells you what it represents.
Icons A tiny picture that represents a program, folder, or program function.
There is a bar that is usually at the bottom of the desktop, however it may also be on any other side. If you cannot see it, then move the cursor to the edge where it is and it will come up. It is called the task-bar.
Taskbar The taskbar is the bar along one side of the desktop. It is used for launching programs or opening the window of an open program.
Along the main part of the task-bar is a list of all open programs, clicking on one element of this list will put that program’s window (the box that a program is viewed in) on top of all other open windows. Over on one side of the task-bar is a clock; beside the clock are a bunch of icons that represent open ‘invisible’ programs. These are programs that are always running and do things ‘behind the scenes’. This area is called the system tray. On the main part of the task-bar there is sometimes a small group of icons, this is called the quick-launch bar. Clicking on one of these icons opens whatever it represents.
System Tray The system tray holds icons for programs currently running ‘behind-the-scenes’.
On the opposite side of the task-bar from the clock and the system tray is a button. A button (or command button) is just like a real button, when it is pushed (clicked) it does something. Some buttons have text on them that say what they do, and some have icons representing what they do. Some have both.
(Command) Buttons Buttons do something when you click on them. They may be labeled by text, an icon, or both.
The quick-launch icons are also buttons. Some buttons are raised to look like real buttons and some only raise up when you hover (put the cursor on top of) them. The button on the other side of the start-bar from the clock and system tray is called the start-button. When you click the start-button it opens the start-menu. The start-menu has icons for more programs and data collections, although it is usually programs.
Start button The Start button is a button that opens the start-menu.
Start menu The Start menu contains icons for all installed programs and data collections, usually for programs.
The icons that are on the desktop, the quick-launch bar, and the start-menu are usually shortcuts. On the desktop shortcuts are often indicated by a small symbol on top of the icon (). Shortcuts are what I meant earlier when I said ‘if you move or get rid of an icon, all that means is that you have to access what they represent a different way, you haven’t gotten rid of the actual thing’. Icons represent all data collections and programs even if they are not shortcuts, however normally the ones on the desktop and in the start-menu are shortcuts.
Shortcuts Icons that are only links to the things those icons represent.
The difference between icons and shortcuts is important so be sure you understand it. An icon is any picture that is meant to convey what something is. The icon on the start-button represents the fact that it is a major part of Windows, which is why it is a Windows logo. Shortcuts are a link to a program or data collection; the icon on a shortcut represents whatever the shortcut opens, however the same icon would be on the real thing as well. A Venn Diagram can maybe better show this, see Figure 2.2.
You open whatever is linked to by each shortcut on the start-menu by clicking on it. If any icon has a right-arrow beside it, then hovering over it or clicking on it will make a sub-menu (a menu inside a menu) come out with more shortcuts on it.
Everything we just talked about is part of the Windows interface. An interface is just anything that goes between two or more things. This interface goes between you and the computer, you could also say that the Operating System is the interface between the hardware and software.
Interface An interface, just as the name suggests, is anything that acts as or creates a medium of interaction or communication between multiple things. Auser-interface is the means of interaction between (you)the user and the computer.
There are some standard things that are on most user-interfaces. We have already talked about one, buttons. These things are called controls. Below is a table of some of the more common controls, starting with buttons:
Name of control and pictureDescription(Command) Button Buttons (also called command buttons) do something when clicked.Check box A check box turns something on or off. There is a check in the box if it is on, to change it click on it.Text box Also called edit boxes, these boxes let you type text in them.Radio buttonAlso called option buttons, these boxes come in groups, you can only pick one per group.List boxThese boxes contain lists of things: you can select one.Combo boxAlso called drop-down boxes, these boxes are like text boxes, but they have a button on the side that, when clicked, brings up a list of things that you can pick from.Spin buttonThese buttons increase or decrease numerical values by one when the up or down arrow half is clicked.Scroll barClick on the arrows at the top and bottom of these bars to move the screen, you can also drag the box that is on the bar.LabelOften overlooked, labels don’t do anything, but they sit near other controls with text in them to tell you what those things are.You can get a basic description of what any control does by hovering your mouse over it. A little thing with text will pop up. This is called a tool-tip (or a ToolTip).
Besides these there are also menus. Menus all operate the same way as the start-menu. Some of them are found at the tops of programs. These are calledmain-menus or simply menus. Other menus are opened by right-clicking (pushing the right mouse button over something). These are called popup-menus.
The DesktopThere are no 'real' layers though; you can’t peel off the wallpaper and see the Desktop! However there are ‘virtual’ layers, arranged with the Desktop on the bottom. What you see behind the icons on the Desktop is called the wallpaper, whereas the whole thing is the Desktop, not just the picture/colour that you see behind the icons. Application windows are layered on top.
You can add shortcuts to your Desktop in a number of ways. The most common way is to right-click on the desktop, which brings up the popup-menu. On the popup-menu there should be a sub-menu labelled ‘New’, hover over this. When the sub-menu pops out find the item labelled ‘Shortcut’ and click it. A dialogue-box will come up asking you where the program or data collection is found. Later we will get into how to form something to type in the box, however it is easier to just click the button beside labelled ‘Browse...’.
The Browse button is a standard button that you will see often, clicking it always brings up a dialogue-box in which you can select programs and data collections. Select the program or data collection you want to make a shortcut to and click the button labelled ‘OK’. The OK button is also a standard button on dialogue-boxes that you click to tell it that you are done filling in information and it can use that data now. ‘OK’ is usually paired with ‘Cancel’, ‘Cancel’ closes the dialogue-box without doing anything.
When you have selected the correct program or data collection click the button marked ‘Next >’. The Next button is, again, a standard button that tells the dialogue box you are done this step and to go on to the next step in the process. It usually comes with the Back button to go to the previous step. This dialogue-box also has a Cancel button. After you have clicked ‘Next’ the dialogue-box comes up with a text-box asking what you want the text under the icon to be for this shortcut. When you have typed what you want into the box click ‘Finish’, another standard button.
NOTE: The true name of these buttons is above in bold. However it is common computer shorthand to say Click ‘OK’ instead of Click the OK button. We will be using this shorthand in this book.
If you do not like the text under a shortcut, you can change it. There are three primary ways to do this. The first one is to click on the shortcut, selecting it, and then push the ‘F2’ key on your keyboard. The text will become a text-box that you can type in to change what it says. The second way is to right-click on the shortcut, bringing up its popup-menu, and select ‘Rename’ from the popup-menu. The same thing will happen. Another way to cause it to happen is to select the icon and then click on it. Do not double-click! That will open whatever it links to, select it and then click.
If you want to change the icon (picture) one your shortcut, bring up its popup-menu and select ‘Properties’. Across the top of the window, just below the bar with the ‘X’ button on it (the title bar), there are a bunch of tabs, click the one labelled ‘Shortcut’. Then, click the button labelled ‘Change Icon…’, in the dialogue-box that comes up select the new icon that you want, or click ‘Browse’ to find more files with icons. In this same window where the ‘Change Icon’ button is, there is a text-box labelled ‘Target:’. It is the same as the box with a Browse button on the first step of adding a shortcut to the Desktop, only there is no browse button. That it what you change if you want the shortcut to link to something else.
You can also move or sort icons on the Desktop. To sort them right-click on the Desktop and hover over the sub-menu called ‘Arrange Icons By’. Then click on the way you want them sorted. If you want them automatically sorted make sure the ‘Auto Arrange’ option is checked (you can check or uncheck it by clicking on it). If you have Auto Arrange off, you can put the icons wherever you want them. Click on one and don’t let the button go back up. Move the cursor over to where you want the icon to be and it will move right along with it. When you have it where you want it, let go of the mouse button. This is called dragging-and-dropping.
If you want to take an icon off the desktop there are three major ways to do it. You can select the icon you want to remove and push the ‘Delete’ key on your keyboard. A dialogue-box will come up, click ‘Yes’. You can also drag-and-drop the icon onto the recycle bin, which is an icon on the Desktop labelled exactly that. Or you can right-click on the icon and click ‘Delete’. The same dialogue-box will come up for you to click ‘Yes’ on. If you did it by accident you can click ‘No’ and it won’t remove the icon.
There are other settings you can change on the Desktop. To access them right-click on the Desktop and select ‘Properties’ from the popup-menu. To change the wallpaper select the tab labelled ‘Wallpaper’ or ‘Desktop’. To change what picture is displayed for wallpaper select it from the list or if it is not in the list click ‘Browse…’. There is a combo box from which you can select whether to stretch, tile (repeat by picture with itself together likes tiles), or centre the picture. If you just want a colour for your wallpaper, then select ‘(None)’ from the list. Sometimes there is a combo-type box to select the colour right there and sometimes you have to change it under the ‘Appearance’ tab.
You can also change the Screen-Saver. The Screen-Saver is a program that shows up after your computer has not been used for so long so that the monitor will not get wrecked (which can happen if the same picture is displayed on it for hours at a time). To change the Screen-Saver click the tab labelled ‘Screen-Saver’. There will be a combo box that lists all the Screen-Savers on your computer. After you have selected the one you want you can change how long the computer waits before bringing it up in the text box with a spin button that is below the combo box.
You can also change the colour scheme of all the controls in almost all programs. Click the ‘Appearance’ tab. There is one or more combo boxes on this page that allow you to select different combinations of default colour schemes. On this same page, or sometimes you have to click ‘Advanced’ to get there, are other settings. You can select an element from one combo box, and then change it’s colour and how its text looks. You can try experimenting with this if you want, just be sure to save your current settings so you can change back (which some versions of windows don’t allow, so don’t worry then). You do this by clicking the ‘Save As…’ button and typing the name you want to call the colour scheme.
There is one final tab common to most versions of Windows. It is the ‘Settings’ tab. It is not recommended to change settings in this tab unless you know what you are doing. Some games will give errors when you try to start them like ‘256 colours required’ or ‘This program needs 640 × 480 to run’. This is where you set those. There is a combo box here, selecting a different option from this box changes the number of colours your computer can display. More colours mean more quality. There is also a slider labelled ‘Screen resolution’. It increases or decreases the size of everything displayed on your monitor. The larger the numbers, the smaller things are, and the smaller things are the more you can fit. When this is set to make things smaller, some programs (or you can manually) change their stuff so that it looks the same size, allowing them to have more quality in display.
File Systems
Table of Contents
- Computers and Peripherals
- Operating Systems and Controls
- The Desktop
- File Systems
- Concepts and Settings
- Networks and the Internet
- Email, Chat-rooms, and IM
- Appendices
Before we get into anything else we need a basic understanding of how a computer stores data. Inside the computer box there are many different pieces of hardware used for storing data. One of these is the memory. A Computer’s memory is where it stores the data that is currently in use. So, for example, when you have a letter open and are looking at or working on it the computer stores it in memory. All the software currently running is stored in memory too. This kind of memory is called RAM (Random-Access Memory). Random-access means that any part of the information may be read or changed randomly, the computer does not have to look through all the data in order so that it can find the right piece. There is another kind of memory called ROM (Read-Only Memory). Read-only means that the data on it cannot be changed. ROM is used to store basic information that every computer needs.
Random-access memory RAM is used to store the data the computer is currently using.
Read-only memory ROM is used to store the basic information that every computer needs.
When a computer is turned off, everything in RAM is erased. Because this would cause you to lose your work all the time, diskswere created. Disks are round flat objects, but in computer slang they are pieces of data storage hardware that do not need electricity to keep the data stored. There are other things that do this that are not disks, however the things inside of all things called disks are round and flat, so that is how the term came to be. All disks need to be in another piece of hardware that acts as an interface between them and the rest of the computer called a drive.
There are two main kinds of disks: Magnetic and Optical. Magnetic disks are the old kind and are slowly being replaced. They store data by aligning little pieces of metal inside differently using a magnet. Because of the way they store data magnetic disks can be erased or completely destroyed by magnets, heat, and dust. The two most popular forms of magnetic disks are Hard Disks and Floppy Disks. Hard disks are stored permanently inside their drive, which is normally installed into the computer box where you cannot see any part of it. Hard Disks can store a lot of data, and are used to store most of the information on computers. Floppy disks are small disks that you can pop in and out of their drive. All you can see of their drive is a slit in the computer box with a button and a light. You can put in different disks and then take them out and give them to someone so that you can transfer data between your computers.
Hard disks Hard disks are used to store most of the data on a computer, and can store more than anything else can.
Floppy disks Floppy disks are used to transfer data between computers, but are very small.
Optical disks The most popular kind of optical disk is the Compact Disc (CD). CDs can still be put into and taken out of their drive, making them good for buying programs on, and nowadays for transferring data. Normal CDs that you buy with programs on them are CD-ROMs. They are called that because, like ROM, they are read-only. You can also get CD-Rs and CD-RWs, which are not read-only and are not erasable and erasable, respectively. Unlike floppy disks that can store only 1.44 megabytes (MB, that’s 1 048 576 bytes, usually we estimate that it is one million), CDs can store around 700MB! And, because CDs store their information with variations in the shape of the disk that reflects a laser differently they cannot be damaged as easily. However, you should still never touch the shiny surface of the CD. Digital Versatile Discs (DVDs) are another kind of Optical disc that work identically to CDs, however they can store much more information and transfer it at much higher speeds. There is also a new format coming in from Japan that is smaller and faster than DVDs and stores much more information! Today you can also get memory cards that are called flash memory or, more properly, EEPROMs. These are cards that operate just like ROM that isn’t read-only, so they don’t lose their information when the power is cut.
Compact Discs CDs are the most popular form of optical discs.
Digital Versatile Discs Sometimes called Digital Video Discs because of their extensive use in video, DVDs can store more than CDs.
All data on a computer is stored in collections called files and folders. A file is the most basic collection of data on a computer. A file can store the instructions for a single program, or the data for a single letter. Folders are collections of files. So a file is like a piece of paper and you put it in a folder.
Files Files are the most basic data collections, they store the data for a single thing.
Folders Also called directories, folders are collections of files.
It is very necessary to sort files properly into folders so that you can find them again. Many people have had to redo entire projects because they lost their file by putting it into the wrong folder. Most files are named with two parts. The first part of the filename is a description of the file. After this comes a ‘.’ followed by the second part. The second part of a filename is called the extension. Extensions are often three letters long and they tell you what kind of file it is. For example ‘exe’ files (files with an extension of ‘exe’) are programs. ‘Doc’ files are Microsoft Word documents.
Besides saving (taking a file you have open in a program and writing it from memory onto a disk) there are many other file operations. These can all be done using the same program. This program is a utility called a file manager. There is a file manager that comes with Windows called Windows Explorer, or sometimes just Explorer. To open Explorer go to ‘Start->Programs->Windows Explorer’ or Right Click Start, Click Explore, and the Directory should show. Yet in Windows XP, You go ‘Start->All Programs->Accessories->Windows Explorer’.
NOTE: This is a standard computer notation for menus. When you see something that goes ‘M1->M2->...’ or sometimes ‘M1 > M2 > ...’ it means that you are to open the menu item M1 and then open the sub-menu M2 etc. and the final item is the menu item to click on. Obviously, ‘Start’ is the start-menu.
Sometimes Explorer will start you off looking at your ‘My Documents’ folder, and sometimes it will start you off looking at drive C (C:).
Don’t worry if your window doesn’t look exactly like this. Since this is our first screenshot, let’s make sure we know what were talking about. (1) is the title bar and (2) is the main menu. Below the menu is the toolbar. (3) is the icon representing a folder and (5) is the icon representing a file. (4) is the icon representing a hard disk, also called hard drive, because the disks and the drive are in one, sealed, box, (this one is called ‘C:’, all drives have a letter). (6) is what you click to view sub-folders. So, if there isn’t a tree (the part in the circle) below your hard drive (which should be the icon in the left-hand pane, the part in the square, and should have a name followed by ‘(C:)’ as seen above with (4)) then click the ‘+’ (6) beside it. This is a lot of new stuff so it may be a little bit confusing.
Now we have a tree open below our hard drive showing us all the folders that are directly in the root of the hard drive. Now should be a good time to look at the standard conventions for drives and paths. As you can see above, the drive letter is always is brackets after the name of a drive. The first (or only) floppy drive is almost always ‘A:’. If you have a second floppy drive it will be ‘B:’. Your first hard drive is ‘C:’ and your CD drive is ‘D:’. If you have more hard drives the other drives change accordingly (i.e. if you have a second hard drive that is ‘D:’ and your CD drive will become ‘E:’). You can have folders inside folders as well as files, and the drive itself acts like a folder. So if you wanted to designate a file called ‘Letter.rtf’ that is in the folder ‘My Documents’ and that folder is found in the root of the hard drive ‘C:’, you separate the elements with a back-slash ‘\’ and come up with ‘C:\My Documents\Letter.rtf’.
Now navigate to your ‘My Documents’ directory. It should be found at ‘C:\My Documents’ or ‘C:\Documents and Settings\[Your Name]\My Documents’.
NOTE: Navigate means to make it so you are looking at that in your file manager. For example to navigate to ‘C:\My Documents’ you would open the tree on ‘C:’ like we did before (or by double-clicking on it in the right-hand pane). Then you would click the icon that is labeled ‘My Documents’, or double-click on this icon in the right-hand pane (that is, the part in the octagon).
Now, to open a file in its program, double-click on its icon in the right-hand pane. To delete (remove) files is the same as removing shortcuts from the desktop. If you accidentally delete a file you wanted, open the Recycle Bin (double-click on its desktop icon) right-click on the file and select ‘restore’ from the popup-menu. If you want to permanently get rid of all files in the Recycle Bin, right-click on the Recycle Bin and select ‘Empty Recycle Bin’ from the popup-menu. Deleting or restoring folders works the same way.
If you are going to sort your files properly into folders, you need to know how to create them. To create a folder, navigate to the folder you want the new folder in. Then, right-click on a blank area of the right-hand pane to bring up the popup-menu. Then select ‘New->Folder’ from the menu. Type the name of the folder and press ‘Enter’. To arrange file in folders, you also need to be able to copy and move both files and folders. Moving means that the file or folder goes to the new location and is no longer in the old location. To move a file or folder, simply drag-and-drop the file or folder from where it is in the right-hand pane on top of the folder where you want it to be in either the right or left-hand pane. Copying means that the file or folder stays where it is, and a duplicate is created in the new location. To copy a file or folder you right-drag-and-drop (that is, drag-and-drop by holding down the right mouse button instead of the left one) from its old location on top of the new one. A popup-menu will come up asking if you want to copy, move, or create a shortcut to the file or folder. If you want to copy, select ‘Copy Here’.
If you want to search the whole computer for a specific file or folder there are two possible ways to do it. Some versions of Windows Explorer have a button on the toolbar that says ‘Find’, click on this. In all versions of Windows you can go to ‘Start->Find->Files or Folders’ or ‘Start->Search’. Some versions of the search have extra features to make it easier that it displays first. To bypass these click ‘All files and folders’. If your version came up with text boxes right away you don’t have to do this. Once the text boxes are up you can select what drive or folder to search from the combo box. The topmost text box is where you type all or part of the filename. You can also create wildcard searches. To do this you type letters that are in the filename along with symbols called wildcards. The wildcards are ‘*’ and ‘?’. ‘*’ represents an infinite number of characters or nothing. ‘?’ represents exactly one character. So ‘?ello.doc’ would find ‘Hello.doc’ and ‘jello.doc’. ‘Si*.*’ would find all files that start with ‘Si’.
Finally there are file properties. Different kinds of files have different properties and different versions of Windows can have different kinds of properties allowed. You can experiment with these if you want. To open the properties for any file, right-click on it and select ‘Properties’. In the window that comes up you can change all the properties of the file that can be changed. In this window it also shows the name and location of the file and its size in bytes, kilobytes (KB, 1 024 bytes, usually estimated at 1 000 bytes), or megabytes. It also shows the attributes, the most commonly used and useful of which is the read-only attribute. When you check the read-only check box and click OK, Windows won’t let any program change the file. If you uncheck the box Windows will let programs change it again.
Concepts and Settings Table of Contents
- Computers and Peripherals
- Operating Systems and Controls
- The Desktop
- File Systems
- Concepts and Settings
- Networks and the Internet
- Email, Chat-rooms, and IM
- Appendices
We’ve been moving extremely fast and covering a lot of potentially new and confusing material, so let’s take a second to review (some of you may remember this better if you try thinking about the pictures in brackets instead of the words):
- Computers are machines that process data (picture a giant contraption with sheets of paper containing information being fed in, and ice cream coming out)
- Go back to the table of controls in Chapter 2 and review all of those (picture something really obvious for each one, like the control panel of a sci/fi spaceship for buttons)
- The desktop is behind everything and is your access panel to everything (picture an office desk covered in switches, buttons, and knobs)
- Shortcuts are only links to other files (picture a whirlpool that looks like Mars sucking you to Mars)
- Everything, programs, shortcuts, letters, and data of all kinds is stored on the computer as files (come up with your own picture, make it interesting)
- You copy and move files by drag-and-drop (picture a ball, you pick it up and move it, then you pick it up and put it down somewhere else while it stays in the second place)
Now we’re moving forward again. The next big centre to tackle in Windows is the Control Panel (CP). The Control Panel is where you change almost all the main things in Windows. “But didn’t we change a lot of things, like the wallpaper and colours and screensaver, without going through there?” Yes, but we took a shortcut. Go to ‘Start->Settings->Control Panel’ or ‘Start->Control Panel’ (it may come up with a window or be a sub-menu), then double-click (click if it’s a sub-menu) on ‘Display’. There it is; the box that we used to change the wallpaper, screensaver, and colours
NOTE: Your Control Panel may come up looking totally different and you may be lost. If there is no icon in your control panel called ‘Display’ then your computer is running in a ‘User Friendly’ mode. To switch out of it into the ‘normal’ view, look at the left-hand side of the Control Panel window and find the option called ‘Switch to classic view’ and click this. If you can’t find it, look at Appendix A.
So now we’ve reached the main control centre of Windows, what’s the first thing? How about a severe warning? The options in the Control Panel are necessary and useful, however do not change anything unless you understand it and know what you are doing. Blindly changing any setting can wreck havoc with your computer.
Now, on to the next item. Desktop themes! We have already changed the way Windows looks, however Desktop Themes (or just Themes) are designed to make it easier. Navigate to ‘Start->Settings->Control Panel->Desktop Themes’ or ‘Start->Control Panel->Display’. These two versions of Desktop Themes are implemented very differently. If you have a ‘Desktop Themes’ item on your Control Panel, the double click on this icon. In the window that opens, you can select a theme from the drop down box near the top. In the centre area, the different items will change to show you what that Theme looks like. There are two buttons in the top right-hand corner of the window that allow you to preview the Screen Saver, sounds, and cursors. The check boxes below these buttons are for selecting which parts of the Theme to apply. So if you only want, say, the wallpaper from one Theme and everything else from another, then you would uncheck everything except for ‘Desktop wallpaper’.
If you don’t have a ‘Desktop Themes’ item on your Control Panel, then Desktop Themes for you are integrated into the Display box. Go to the tab labelled ‘Themes’ and select the one you want from the ‘Theme:’ combo box. Just as with the other version there is an area below that will show a preview of what the wallpaper, colours, and some of the icons will be changed to. Click ‘Apply’ or ‘OK’ to change your settings to those determined by the Theme.
Now to get to something really useful, installing and uninstalling programs! Most programs nowadays come on one or more CDs. You put the CD (or the first CD) in the drive and it auto-starts (automatically runs the installation program). You follow the instructions, answer the questions, and voila! Your program is ready to use. Sometimes, however, this does not work, and what if you want to remove a program? So, navigate to the Control Panel and open ‘Add/Remove Programs’ or ‘Add or Remove Programs’. No matter what your version of Windows, a list will be displayed of most of the programs on your computer. To remove a program (uninstall it), click on it in the list and then click ‘Add/Remove’ or ‘Change/Remove’ and answer the questions, if there are any. To add (install) a new program make sure that its CD or Floppy disk is in the drive and then click ‘Install…’ or ‘Add New Programs’ and answer the questions.
Okay, that was easy, wasn’t it? All automated and simple. Now remember back to Chapter 1 when we logged on to the computer. Some computers don’t have a password to log on: some never show the box. Some computers can be set up to have multiple usernames and passwords (accounts) so that you can log into different desktops. How can we set all this up? From the Control Panel, of course! Open ‘Passwords’ or ‘User Accounts’ on your Control Panel. These two work very differently, and they are both presented below.
If your computer has the ‘Users’ item, then you have to check something before you can change the accounts. Open the Control Panel item called ‘Passwords’. In the window that pops up, click the ‘User Profiles’ tab (profile is another word for account). There are two radio buttons here. Click the first one if you want to have only one account on the computer, click the second one if you want to have multiple accounts. Then use the check boxes at the bottom to specify what things can be customised on each account. It is recommended to check all of these.
Once you have enabled using multiple accounts, it becomes easy to create a new account. To create a new account, just type in a different name and password when you start the computer. Windows will automatically create the new account with that username and password to be used every time you log on with them.
If your computer has the ‘User Accounts’ item then you have a much easier way to change all of these options. To create a new desktop click ‘Create a new account’. The computer will ask you what you want to call the new account, this is the username. Click ‘Next’. The computer will then ask you if you want this to be a ‘Computer administrator’ or ‘Limited’ account. It is recommended to run most desktops as limited accounts, however there are some programs that do not function well this way. There are also many things you cannot do from a limited account (like create a new account, so if the instructions in this paragraph don’t work for you, then it is because you have a limited account). Click ‘Create Account’ and you have a new desktop of that type under that name!
To change an account in ‘User Accounts’, click on it in the list at the bottom of the window. The window will then give you the list of options of what you can change. You can change the account name by clicking on the first option. You can also change the password by clicking the second option or you can make your account password-less with the third option. To change the picture representing the account you use the fourth option. You change the account type from administrator to limited and vice-versa with the fifth option, and you assign a ‘.NET Passport’ to the account with the fifth option. All of these options save the last one should be self-explanatory. The final option will be discussed when we discuss the Internet. If you have multiple desktops on your computer and the account selected is not the account that is currently logged on, then there appears a sixth option ‘Delete the account’. This options starts a wizard to remove the user from the computer.
You can change the ‘Welcome screen’ (which is the log-on screen variation that fills the whole screen talked about in Chapter 1) to the normal log-on box. To do this select ‘Change the way users log on or off’ from the main ‘User Accounts’ screen. Then uncheck ‘Use the Welcome screen’ and click ‘Apply Options’.
All right, was that a lot of stuff or what? Now for some concepts, first of all, viruses, hackers,crackers, scanners, and firewalls. You may have heard some of these terms before. Viruses are what people often like to blame (wrongly) for computer problems. Computer viruses work much the same way as normal ones. They ‘infect’ a computer by getting their files on its hard disk. They then begin to copy themselves all over the computer and onto anything that might carry them to another computer, such as floppy disks and emails (more on emails when we talk about the Internet). They also do damage while they are on the computer. Many viruses do annoying things, like playing a song or slowing the computer down, however some of them delete files and erase crucial data. Therefore many people get Virus Scanners. There are some major benefits to scanners. The biggest one being that they will destroy many (and maybe all) of the viruses on your computer. Their disadvantages are that they must be updated regularly, and they slow your computer down. They also give a false sense of security, making you think you are well protected when they may have missed something.
Crackers are people who break into computers. Sometimes they do it for fun, sometimes for profit, sometimes to show off. They often touch nothing. Sometimes they will take data or erase it. They tend to prefer government or corporate targets and seldom do serious hackers target normal people. However, to protect against the theft of data, many people run firewalls. Firewalls are pieces of software that identify hacker-like things and cut them off, providing a huge measure of protection for the home user. A similar term, hacker, is often used to refer to crackers, however the term hacker more properly refers to someone who knows how to exploit a computer system for beneficial purposes.
We’re almost done, now for error messages. Error messages do not always indicate an error (or at least, not what you call error messages). Many so-called error messages are simply the program asking for more information. The first thing to do when you see an error message is to read it. Many computer experts may seem to violate this rule: that is often because they recognise common messages and know what they say without reading it. Below is a list of common error message buttons and what they usually do:
Button label What it doesOKConfirms the operation and shuts the boxYesIt performs the operation the message box says it is going toNoIt does not perform the operation the message box says it is going toCancelStops the operation and shuts the box (any data is lost)AbortIt stops the operation you were trying to doRetryTries again giving to time to make changesIgnoreCancels an error message.Most error boxes have icons beside them to indicate their nature as well:
Icon What it meansThe computer have some information for you.The computer is warning you that there may be something you forgot to do or did wrong.There has been a major computer error.Computers can break. Things can go wrong, viruses can destroy information, and the person using the computer can do something wrong. To protect your data just in case this happens it is necessary to back it up. Backing up is making a second copy of data. If you are changing something and do not want to lose the original you can create a second copy on the hard drive to work with, this is a back up. However to protect your data in the case of major computer error it is necessary to back it up off of the hard drive. The most common way to do this is to put all of your data on CDs or DVDs.
Networks and the Internet Table of Contents
- Computers and Peripherals
- Operating Systems and Controls
- The Desktop
- File Systems
- Concepts and Settings
- Networks and the Internet
- Email, Chat-rooms, and IM
- Appendices
We have now covered all the basic concepts using a computer. In this chapter we are going to cover the concepts related to networking and using the Internet.
A network is a way of connecting two or more computers together so that they can share peripherals (hardware like printers) and data. The most common form of network uses Ethernet. Ethernet is a system of data transfer that uses two different kinds of wire, the older one being like a cable television wire and the newer one being like telephone wire. The newer one is faster and uses an end called RJ-45, which looks like a fat telephone cable end. Normally, computers are plugged into a hub, or switch using an internal piece of hardware called an Ethernet card or simply a network card and one of these cables. Then they can all communicate with each other.
Once the computers can communicate, each item (i.e. printer or folder) that needs to be accessed on the network must beshared, allowing it to be visible to the other computers. Any shared item may be blocked off from general use by a password. One of the other benefits of networks is email (electronic mail). Email allows users to send messages and files to each other. When a new message is received it goes into the users inbox for storage until it is read, so that a user may receive mail while away from the computer.
Ethernet networks create what is called Local Area Networks (LANs). This means that they are used within one area (i.e. a house or business building) and that is it. All the computers in that area may be connected, but no one else. This can be a problem depending on what you want to do, and a larger network could open up immense possibilities. Enter the Internet. In 1957, just after the USSR launched Sputnik, the American government created ARPA, a scientific research branch for the military. In 1969 ARPA decided to attempt the creation of a national computer network for communications by the military. They did not want to use any standard system, however, not just because of the distance, but because of the fear of nuclear attack. They wanted a network where there was not central hub that could be taken out, but where all remaining parts would function if any other part were destroyed.
After their success, the idea spread. Different government and educational institutions started connecting into the network. Because they all used the sameprotocol (a set of rules that computers use to communicate, in this case TCP/IP) and the same wires that carried telephone across the country as soon as they plugged in it was the same network. Soon different institutions were creating their own servers (computers that store information meant to be accessed on a network). By 1989 there were more than 100 000 servers on what was becoming known as ‘the Internet’. After the Cold War the American government no longer needed a specifically protected portion of this network they had started for their own and the Internet became completely public domain.
In 1990 Tim Berners-Lee invented a protocol based on TCP/IP that could work with it on the Internet and was more flexible. Soon after this, the NCSA (National Centre for Supercomputing Applications) developed Mosaic, a graphical interface for this protocol called the World Wide Web (WWW).
The rest of this chapter is going to be spent looking at the WWW (or ‘the Web’). To view Web pages (the electronic documents with pictures and formatted text that you view on the Web) you need to have a Web browser. The two most popular browsers are Mozilla Firefox and Internet Explorer. You can use either one or any other Web browser. If you are not sure what you have, then you will still have Internet Explorer, it comes with Windows.
To do anything online (on the Internet), you must first connect to the Internet. If you don’t know how, see Appendix B. After you have connected to the Internet, open your Web browser. Every computer connected to the Internet has an address, called an IP address to identify it. This is a number like ‘207.194.50.216’. To have to remember something like that to access a web page would be a pain, so Domain Names were created. Domain names are names that you can type in the location bar (more on this below) in your browser. The name is then sent to a server on the Internet called a DNS (Domain Name Service) server that then returns the correct IP address.
You should be connected to the Internet and have your browser open. (You may not have access to the Internet where you live. Your teacher will provide a substitute.) First we should identify the parts of a browser so that we know what we’re talking about. Figure 6.1 is a picture of Internet Explorer. If your browser looks a little different, that is okay.
The location bar can also be called the address bar, and it is where you type the URL (Universal Resource Locator or Uniform Resource Locator), which is laid out as follows:
http://home.golden.net/~psweber/The protocol nameThe domain nameThe folder and/or file name on the serverAfter you type the URL press the Enter key and you web browser will take you to the page. The first button on the toolbar is the ‘Back’ button. It does the same thing as the ‘< Back’ button that we saw before, it goes to the previous screen you were looking at. In this case, the previous web page you were at. The back arrow on the button is a universal icon. Universal icons are ones that are always used to represent the same function. This is different from a program icon like on your desktop or from an icon that only occurs in one program. Even the ‘< Back’ button has a back arrow, that’s what the ‘<’ is for. Note that universal icons do not always look exactly the same (i.e. the arrow can look different, as long as it points left).
A universal icon also identifies the next button on the toolbar, the ‘Next’ button. If you push the back button, then you can go forwards again by pushing this button. The next button on the toolbar has two universal icons used together. A sheet of paper represents a file. An ‘X’ represents stop. So the sheet of paper with an ‘X’ on it represents stop loading the file, which is what this button does. Some web browsers have just and ‘X’ or have a red stoplight on this button. They mean the same thing, stop.
Two icons are also used on the next toolbar button. The paper means the same thing, and the arrows going around mean refresh or reload. This is actually typically a Microsoft icon, although some other companies also use it. The reload button in Netscape as a bent up-arrow, signifying looking at the server again. This button forces the web browser to look at the server and download all the data for a web page again. This is primarily used for when the cache (the place where a web browser stores web pages on your hard drive for quicker access) has an old version of the page that the web browser is displaying and you want to see the newest version of the page.
The next two buttons on the toolbar are the last ones with universal icons. They have a house, and a magnifying glass. A house represents ‘home’ and this button takes you to your home page. A home page is a web page that you have set up for your browser to take you to when it first starts or when you click this button. The magnifying class represents ‘search’ and this button will take you to a web page from which to search the Internet.
There is one more thing you need to know about if you are going to be using web pages, hyperlinks. Hyperlinks (one is labelled in the picture above) can be either text or pictures. When they are text they are often a different colour and underlined. When you click on them they take you to a different web page. The text ones are a different colour once you have been to the web page they point to. Some text hyperlinks are formatted differently, though, and many hyperlinks are pictures. How can you know if something is a hyperlink? Hover your cursor over it and if it is a hyperlink your cursor will turn into a hand, and usually the URL that the hyperlink (or just link) points to will be displayed in the status bar.
The web is very useful for getting information this way, but what if you don’t know the URL you need? That is why search engines were created. There are more than 10 billion web pages on the Internet, not all of them are catalogued in all search engines and when you search for something you will tend to get pages that have nothing to do with what you want. However there are some ways to improve your search results.
Go to a search engine. They all work much the same but if you don’t know of one go to http://www.google.com. In the text box you can type keywords (words that have something to do with what you want to find). Some search engines have more advanced features that you can explore on your own, but all of them support Boolean operators. The two most useful for web searches are AND and OR. It is best to type them in all caps. AND tells the search engine that the things on both sides must be in the web page (they may be in its text or in its META tags). OR tells the search engine that one or the other must be in the web page. So typing ‘boats AND models’ will look for all pages containing both words, whereas ‘boats OR models’ will find any page with either word. You can also use NOT, ‘boats NOT Titanic’ returns everything containing ‘boats’ that does not contain ‘Titanic’
You can do more complicated strings too, like ‘boats AND models OR ships AND kits’ which finds all pages containing both ‘boats’ and ‘models’ or both ‘ships’ and ‘kits’. You can also do something like this, ‘boats OR ships AND models OR kits’ which finds anything containing the word ‘boats’ or ‘ships’ along with either ‘models’ or ‘kits’.
Email, Chat-rooms, and IM Table of Contents
- Computers and Peripherals
- Operating Systems and Controls
- The Desktop
- File Systems
- Concepts and Settings
- Networks and the Internet
- Email, Chat-rooms, and IM
- Appendices
Email was already partially explained when we talked about networks. The Internet is often called a ‘network of networks’ but it still has many of the things a network has. One of those things is the ability to do email. The problem with email over the Internet is that it would be impossible to list every person on the Internet in one place, have it current with their names, have those names be unique, and still have it be useful. Since this is the way email on LANs works there needed to be a better addressing system. Email addresses on the Internet work with domain names, but not with URLs. All email addresses go by the format ‘[email protected]’. Thus ‘[email protected]’ is the email address for the person who signed up with Yahoo! Canada for an email address under the username of ‘julia’. ‘[email protected]’ is what happens when a name was already taken and someone else wants it.
Email typically operates on two sub-protocols of TCP/IP, SMTP and POP3. SMTP is used for sending email, and POP3 is used fordownloading (taking off the Internet and putting on your computer) email. Many different email programs exist. Three of the most popular are Qualcomm Eudora, Microsoft Outlook, and Windows Mail. Another popular way to access email is through a web page interface. There are many differences between all the major programs, however there are some things that are standard.
You can create and email, usually by clicking on a button or link labeled ‘new message’. The universal icon for an email message (or just for email) is an envelope and the universal icon for ‘new’ is a star. So there may be an icon of an envelope with a star or something like that. Remember to use tool-tips to find out what buttons with no labels are called. You type one (or more than one separated by a comma) email address in the box labeled ‘To:’. The ‘From:’ box is filled in automatically, and then there are ‘Cc:’ and ‘Bcc:’. You can put email addresses in them and the email will be copied to them so that they can see it was copied or so that they cannot, respectively. You then type the text for your message into the big text box at the bottom.
If you are connected to the Internet when you click the ‘Send’ button (or other similar button) on the email it will go immediately. If you are not (or if the button is called ‘Queue’) then the messages go into you Outbox until you check your mail. To check your email (that is, to download new messages and send the ones in the outbox) click the ‘Check Mail’, ‘Send and Receive’ or other similar button. A progress bar will appear in the status bar or a window will come up with one so that you can know when it is finished. All new messages go into your Inbox, unless you have filters set up (we will not be discussing filters in this book). You can then move them into other mailboxes that you have created by drag-and-drop. (To create a new mailbox there should be a ‘Create new mailbox’ on the menu or on a popup-menu for the Inbox.)
Some emails have attachments, these are files that are in the email that you can open and/or save. The universal icon for attachments is a paper clip. You can attach file to you emails by clicking the ‘Attach’ or similar button. You can open files in email that you receive by either clicking on their icon at the end of an email, or double clicking on it in the ‘Attachments:’ spot at the top, depending on your program.
Email is very useful, but what if you want to talk to someone directly? So chat-rooms were invented. Chat-rooms are found on web pages all over the place, some are public, and some you need a membership for. Once you are in, to use it is simple. There is (usually) as list of the nicknames (or handles, fake names people use on the Internet) somewhere on the page, and when you sign in you give it the one you use. You type something in a text box at the bottom and press either the ‘Enter’ key or the ‘Send’ or ‘Say’ button and your messages is visible to everyone in the chat-room in the text box above, including yourself. IRC chatwas designed to go a step further. You need a program for it and it has a few more features (like the ability to ‘whisper’ to only one person in the room).
IM (Instant Messaging) was designed for one-on-one or conferencing, much like telephones. Everyone has a unique nickname or number that you must know in order to contact them with a message, send them a file, or do a real-time chat, depending on what your program supports. You add people to your contact list orbuddy list and then if you are online, the program notifies you when they are too. Then you can send them messages, chat with messages, or do other things.
Some IM programs also let you send them messages when they are offline that they will get when they come online. Something like email, but it works faster. You can also usually invite other people on your list into an existing chat (or messaging) session so that you can have a little chat room with only people you want. There are new features coming out for computers all the time. Many IM programs now let you talk with the people while chatting or even see them! The biggest advantage over telephones? You can talk to anyone in the world for any length of time without paying more than your monthly Internet bill. No long-distance charges!
Appendices Switching the Control Panel to Classic View Table of Contents
- Computers and Peripherals
- Operating Systems and Controls
- The Desktop
- File Systems
- Concepts and Settings
- Networks and the Internet
- Email, Chat-rooms, and IM
- Appendices
First click on the Start button on the lower left corner, then click on Control Panel on the right-hand side of the menu that pops up (if using the Classic Start Menu layout, click on Settings and then on Control Panel). When the window opens click on Switch to Classic View in the left column of the same window.
Connecting to the Internet Table of Contents
- Computers and Peripherals
- Operating Systems and Controls
- The Desktop
- File Systems
- Concepts and Settings
- Networks and the Internet
- Email, Chat-rooms, and IM
- Appendices
You may access an Internet connection that is already set up by any of the following means, and then you may right-drag it somewhere to create a shortcut. Navigate to ‘Start->Programs->Accessories->Communications->Dial-up networking’ or to ‘Start->All Programs->Accessories->Communications->Netowork Connections’ or to ‘Start->Connect To’. Depending on your version of Windows one or more of these methods may not work, but one of them, at least, will.
To create a new dial-up connection to the Internet (that is, not a high-speed connection) navigate to one of the three places above (if it is the last one click on ‘Show all connections’). Then there will be either an icon that says ‘Make New Connection’ or an item on the left-hand side labeled ‘Create a new connection’. Open the one that your computer has and follow the instructions. If it is called ‘Create a new connection’ you can also create a high-speed connection in there.
Assignment 1: Create 2 "Sweet Sixteen" Party Invitations
MICROSOFT WORD
You are planning your own theme party. You need to design an invitation in Microsoft Word using tools such as borders, bullets, clip art, word art and auto shapes, colored font and background etc. You should also include at least one image from the internet (Right click on the image and copy and paste into the word document). Please save in your student folder.
Please include the following information in the contents of your invitation:
Time
Place
Date
What to bring
Theme of the party
What type of food, games, and activities etc.
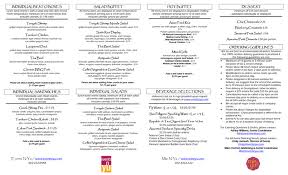
|
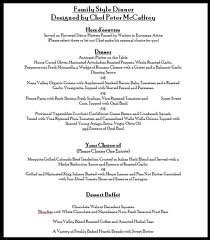
|
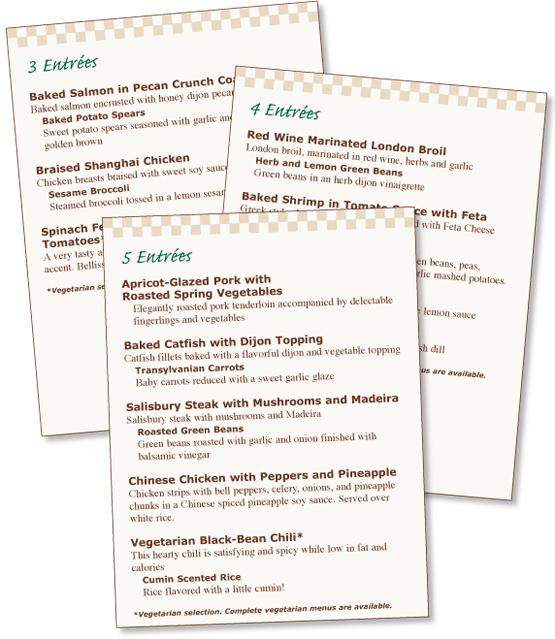
|
Assignment 2: Designing a restaurant menu in
Microsoft Word
Lesson: Designing a restaurant menu in Microsoft Word
Lesson Steps:
You are opening a new restaurant and you will need to design your own menu. You will be using Microsoft Word as a tool to create your menu. Please include the following when you design your menu. For ideas visit www.restaurantrow.com
1. Menu Content: What you will include in your menu
-Select a theme for your restaurant.
-Choose a unique name.
-What type of food will be served at your restaurant? (The menu must include: breakfasts, lunches, appetizers, soups, salads, dinners, non- alcoholic beverages, coffees and teas etc).
- All of the items must be given a price value. (You may make up your own)
2. Menu Design: How you will design your menu using tool options in Word
- Choose a font style and color that compliments your restaurant theme.
- You might want to include a border, change the color of the background and add fancy bullets to present your menu.
-Import Images from the internet: To import images into your word document from the internet just right click with your mouse and copy and paste the image where you want it. Try www.punchstock.com , www.info.com, or www.ask.com for great images.
DO NOT USE MICROSOFT TEMPLATES
Lesson Steps:
You are opening a new restaurant and you will need to design your own menu. You will be using Microsoft Word as a tool to create your menu. Please include the following when you design your menu. For ideas visit www.restaurantrow.com
1. Menu Content: What you will include in your menu
-Select a theme for your restaurant.
-Choose a unique name.
-What type of food will be served at your restaurant? (The menu must include: breakfasts, lunches, appetizers, soups, salads, dinners, non- alcoholic beverages, coffees and teas etc).
- All of the items must be given a price value. (You may make up your own)
2. Menu Design: How you will design your menu using tool options in Word
- Choose a font style and color that compliments your restaurant theme.
- You might want to include a border, change the color of the background and add fancy bullets to present your menu.
-Import Images from the internet: To import images into your word document from the internet just right click with your mouse and copy and paste the image where you want it. Try www.punchstock.com , www.info.com, or www.ask.com for great images.
- You have three classes to work on this project. The forth day you will present the menu to the class.
- Remember it is always your responsibility to save your work in your student folder. Save this project as Menu + your last name.
DO NOT USE MICROSOFT TEMPLATES
Assignment 3: Designing a CD cover
1. Go to http://www.popculturemadness.com/Music/Pop-Old/1929.html
2. - Choose a year
3. -Choose an artist
4. Go to TABLES – DRAW TABLE 1 column 6" x 6"
5. SAVE AS: CD COVER_Your Name
6. Include artists name, best hits etc.
7. Include color background, images of artist
8. On the back cover, Include a 2 column list of songs, and Information about the artist.
2. - Choose a year
3. -Choose an artist
4. Go to TABLES – DRAW TABLE 1 column 6" x 6"
5. SAVE AS: CD COVER_Your Name
6. Include artists name, best hits etc.
7. Include color background, images of artist
8. On the back cover, Include a 2 column list of songs, and Information about the artist.

Assignment 4: Comic Strip
1. File – Page set-up- landscape
2. Table- Insert table – 2 row- 4 columns
3. SAVE AS – ASSIGNMENT 4 COMICS – in your folder
4. Search online for a character idea. Extra points if you draw your own characters in PAINT.
You can have as many characters as you want.
5. You will write a dialogue for each table in your comic strip.
(Insert- Picture- auto shapes for different dialogs)
Your dialog must be creative and original. Your comic should have a beginning, middle and end.

Assignment 5: Welcome to Powerpoint
Topic of interest PowerPoint
Often times we forget to stop and think about the world around us and the current events that take place. For instance, we watch the news or flip through a newspaper to glance at a feature story, yet we rarely take time to analyze or research what has happened. Now let’s stop and take the time.
Research Requirements:
www.pbs.org
www.cnn.com
www.guardian.co.uk
www.nationalgeographic.com
http://www.time.com/
www.wikipedia.org/wiki/current-events.com
www.msnbc.msn.com
Your PowerPoint should address the following questions:
PowerPoint Requirements:
1. Use Microsoft PowerPoint as a visual presentation tool. Create a new Folder – MS POWERPOINT- save your PowerPoint as final Presentation _yourfirstandlastname.
2. Create a slide presentation advocating your current issue or topic
3. The slide show should include a minimum of SEVEN well thought out slides including a title page and the final slide should be a list of your resources.
4. Each slide should include a well thought out information about the issue you have researched. No more than 5 bullets or sentences of information per slide.
5. Each slide should include creative images, fonts, bullets, backgrounds, animation and sound.
Often times we forget to stop and think about the world around us and the current events that take place. For instance, we watch the news or flip through a newspaper to glance at a feature story, yet we rarely take time to analyze or research what has happened. Now let’s stop and take the time.
Research Requirements:
- Choose an event, topic or issue that interest you. I must approve your choices before you start working. (If you use a topic that you already used in another class, you will fail this course).
- Go to http://www.lib.odu.edu/libassist/idea/ or http://www.questia.com/popularSearches/index.html and use the idea generator to find your topic. You may use a topic that is not listed on that site.After I approve your event/topic you will research from online articles and research.
- Create a PowerPoint presentation on your current event/topic. You will narrow down information from your facts sheet into bullets and small paragraphs of facts and information. You will present the final PowerPoint to the class.
www.pbs.org
www.cnn.com
www.guardian.co.uk
www.nationalgeographic.com
http://www.time.com/
www.wikipedia.org/wiki/current-events.com
www.msnbc.msn.com
Your PowerPoint should address the following questions:
- What were/are the causes of the chosen event, topic? What is the issue?
- How did/does it affect society?
- Are there pros or cons? List them.
- Why did you choose this event, topic or issue?
- How has your research influenced or changed your views of this event/topic?
PowerPoint Requirements:
1. Use Microsoft PowerPoint as a visual presentation tool. Create a new Folder – MS POWERPOINT- save your PowerPoint as final Presentation _yourfirstandlastname.
2. Create a slide presentation advocating your current issue or topic
3. The slide show should include a minimum of SEVEN well thought out slides including a title page and the final slide should be a list of your resources.
4. Each slide should include a well thought out information about the issue you have researched. No more than 5 bullets or sentences of information per slide.
5. Each slide should include creative images, fonts, bullets, backgrounds, animation and sound.
Assignment 6: Plan and take a road trip through a US state
USING THE INTERNET
In this activity, you will learn about various towns, cities, and places of interest within a US state by planning and taking a two-week road trip.
Step 1
Plan and map your route (Pick a town or city with in the state you choose as your starting destination. You will need an actual street address to begin your trip)
On the Internet, research the geography of a US state to help you identify places you might want to visit. For example, you can visit the official Web site of the state, use an online encyclopedia, use the Geography link on the netstate.com Web site http://www.netstate.com/states/index.html, or type locations in a search engine to help you identify the places that fit the lesson and interest you.
Make a list in WORD of the places you want to visit. Check to make sure that the locations you have entered include:
Open Google Maps. Click the Get Directions button on the top left of the page. Click the icon of the car and then enter the locations you wish to visit and plan the route you wish to take. (Pick a town or city with in the state you choose as your starting destination. You will need an actual street address to begin your trip)
On your route, calculate the miles between locations. You will need the number of miles between locations for your postcards.
Calculate how many hours and/or days you plan to stay at each location.
Save your map and route plan and print. Be sure to put your name on the back of the Map
Step 2
Research destinations and write postcards home
Visit each place on your route, research it, and mark it on your map with a red circle.
For each stop on your trip, write one postcard home using Microsoft Office Publisher. Each postcard should include:
Create your postcard
Select one of the postcard templates and a theme in Microsoft Publisher to create your postcard. Use the same template and theme for all of your postcards. See a sample postcard (http://download.microsoft.com/download/2/4/b/24bb8c05-8bd4-4cac-89ff-0901bf3b8468/RoadTrip.pub).
To find Microsoft Publisher on your computer, go to the start Menu, Click All programs, Search in the Microsoft
Office folder for Publisher.
Step 3
Complete your trip and record it
When you have completed your trip, print all postcards, your google map, and route planner.
Assessment:
In this activity, you will learn about various towns, cities, and places of interest within a US state by planning and taking a two-week road trip.
Step 1
Plan and map your route (Pick a town or city with in the state you choose as your starting destination. You will need an actual street address to begin your trip)
On the Internet, research the geography of a US state to help you identify places you might want to visit. For example, you can visit the official Web site of the state, use an online encyclopedia, use the Geography link on the netstate.com Web site http://www.netstate.com/states/index.html, or type locations in a search engine to help you identify the places that fit the lesson and interest you.
Make a list in WORD of the places you want to visit. Check to make sure that the locations you have entered include:
- One or more major cities with populations of 1,000,000+
- Two or more cities with population between 500,000 and 999,999
- One or more minor cities with population of 100,000-499,999
- One or more towns with population between 20,000 and 99,000
- The state capital
- Two or more other areas of geographical interest within the state. Look for places beyond the familiar tourist attractions, for example, an old growth forest, a historic site like an abandoned mining town, the geographic center, the highest peak, and so on. If you do choose a familiar attraction, research its history or try to find unusual information about it.
Open Google Maps. Click the Get Directions button on the top left of the page. Click the icon of the car and then enter the locations you wish to visit and plan the route you wish to take. (Pick a town or city with in the state you choose as your starting destination. You will need an actual street address to begin your trip)
On your route, calculate the miles between locations. You will need the number of miles between locations for your postcards.
Calculate how many hours and/or days you plan to stay at each location.
Save your map and route plan and print. Be sure to put your name on the back of the Map
Step 2
Research destinations and write postcards home
Visit each place on your route, research it, and mark it on your map with a red circle.
For each stop on your trip, write one postcard home using Microsoft Office Publisher. Each postcard should include:
- Location
- Date
- Miles driven since last postcard (location and date)
- Number of days you've been at the location
- Brief description of the location (Use the Internet to search for information about the interesting sights, history, significance of the location.)
- A different photo of the location than the one you used for your push pin
- Place you plan to go next
Create your postcard
Select one of the postcard templates and a theme in Microsoft Publisher to create your postcard. Use the same template and theme for all of your postcards. See a sample postcard (http://download.microsoft.com/download/2/4/b/24bb8c05-8bd4-4cac-89ff-0901bf3b8468/RoadTrip.pub).
To find Microsoft Publisher on your computer, go to the start Menu, Click All programs, Search in the Microsoft
Office folder for Publisher.
- Enter the required information in the list above using complete sentences in a narrative format.
- Check to make sure you have included all required information.
- Proofread your postcards.
- Save your work.
Step 3
Complete your trip and record it
When you have completed your trip, print all postcards, your google map, and route planner.
Assessment:
- Route planner and map. Check that all required locations are included.
- Postcards. All information is included, interesting sights are represented, and that the writing is correct, coherent, and interesting.
Assignment 7: Lets go Food Shopping
Using Microsoft Excel you will create a shopping list of 25 different food items.
A. Demonstration of Excel
After you have completed your shopping you will:
Step 1
You will buy your groceries at: Walmart.com. You only have $150.00 to spend. You cannot go over your budget. Be frugal
Step 2
1. Keep track of your expenses.
2. Create a total sum of your expenses
3. Average you expenses
4. Create a bar Chart or Pie chart
Step 3
5, Copy your Chart to a word document
6. Make you conclusions based on the information you have gathered.
7. Print your Excel file
8. Print you Word File