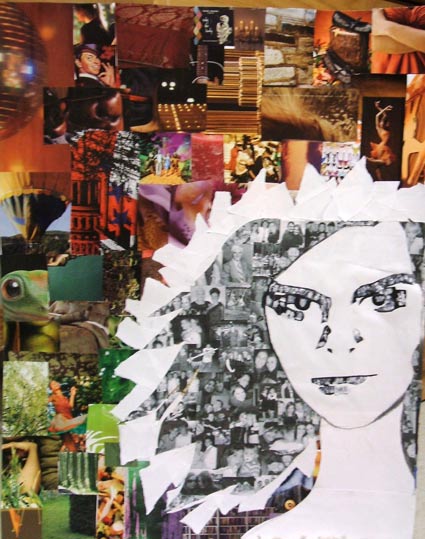
1. Smashing Faces


|
Objective: Focusing on value, you will create untraditional portraits based on the work of Ana Mendieta.
Ana Mendieta: Born in Havana, Cuba, Ana Mendieta was exiled from her native country in 1961, just before the outbreak of the Cuban Revolution. Much of Mendieta's work expresses the pain and rupture of cultural displacement, and resonates with visceral metaphors of death, rebirth, and spiritual transformation. A seminal figure in feminist art practice of the 1970s, Mendieta devised an emblematic, at times mythical female iconography. In 1972 Mendieta began making ritualistic performances and haunting earth works, in which she immersed or inscribed her own body within nature. Blood, fire, water, and other natural elements are essential to her highly personal, often mystical vocabulary. Burial and regeneration are recurrent themes. Mendieta's ephemeral "earth-body sculptures" and provocative performances were documented through film, video and photography. Whether painting her body with blood, or burning, carving and inscribing female symbols into the landscape, as in her Silueta series, Mendieta's work is infused with enormous power and poetry. Mendieta writes: "I have been carrying on a dialogue between the landscape and the female body (based on my own silhouette)... I am overwhelmed by the feeling of having been cast from the womb (nature). Through my earth/body sculptures I become one with the earth... I become an extension of nature and nature becomes an extension of my body..." Over a fourteen-year period Mendieta made more than seventy films and videotapes that document her powerful body-based performances and landscape sculptures. A selection of these works has now been made available. Ana Mendieta was born in Havana, Cuba, in 1948, and died in 1985. She studied at the University of Iowa, where she created many of her early performance works. Mendieta's performances were also held at Franklin Furnace, New York; Oaxaca, Mexico; Belgrade and Antwerp. Her work has been included in exhibitions at the Bronx Museum, New Museum of Contemporary Art, and the Whitney Museum of Art, New York; and the Musée National d'Art Moderne, Paris. One-person exhibitions by Mendieta were held at A.I.R. Gallery, New York; Museu de Arte Contemporãnea, São Paolo, Brazil; Museo Nacional de Bellas Artes, Havana, Cuba, and Primo Piano, Rome. Following her death, retrospective exhibitions have been organized by the New Museum of Contemporary Art, New York; Pat Hearn Gallery, New York; Wexner Center for the Arts, Columbus, Ohio; and Helsinki City Art Museum, Finland. In 1997 Mendieta was the subject of a major retrospective organized by the Fundació Antoni Tàpies, Barcelona, Spain. |
Materials
• Digital Cameras
• Printer
• Drawing Materials
Step 1: Take Photos
There’s not really a right way to do this, just make sure your faces are pressed hard enough against the glass so that your features are distorted.
Step 2: Edit and save the Photos to Google Docs
Edit your photos, making decisions about cropping and composition. cropping images, distorting image using photoshop. Photoshop demo
Step 3: Do Some Drawing! Take a photo of it and save it to a Google Doc.
Using a grid or working freehand, you will draw your edited photos. The drawing aspect works really well because of the way it
re-contextualizes facial features and keeps you from trying to make things perfect. When you distort features, change proportions, and alter visual cues, there’s not a lot of ‘perfect’ left; you can only draw what’s there. These changes can take away the mental block that often holds you back while they’re working on portraits. You can work on softening shading, using and blending values, sharpening details, and whatever other drawing techniques you may see fit.
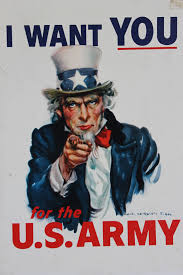
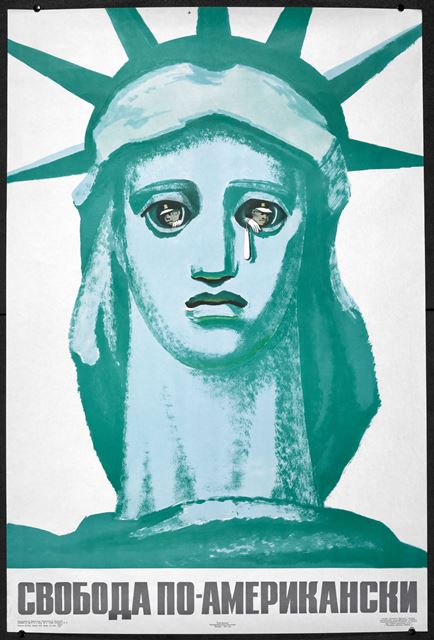
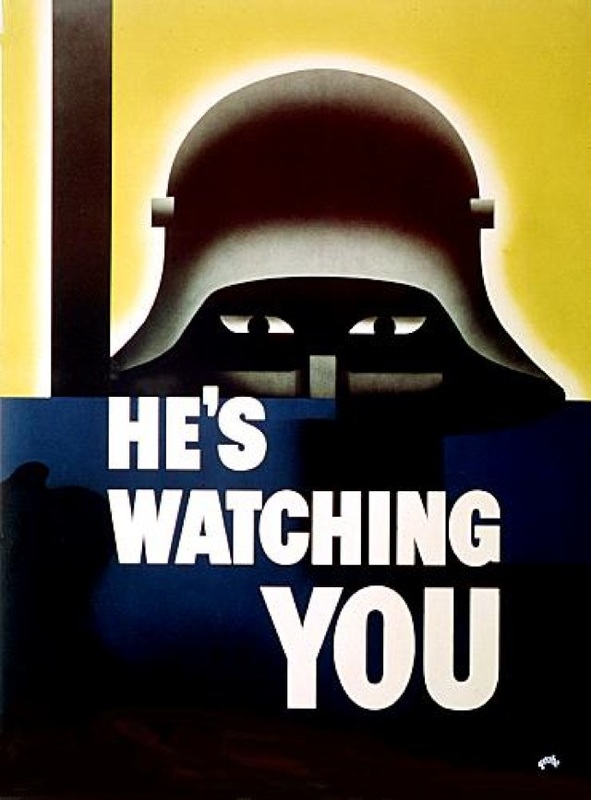
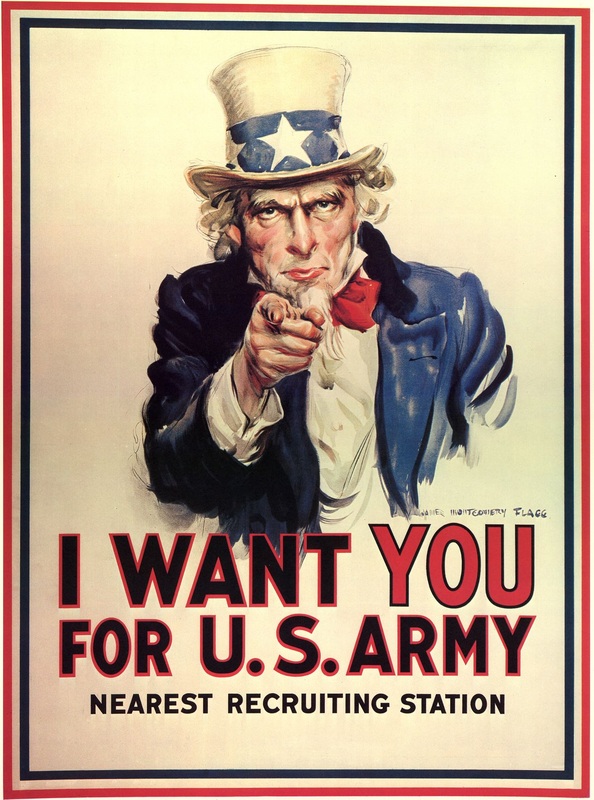
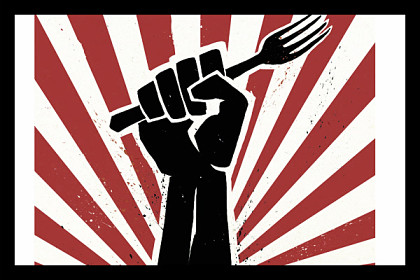
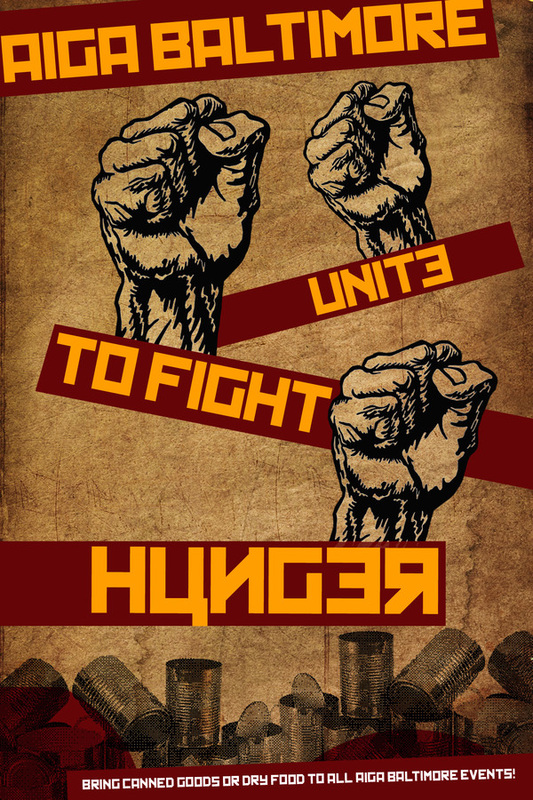
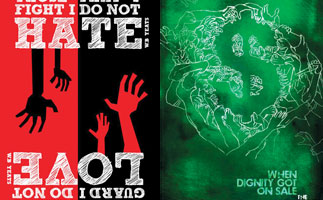
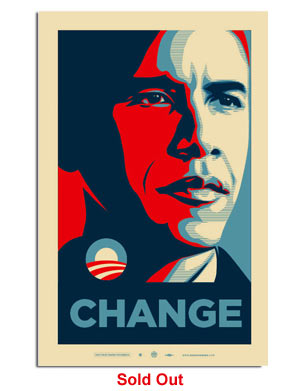
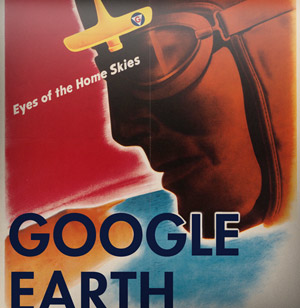
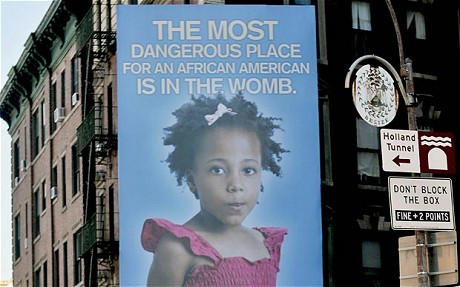
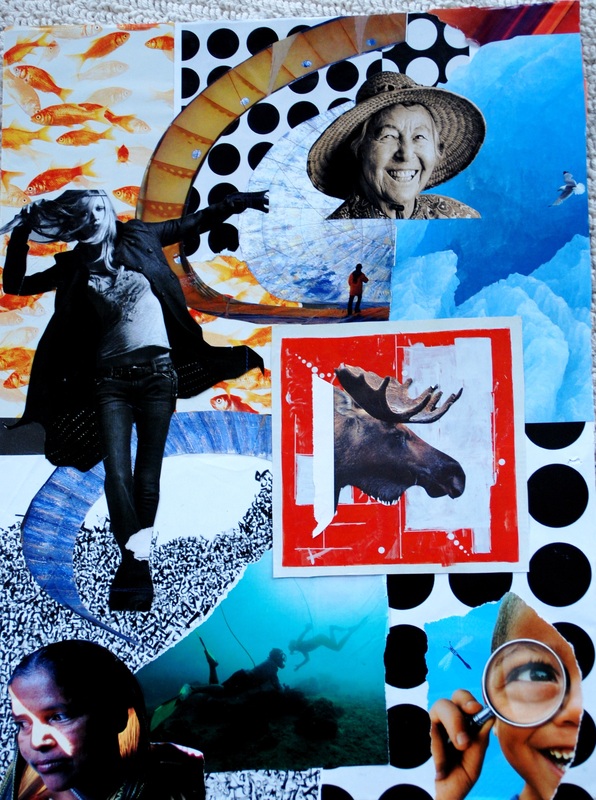
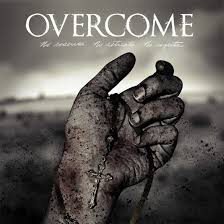
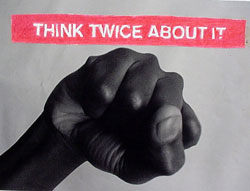
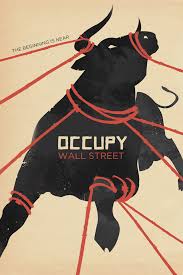
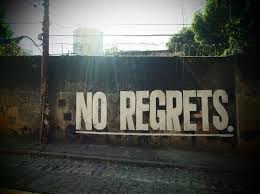
2. Social Issues Montage
|
Objective: Focusing on message, you will create a social issues poster that expresses you opinion of a social issue
Decide upon an issue that you have a strong opinion on, or a viewpoint you want to express. You must express this viewpoint using multiple layers of text, illustrations and effects in a propaganda-style. You may search the internet, take photos, and/or create original material for images. You will create an 11 x 17 poster in Photoshop or Pixlr. The final poster will be saved as a PDF in your Google drive folder. All Back up materials will be saved in your Google Drive folder. 4 detailed sketches are required. Please use your computer to take pictures of your sketches and share them with me on Google classroom. Put all your sketches into a Google doc and name the doc, Sketches I will not accept anything less than you best. Social issues are controversial political issues which relate to people's personal or professional lives and interactions. Social issues are distinguished from economic issues. Some issues have both social and economic aspects, such as immigration. There are also controversial issues that don't fall into either category, such as those associated with wars and religion. Social issues include, but are not limited to: |


|
|
|
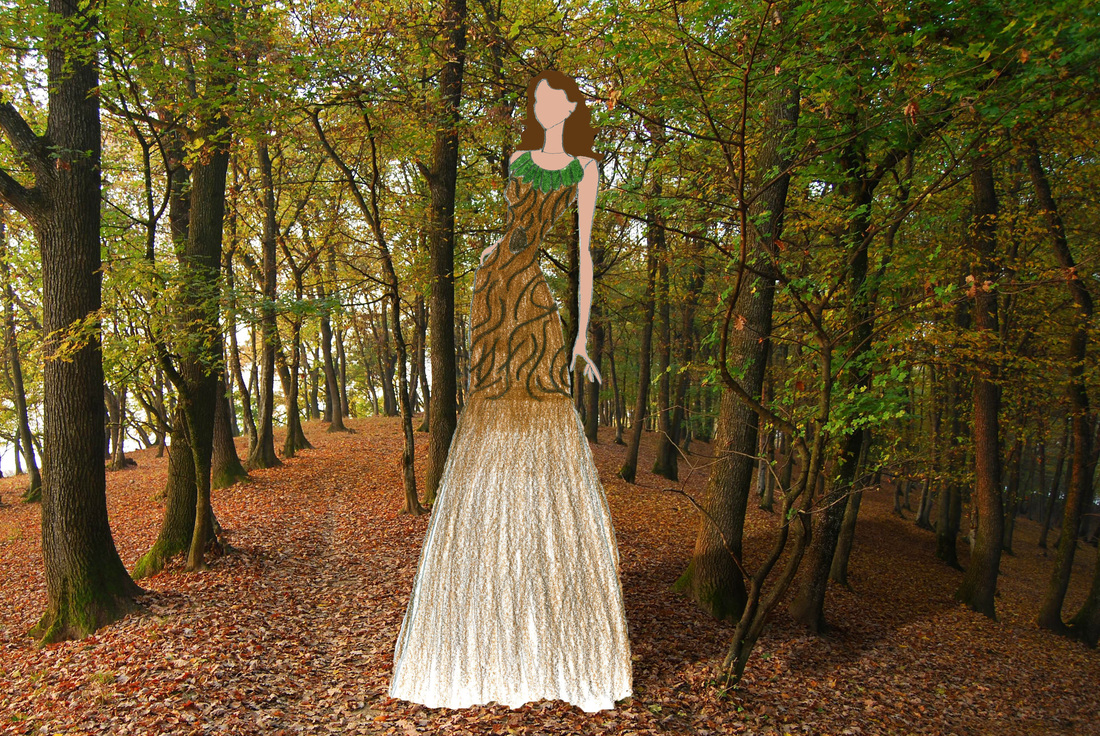
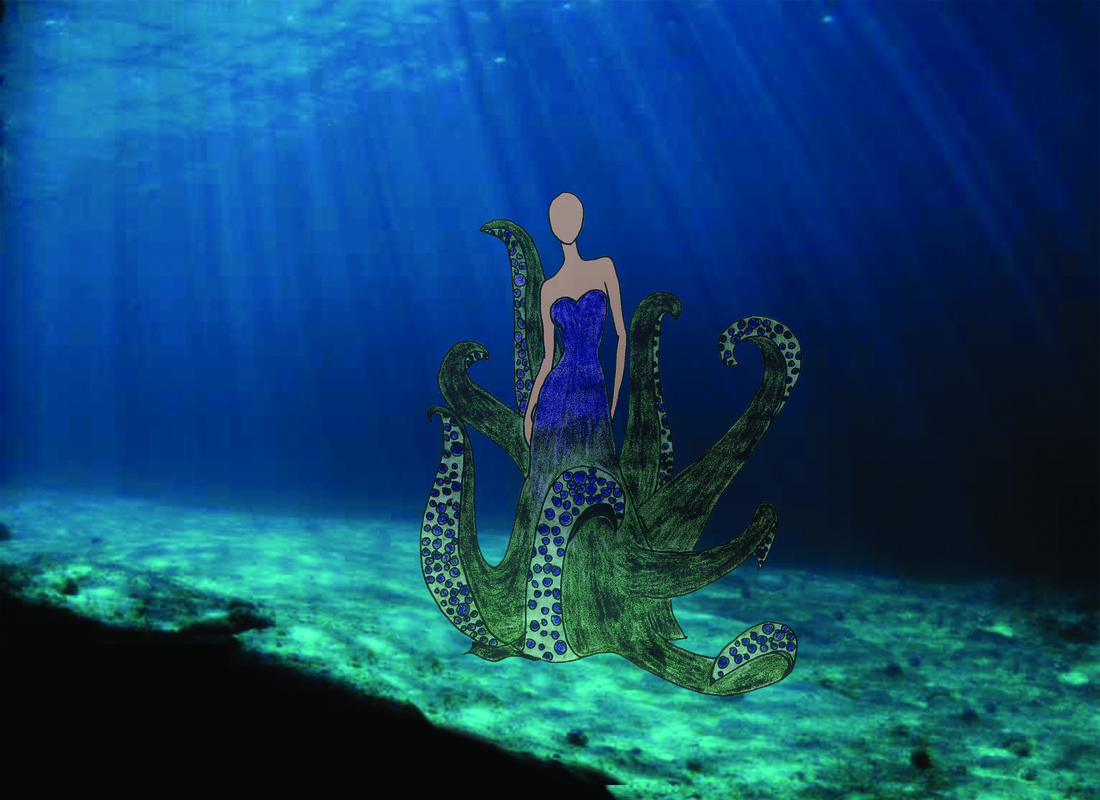
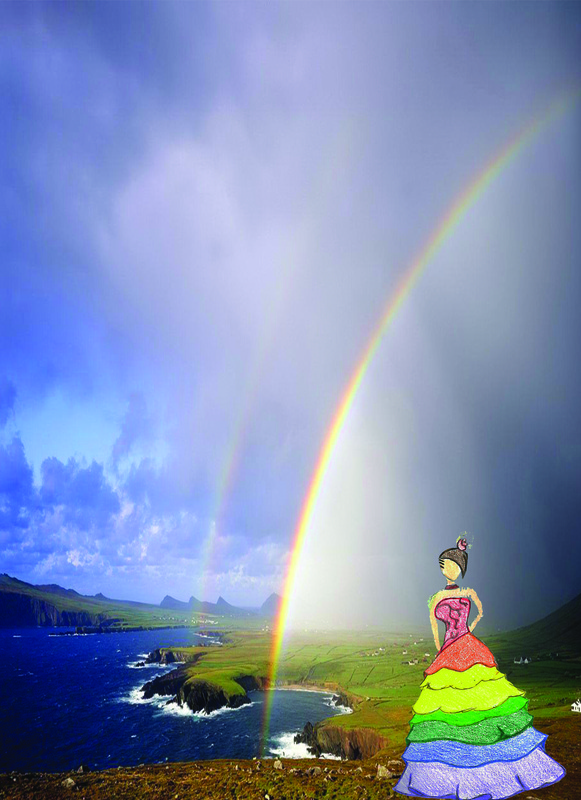
3. Fashion Design from Nature
Objectives:
-You will identify the elements of art such as color, pattern, textures, shapes, and the forms that are inherent in animal plants and insects . After finding inspiration in the source, you will create outfits detailing these elements in a unique way. -You will analyze and redraw a figure. The same figure can be used twice by changing the hair and facial features or reversing the direction of the original. ARTISTS: REQUIRED: 1. sketch pads 2. 8 1/2 x 11 4. Final images created in colored or Black pencil Ideally, use color Vocabulary Pattern - Texture - Form Shapes - Variation - Overlap Background - Center of interest Balance line - Center line |
DESIGNERS: In Photoshop or illustrator,You will create a background that accentuates and ties the fashion designs to the original theme.( Finding imagery on the internet) REQUIRED: 1. sketch pads 2. Colored pencils 3. Final Document will be:
4. You will print the final file Vocabulary Pattern - Texture - Form Shapes - Variation - Overlap Background - Center of interest Balance line - Center line You can download fashion templates from http://www.designersnexus.com/tag/female-croqui/ Great Links:http://fashion-sonnets.blogspot.com/2011/05/weedrobes.html Books
|
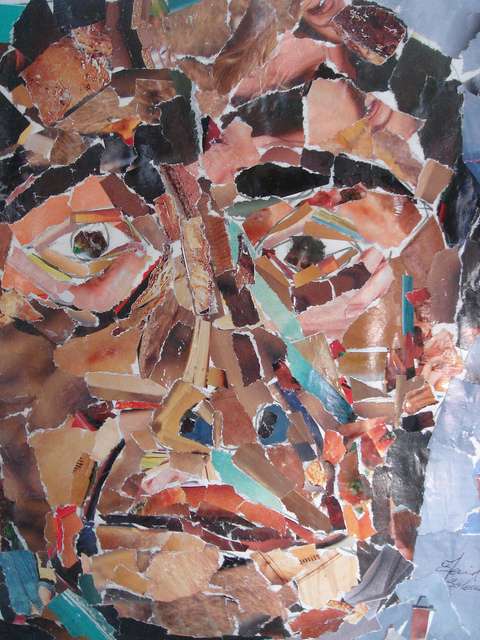
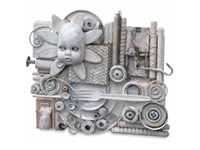
4. Object Self Portrait

|

|

|
Instead of drawing yourselves in a representational manner, Draw objects/Paint objects, or created a digital or traditional collage that represent you and put them together so that they resemble a face or figure. Overview and Purpose: It will allow the you to look at self portraiture in a new way and provide for an interesting outlet for self expression. Material choices:
Final on 12” by 18” white drawing paper Objectives: You will learn to express themselves as an individual through visual communication Delivery of Info: You will be asked what is a self portrait? You will then to create self portrait using only symbols or objects that represent them. This is a non-traditional self portrait. Guided Practice: You will spend the next four class periods creating the artwork. Estimated Duration: 4 days 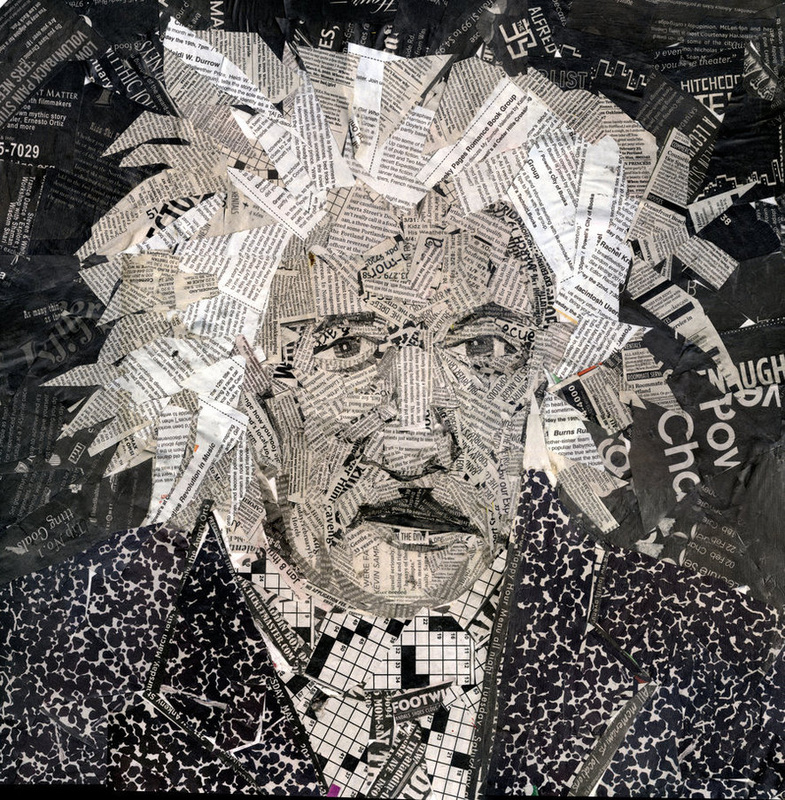
|
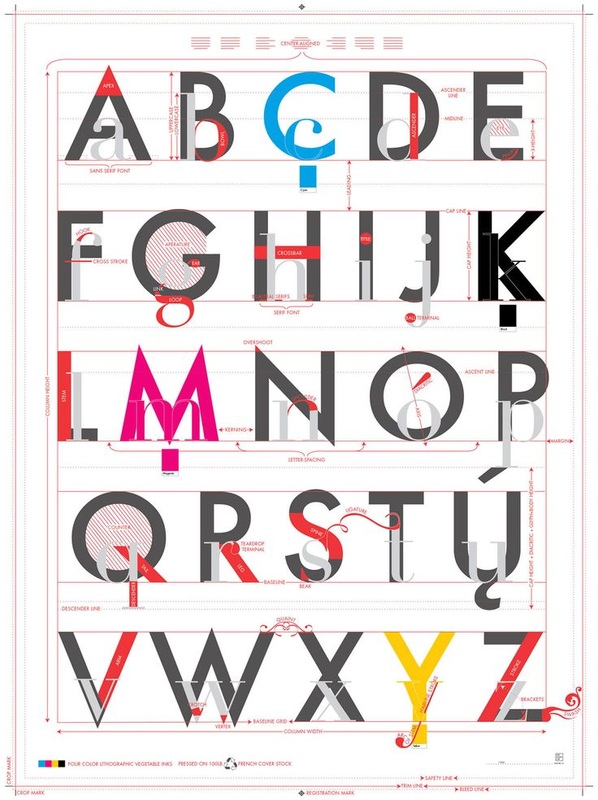
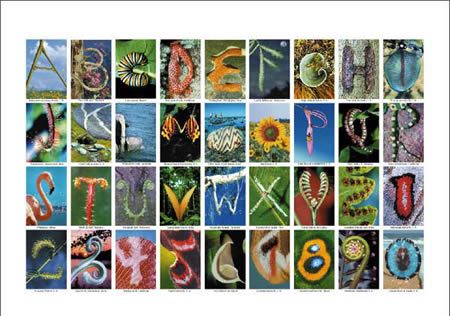
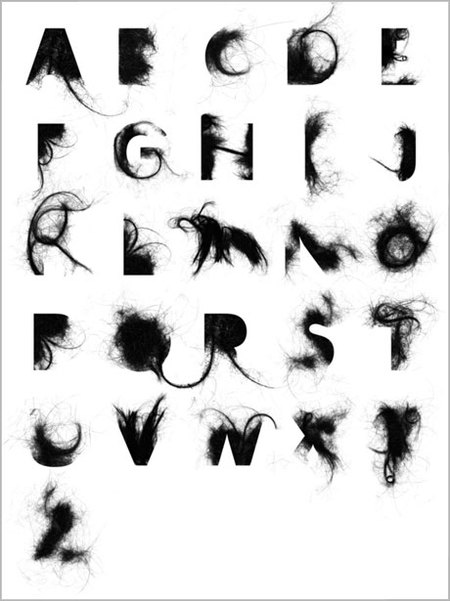
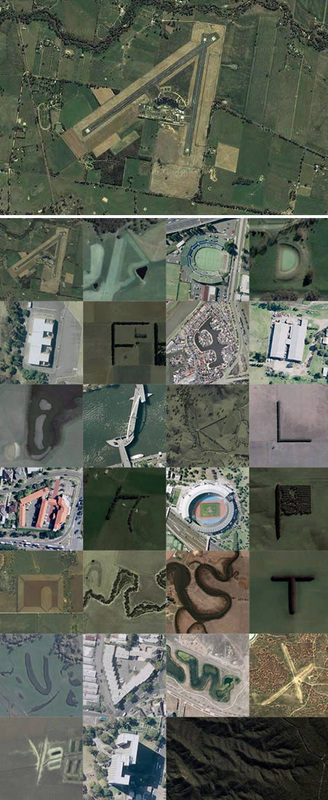
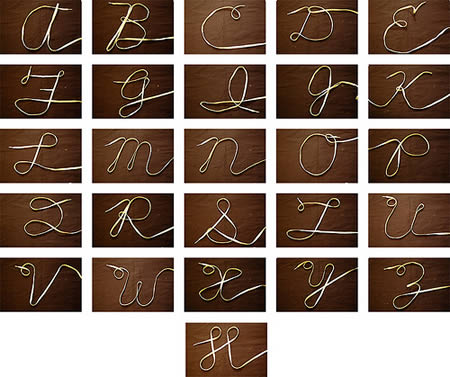
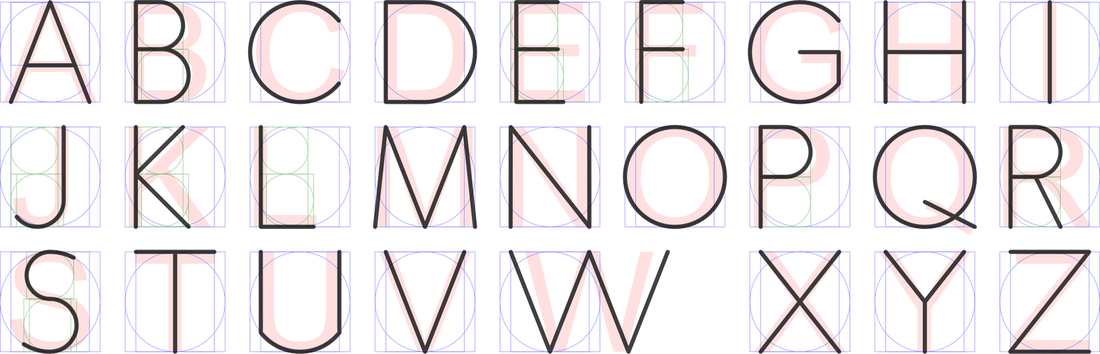
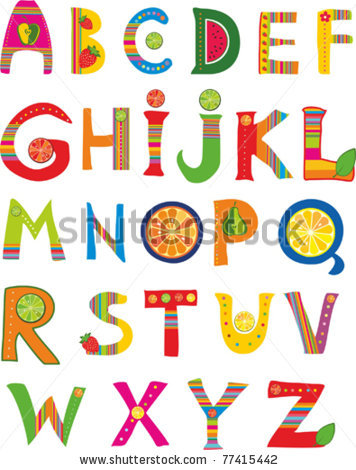
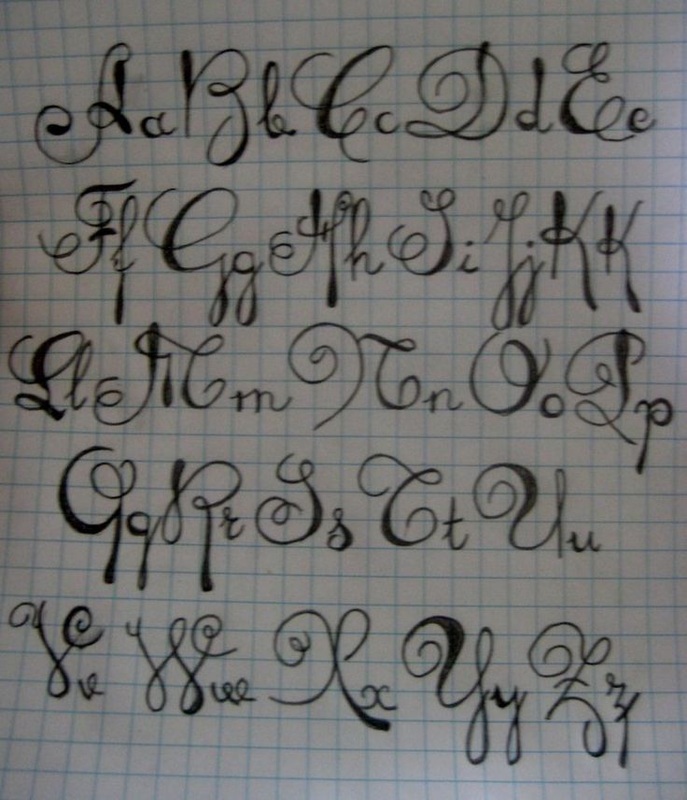
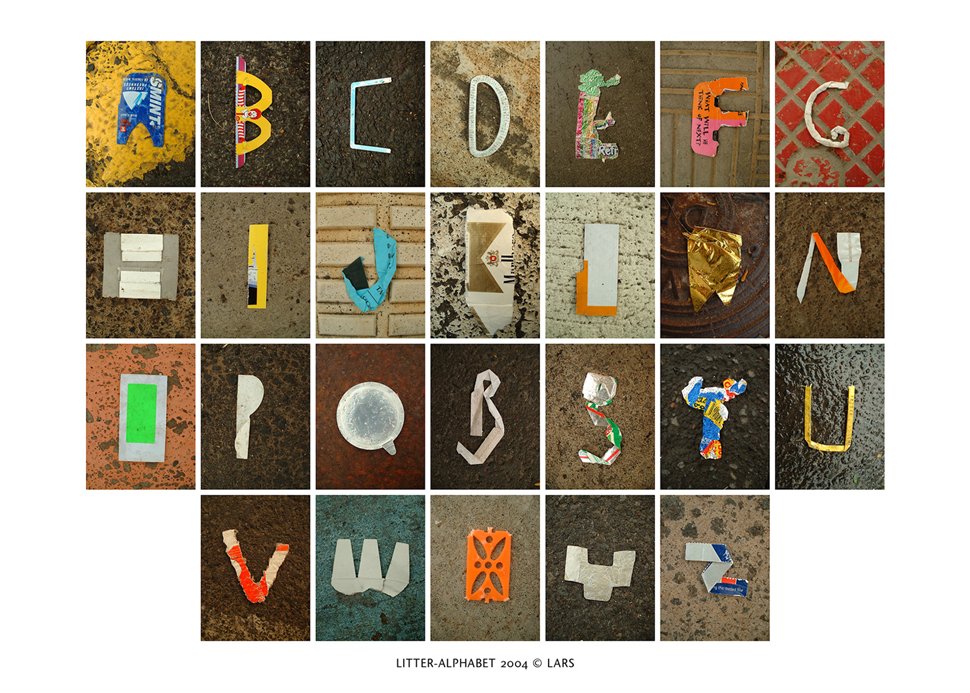
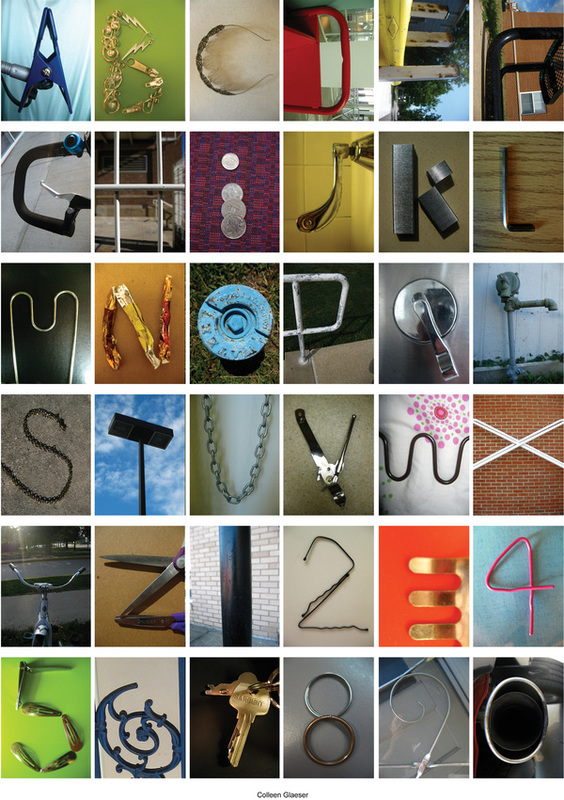
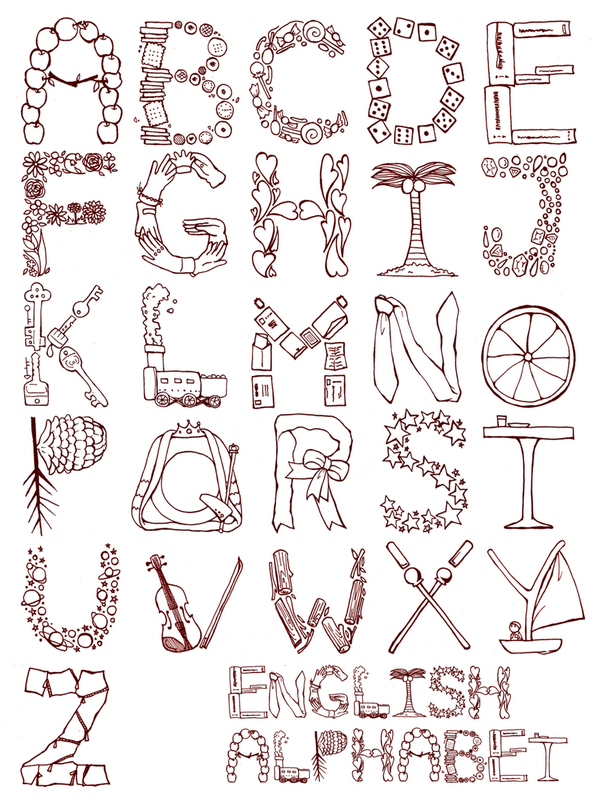
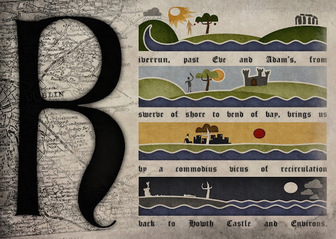
5. Design an alphabet
WHAT IS TYPOGRAPHY?
Typography-ty·pog·ra·phy noun \tī-ˈpä-grə-fē\: the work of producing printed pages from written material:
the style, arrangement, or appearance of printed letters on a page
Design or selection of letter forms to be organized into words and sentences and printed or displayed electronically. Typography originated after the invention of printing from movable type in the mid 15th century. The three major type families in the history of Western printing are roman, italic, and black letter (Gothic). All had their origin in the scripts of the calligraphers whose work was ultimately replaced by printing. In the succeeding centuries typographers have created some 10,000 typefaces (a complete set of letter forms of a particular design). Depending on the style of their letters, typefaces are categorized as old style, transitional, and modern. Commonly used typefaces include Caslon, Baskerville, Bodoni, Garamond, and Times New Roman.
|
Creativity is essential.
TYPE HAS STYLE TYPE HAS THEME TYPE HAS CONSISTENCY TYPE IS READABLE TYPE SERVES A PURPOSE |

|
|

|
|

|

|
|
|
OBJECTIVE
You will create a new 26 letter alphabet. Using various mediums from paint to pencil from computer to collage
This must be done in 4 classes and I will only accept quality work
You must use your time wisely
No cell phones, Music only connected to the computers. If I see you with your cell phone out, I will take it from you
All final images must fit on (1) 11 x 17 paper. Grid attached for printing
Requirements
You can work in various mediums
1. Computer Generated fonts, using Adobe illustrator and/or Adobe photoshop
2. Images found on the internet joined together to create letters
3. You Can draw the letters based on photos, you have taken.
4. Letter sizes must be consistently the same. (create a uniform size by creating an even grid.
5. Work larger and then we will scan to insert on the 11 x 17 document.
6. Research / research
7. You must have a theme
Suggested ideas for letter forms.
Make letters out of:
ANIMALS: Cats, dogs, Animals, People. Pose people in letter positions and photograph, or then draw
Construction materials: Rulers, Hammers, Nails
Art supplies: Paint brushes, Pencils
Plumbing materials. Pipes
|
|
|
|

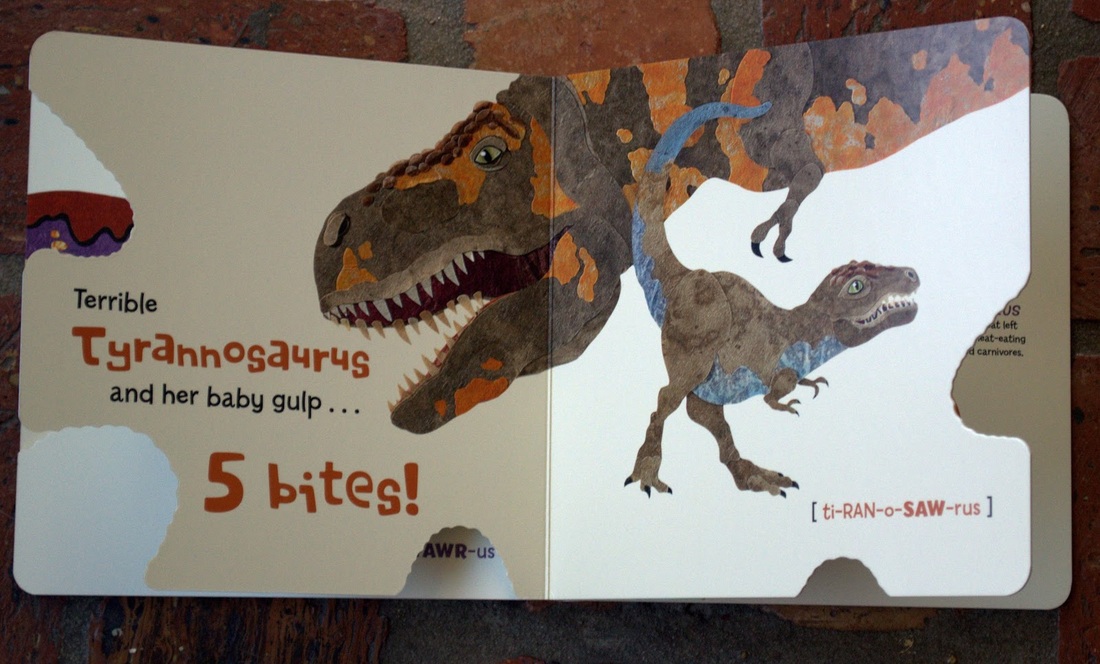
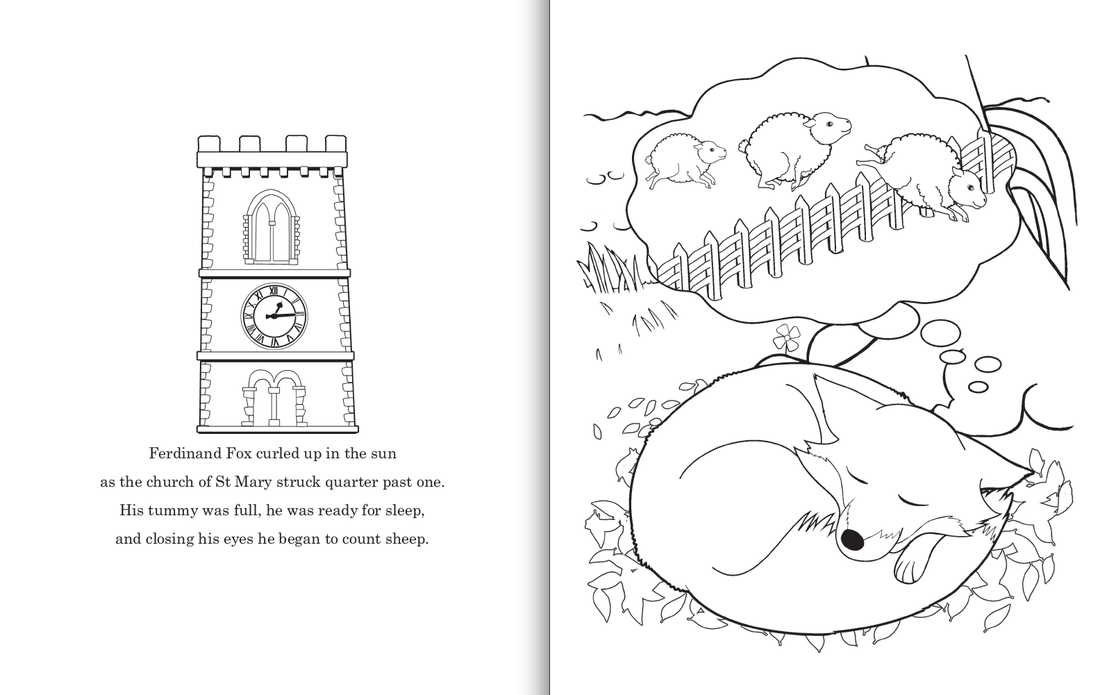
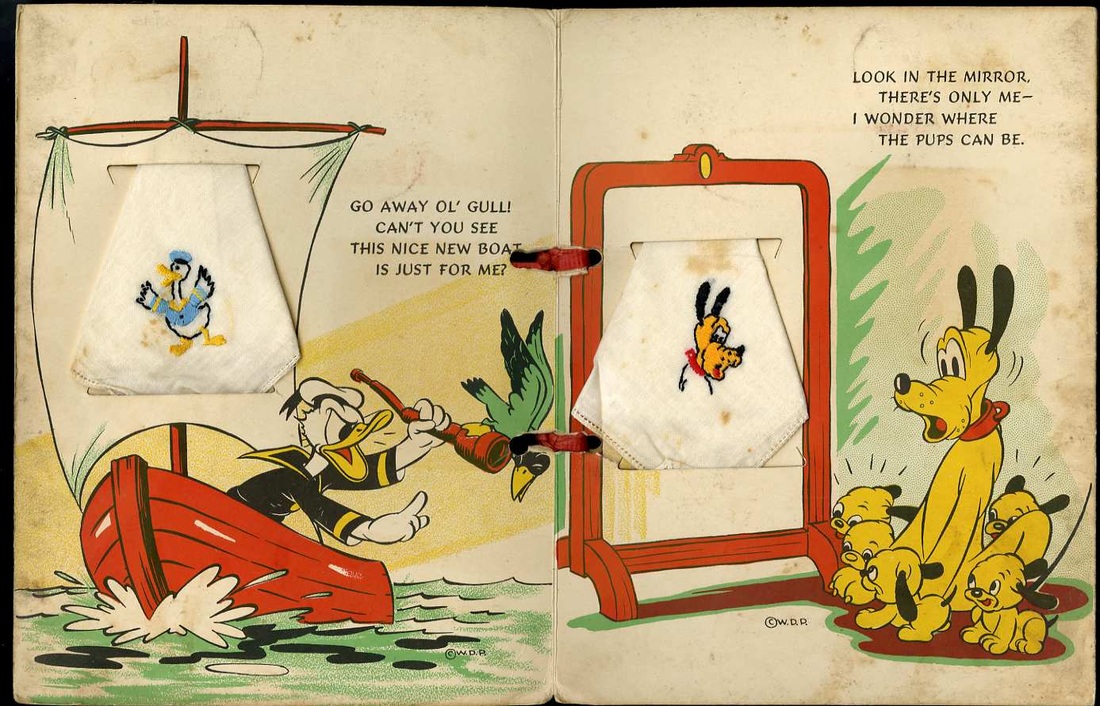
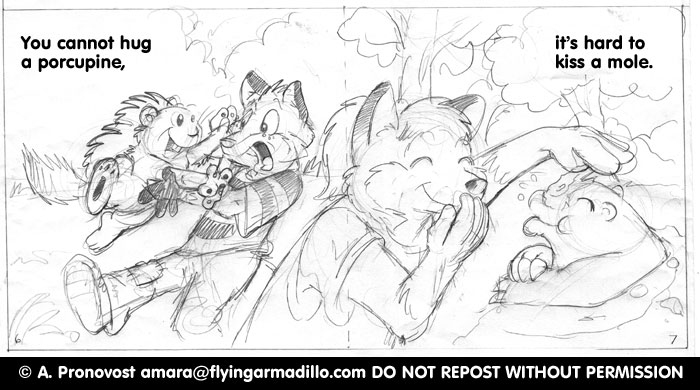
6. Write, design and illustrate a 12+ page children's book.
|
Designing a Children's book
Working as Designer and Artist, you will create a 12+childrens book. The books must have an even number of pages, 12, 14, 16.... No less than 12 pages REQUIREMENTS
Together we will: 1. Brainstorm ideas 2. Brainstorm illustration concepts 3. Rsearch your audience. Who will read my book? 3-5 year olds? 7-10 year olds?
Steps: 1. Read many children’s books. As you begin thinking of ideas for your children’s book, it’s very helpful to read others’ work. Go to your library or children’s bookstore and spend a few hours browsing. Think about which books appeal to you most, and why.
2. Consider which age group interests you as a writer. The term “children’s books” covers everything from board books with one word on a page to chapter books, novels and non-fiction factual books written for kids in middle school and teens (young adults). The plot, content and themes of your book need to be age appropriate for your intended readers for them to be appealing (remember that parents are the ultimate gatekeepers who can determine whether or not a child reads your book).
RESEARCH, RESEARCH RESEARCH You will need to create, detailed sketches and detailed layouts of your book before you do final illustrations and before you create the final book. Go to Amazon, Barnes and Noble, or any other online bookstore and make a list of children's books you like. Be sure to write the names of the books down, and bring in your list next class of those books, with the reasons of what you like about the illustrations and the design. |
7. The Power of Advertising


|
The Power of Advertising project uses technology in a matter-of-fact way to encourage you to explore how the underlying assumptions in the social, cultural, and political aspects of their lives. It combines "high tech" black-and-white digital photography (with an inexpensive digital camera, computer, and printer) with color created by hand with colored pencils or tempera paint. As artist Juan Chávez says, "I want students to utilize and play with technology, not worship it like a false idol."OBJECTIVES:
Investigate themes by creating multiple text/image versions based on one issue or idea. QUESTION TRUTH THINK ABOUT Name one thing a family member told you that you know was a lie. Can men do more than women can? Are women smarter than men are? Do you believe everything you see on television or in textbooks? Why not? CHOOSE AN ISSUE Name an issue or message YOU feel needs to be "PROMOTED" within their community (or possibly globally). WRITE A SLOGAN Create a slogan like "Just do it" or "Crack is Whack". It is best to have the saying be no more than 4 or 5 words. This is really the most difficult part of this project. Most students will simply write down a statement of the issue and be satisfied with it as the slogan. You will reduce it to the least amount of words possible without losing its meaning. Rewrite it as necessary and exchange certain words with slang words you use everyday. Take your time on this. This is the intense portion of the project. Make your words meaningful. Find PICTURES, create illustrations, but keep it simple. 1 photo, or 1 simple direct illustration This process of image creation could also be done using traditional photography, found images, copying machine, or stencils if you choose. Be creative. I will accept nothing less than the best you can do. SIMPLE AND DIRECT! PART 2 . I would like you to repeat the project, with a different concept and a different medium, using only 2 words. You will an additional grade when you complete this. Imagery and Concept are equal Effort and Time are Equal |
|
|
8. Design or illustrate Literature's Greatest Opening Paragraph.
In the right hands, a novel’s beginning alone can make you feel like you’ve just fallen into a fast-flowing river, snatched away from reality and hurtled downhill. They range from hard-boiled pulp fiction to classics to, well, The Bible; the only thing they have in common is that they’re so good it’s impossible not to read on. Unfortunately, right now you can’t. But you can share your minds eye view of that special moment in a graphic representation of that moment in time…
You have 3 classes to complete this project.
Steps and Requirements
1. Choose 1 of the the following paragraphs to create your graphic representation of that moment.
2. Choose the medium or mediums you would like to use to create this illustration. You can use multiple mediums to create your final image
• Photoshop and or illustrator
• Cut paper
• Charcoal and pastel
• Montage of images
3. Include your paragraph in the illustration: Note in the examples below, the paragraph became part of the design. You must type your papragraph, Handwritten words are not acceptable
4. Size is 11" x 17" or 17" x 11"
5. 4 Detailed sketches showing placement and size of image are required. Sketches must be in your sketchbooks and not on loose paper. I will collect the sketch books during this quarter, so be prepared.
Choose from the following Books and opening Paragraphs
NORWEGIAN WOOD (HARUKI MURAKAMI)
I was 37 then, strapped in my seat as the huge 747 plunged through dense cloud cover on approach to Hamburg Airport. Cold November rains drenched the earth. lending everything the gloomy air of a Flemish landscape: the ground crew in waterproofs, a flag atop a squat building, a BMW billboard. So - Germany again.
THE HAUNTING OF HILL HOUSE (SHIRLEY JACKSON)
No live organism can continue for long to exist sanely under conditions of absolute reality; even larks and katydids are supposed, by some, to dream. Hill House, not sane, stood by itself against its hills, holding darkness within; it had stood so for eighty years and might stand for eighty more. Within, walls continued upright, bricks met neatly, floors were firm, and doors were sensibly shut; silence lay steadily against the wood and stone of Hill House, and whatever walked there, walked alone…
PRIDE & PREJUDICE (JANE AUSTEN)
It is a truth universally acknowledged, that a single man in possession of a good fortune must be in want of a wife. However little known the feelings or views of such a man may be on his first entering a neighbourhood, this truth is so well fixed in the minds of the surrounding families, that he is considered as the rightful property of some one or other of their daughters.
A TALE OF TWO CITIES (CHARLES DICKENS)
It was the best of times, it was the worst of times, it was the age of wisdom, it was the age of foolishness, it was the epoch of belief, it was the epoch of incredulity, it was the season of Light, it was the season of Darkness, it was the spring of hope, it was the winter of despair, we had everything before us, we had nothing before us, we were all going direct to Heaven, we were all going direct the other way — in short, the period was so far like the present period, that some of its noisiest authorities insisted on its being received, for good or for evil, in the superlative degree of comparison only.
A FAREWELL TO ARMS (ERNEST HEMINGWAY)
In the late summer of that year we lived in a house in a village that looked across the river and the plain to the mountains. In the bed of the river there were pebbles and boulders, dry and white in the sun, and the water was clear and swiftly moving and blue in the channels. Troops went by the house and down the road and the dust they raised powdered the leaves of the trees. The trunks of the trees too were dusty and the leaves fell early that year and we saw the troops marching along the road and the dust rising and leaves, stirred by the breeze, falling and the soldiers marching and afterward the road bare and white except for the leaves.
THE STRANGER (ALBERT CAMUS)
Mother died today. Or maybe yesterday, I don’t know. I had a telegram from the home: ‘Mother passed away. Funeral tomorrow. Yours sincerely.’ That doesn’t mean anything. It may have been yesterday.
Example:
Moby Dick bodily burst into view! For not by any calm and indolent spoutings; not by the peaceable gush of that mystic fountain in his head, did the White Whale now reveal his vicinity; but by the far more wondrous phenomenon of breaching. Rising with his utmost velocity from the furthest depths, the Sperm Whale thus booms his entire bulk into the pure element of air, and piling up a mountain of dazzling foam, shows his place to the distance of seven miles and more. In those moments, the torn, enraged waves he shakes off, seem his mane; in some cases, this breaching is his act of defiance.'
|
|
|
|
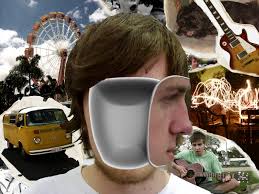
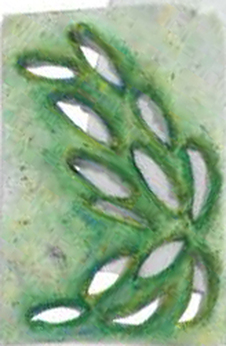
9.Found Faces in Everyday Objects

|
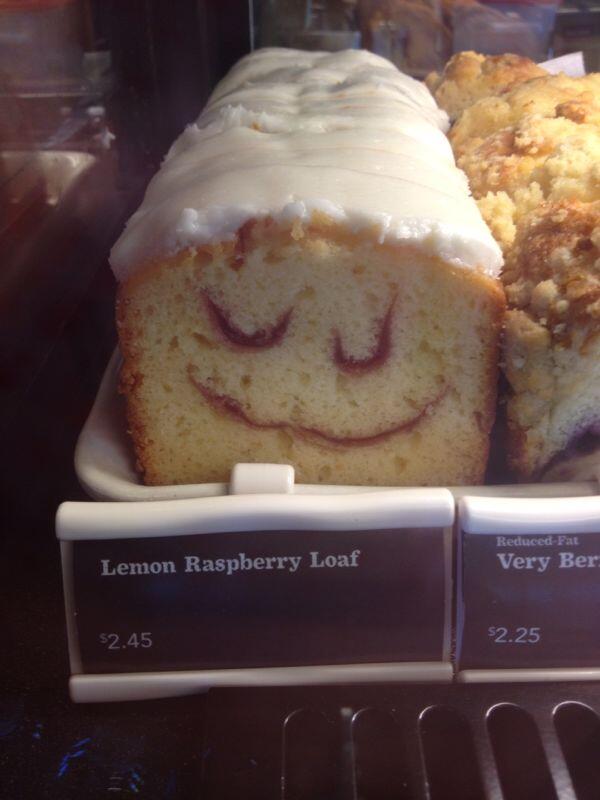
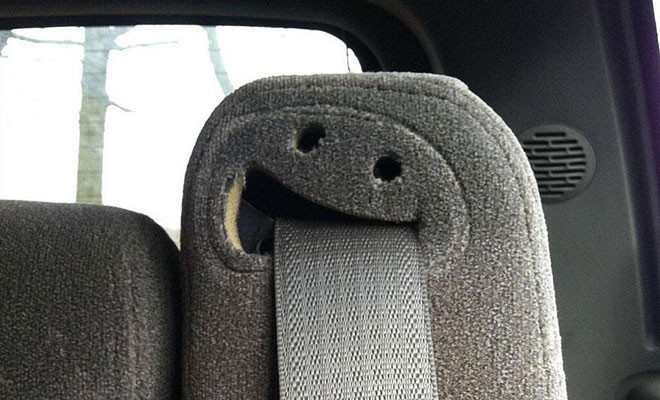
Human beings are “hard-wired” from birth to identify the human face. This allows people to use only minimal details to recognize faces from a distance and in poor visibility but can also lead them to interpret random images or patterns of light and shade as being faces. Take a look at these curious images. Pareidolia is a psychological phenomenon involving a vague and random stimulus being perceived as significant. Common examples include seeing images of animals or faces in clouds and hearing hidden messages on records when played in reverse.
Document size: For Photoshop 11 x 17" Resolution is 300 dpi CMYK Document size for Collage 12 x 18 You may combine other mediums such as tempera and water color paint. PLAN 1. Go out into the world and take 10 photos of human faces, in objects. See the samples on this page. 2. You will combine the images into 1 Photoshop document, or as a traditional collage 3. The final document should tell a simple story, and each image must connect to the other images. For example. A face in a Cake, combined with a face in a cup of coffee, combined with a face in ice cream, combined with a face in a coffee pot. The connected story is about DESSERT. Do the foods want to be eaten? Are they frightened? 4. Are the faces happy, or angry or sad? The viewers (us) want to know the tale you tell from the faces you have found. 5. You cannot use photos found on the internet, 6. You can use photos you have previously taken. 7. All photos must be uploaded to flash drives. You cannot use your cell phone in room 234 so be sure all photos are uploaded to a folder on the student server. FOLDER STRUCTURE Student Server > Mr. Edelstein > Senior art/Graphic Design> Your named folder 8. All photos are due next class and you must be prepared to print your photos in class. or start combining the photos in Photoshop. I will not accept setup photos, such as drawing a face in the snow |
10. Artist Research
- How can one person make a difference?
- How are art trends started?
- Why did the world change?
- Why did 1 life make a difference?
- What do they see, that I don't?
- How can I learn from them?
- Who are they?
- What new style did they create?
- What mediums did they use?
Step 1.Research one of the following designers or artists, Write a 2 page paper (minimum of 500 words) about the life of the person as well as the contribution that person has made with the inclusion of their art into society. The above questions need to be answered in your essay. Additionally, 2 additional pages must also include examples of the artists work as well as descriptions of the art, and how the art was created (50% of the Grade)
After you have completed your writings, you will upload it into Turnitin.com. (Account information to come )
Step 2. Based on the knowledge you have learned about the artist you have chosen, you will create your own art in the same style as that person. If you use chose a painter that layers color, you will do it the same way. Be sure you stay in the same theme as the artist
If you choose a designers that created a trend of splashy color, you will create a design that uses a splashy color, using the tools you have learned in Graphic Design. (50% of the Grade)
Choose 1 of the following artists to research (Senior art students must choose this option)
- George Braque
- Mary Cassatt
- Claude Monet
- Diego Rivera
- Jackson Pollock
- Frida Kahlo
- Paul Klee
- Joan Miro
- Edgar Degas
Choose 1 of the following designers to research (Advanced graphic design students must choose this option)
- Milton Glaser
- Neville Brody
- Herb Lubalin
- Shepard Fairey
- Monteza Momaya
- David Carson
- Armin Hofmann
- Susan Kare
- Jessica Walsh
11. Stencil a Painting
|
Stencils and repeated patterns have been used in painting as long ago as 9,000 years, when early humans placed their hands against cave walls and outlined them in charcoal or paint. Stenciling is the reverse of stamping; the part of the template that is cut out is what forms the image. In this lesson, even a stencil made of basic shapes can be effective. Each stencil can be used repeatedly, and by changing color, overlapping images, or using only a part of an image, the result is a cohesive composition that has depth and color fusion — and the final picture will look like an airbrush painting. You will draws shapes to create a design on a piece of watercolor paper. While drawing your design, you should leave solid areas between each shape to ensure stability (similar to a stained glass window with lead between the glass designs).
This projects should be 3 classes maximum Day 1. Research images in magazines or on the computer of landscapes. The landscapes, can also be cityscapes, or mountains or forests. Your final painting must include large and small objects. Days 2 and 3. Steps.
|
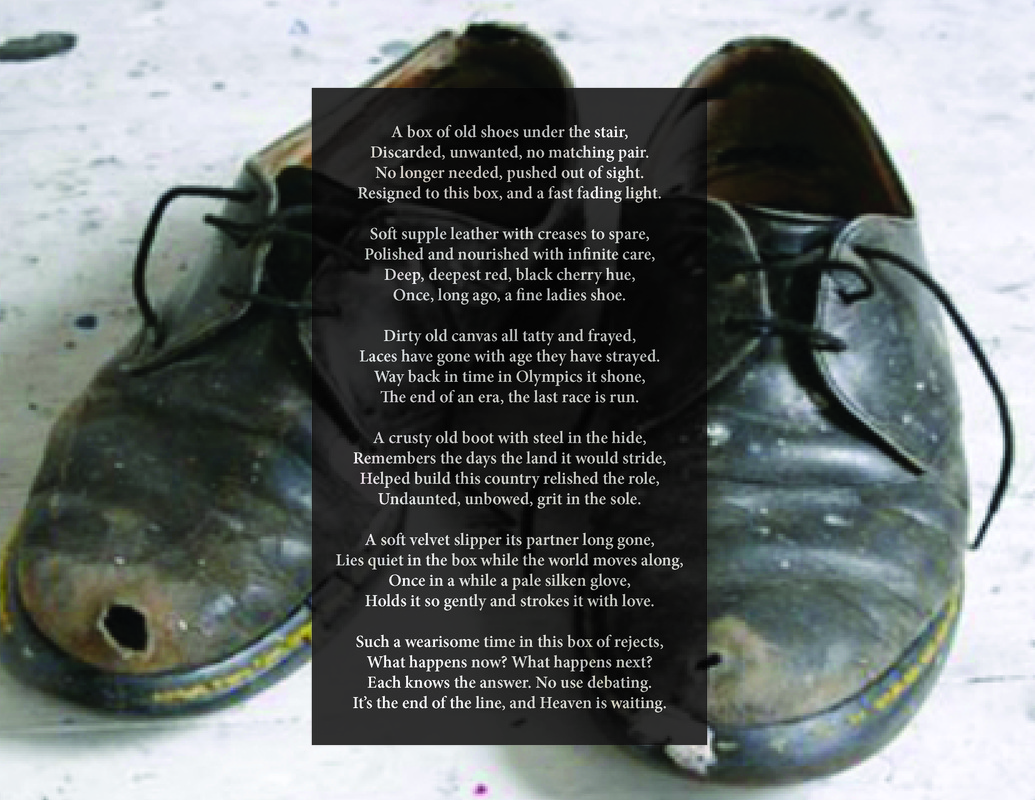
12. Take a Walk in My Shoes
1. Bring in a pair of old shoes. Shoes that have a history. Maybe your grandmothers shoes. Maybe Your fathers old sneakers.
2. Take an unusual photo of those shoes. From high above? Underneath? From a distance?
3. Insert the photo into an 8 ½ x 11 InDesign document
4. Write a poem that tells the story of your shoes.
5. Find a creative way to combine the poem with the shoes.
After saving your photo to your folder. Open in Photoshop
Save the image as a CMYK 300 resolution jpeg.
Use the type tool to add text to the picture
Save final image as a pdf in the FINAL folder
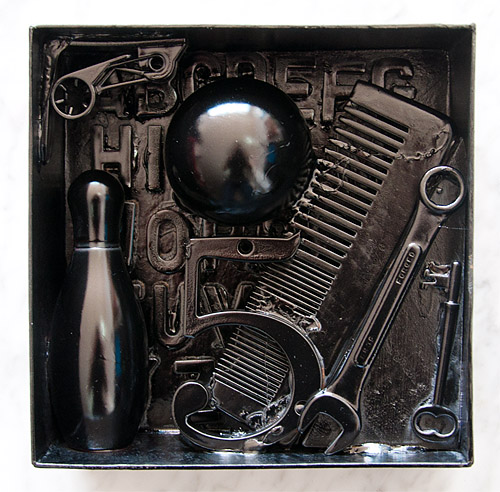
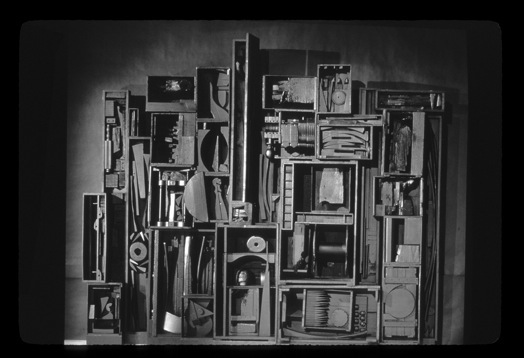
13. Louise Nevelson and throw away art
Louise Nevelson emerged in the art world amidst the dominance of the Abstract Expressionist movement. In her most iconic works, she utilized wooden objects that she gathered from urban debris piles to create her monumental installations - a process clearly influenced by the precedent of Marcel Duchamp's found object sculptures and "readymades." Nevelson carefully arranged the objects in order to historicize the debris within the new, narrative context of her wall sculptures. The stories embodied within her works resulted from her cumulative experiences - as a Jewish child relocated to America from Russia, as an artist training in New York City and Germany, and as a hard-working, successful woman. Her innovative sculptural environments and success within the male-dominated realm of the New York gallery system inspired many younger artists, primarily those involved in installation art and the Feminist art movements.
|
|
|
PROCESS
1. Select a theme and collect wood scraps and found objects, and save in a card board box with your name on the box. Inexpensive and plentiful items such as buttons or craft sticks, tools pens, screws, pencils, old toys, Cast-off objects, such as buttons, machine parts, wire, toy parts, recycled plastic pieces, old jewelry, foamboard or heavy cardboard mostly throw away items.
a. Themes: Represented by objects, for example,
2. Arrange your objects. Discover ways to layer the objects, create patterns and incorporate a variety of textures.
3. Hot Glue objects in place and allow time to dry. It may be helpful to have paper clips, clothes pins or something heavy to hold objects in place while the glue dries.
4. To create a unified piece of art, use a paint brush to coat the finished assemblage with acrylic gesso. Gesso is very white, opaque and adheres well to most surfaces.
5. After gesso is dry, assemblages may be spray-painted black or another color.
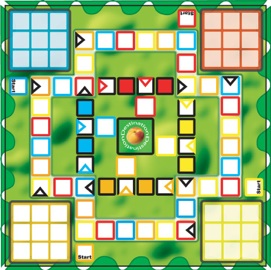
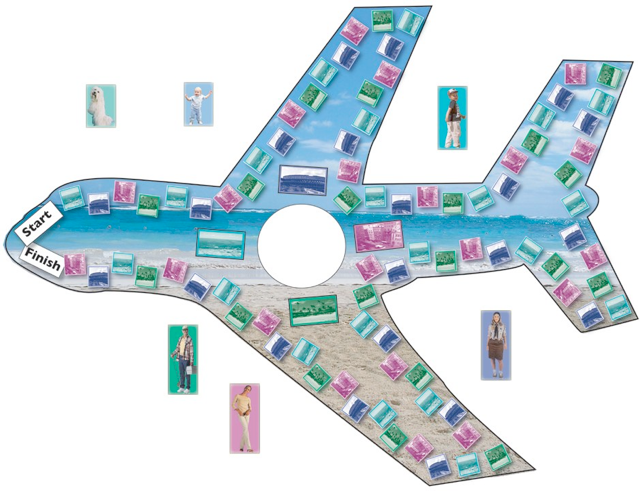
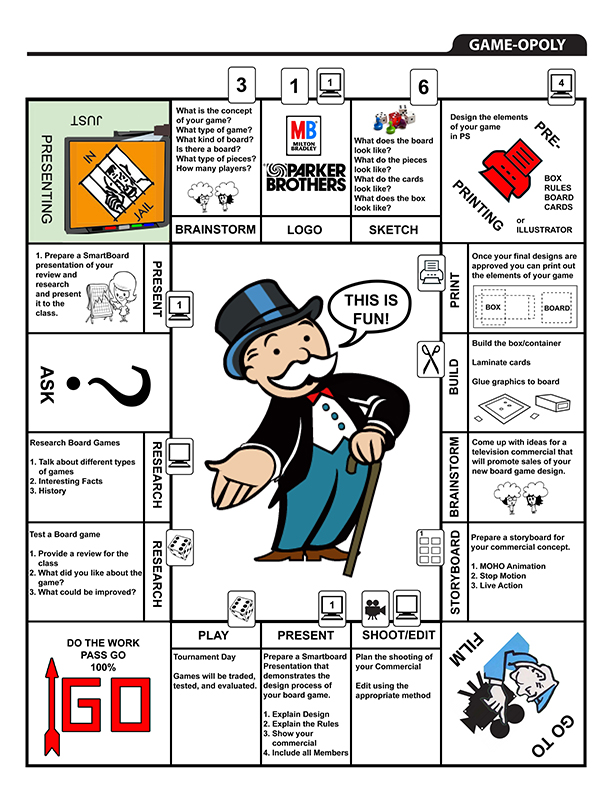
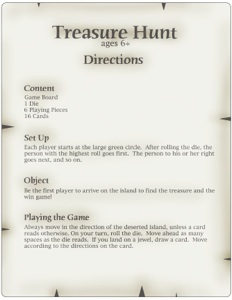
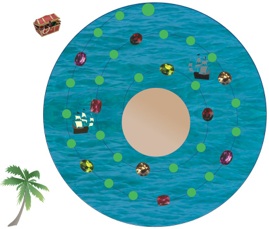
14. Design a Board Game
|
|
|
Project:
Create the design for a board game. Include the directions sheet, the board, playing pieces, cards (optional), and any other pieces necessary to play the game. Objectives
Parameters
Grading Criteria • Design -- visual impact • Inclusion of all important information • Clarity, Playability • Technical quality • Work habits Steps 1.With your partner, develop a theme/concept for the game 2.Write and design a sheet of directions to be placed in the game box. You may use Photoshop, Illustrator and/or InDesign to create this document. Include: • Game Title • Ages • Contents • Set Up • Objective • Playing the Games (Steps, Rules, Directions) 3.Develop the board and game pieces. Be sure to consider the principles of good design to maximize the visual appeal of your game. |
|
|
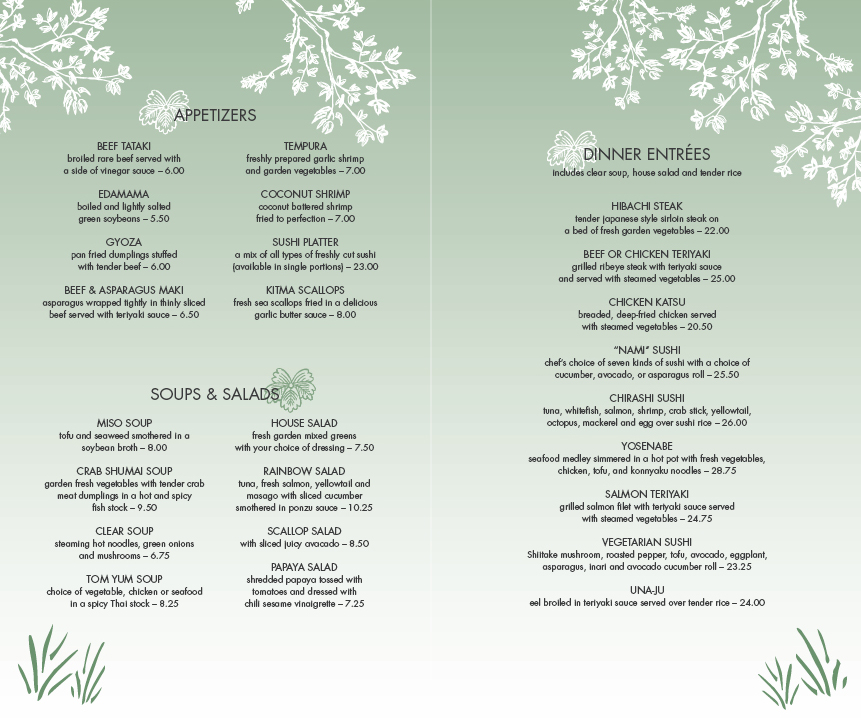
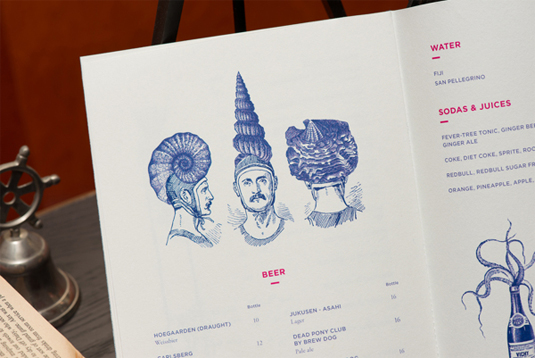
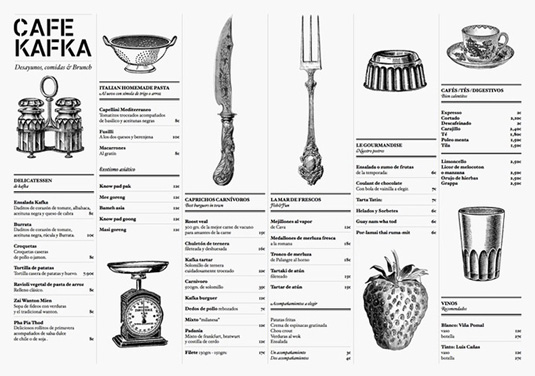
15. Menu Design

|
|
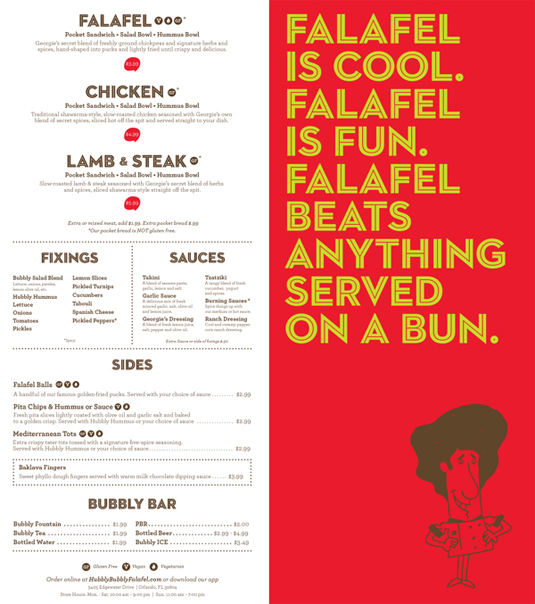
|
|
You will create an 4 page 8 ½ x 11" Menu using Adobe Indesign. The restaurant is a high class restaurant service high end food. The patrons are mostly tourists visiting NYC.
Requirements: 1. View menus online of Ethnic restaurants 2. Your Menu must include photos. i.e.: the Restaurant, Food examples, illustrations. 3. Your menu must include: Lunch, Dinner, Desserts, Appetizers, Drinks, Prices, Locations, Restaurant Name. 4. All foods must have simple descriptions included, next to the name of the food 5. The document is 4 pages. Page 1: cover, Page 2: Menus, Page 3: Menus, Page 4: Menus and last page. 6. Do your research, and collect the examples in your folders 7. Remember Type and imagery must work together ( I will be paying extra attention to your use of typography) 8. I must approve the preliminary sketches in your sketch book, of the cover before you start your design on the computer. 9. I suggest you write your menu text in WORD, before you place it in Indesign. |
|
|