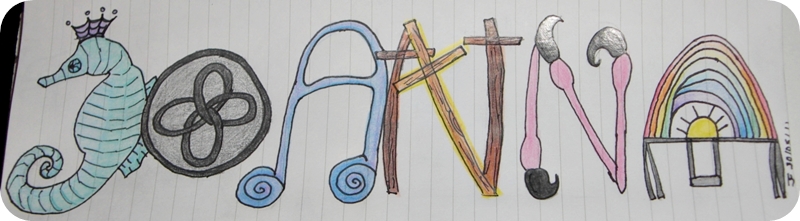
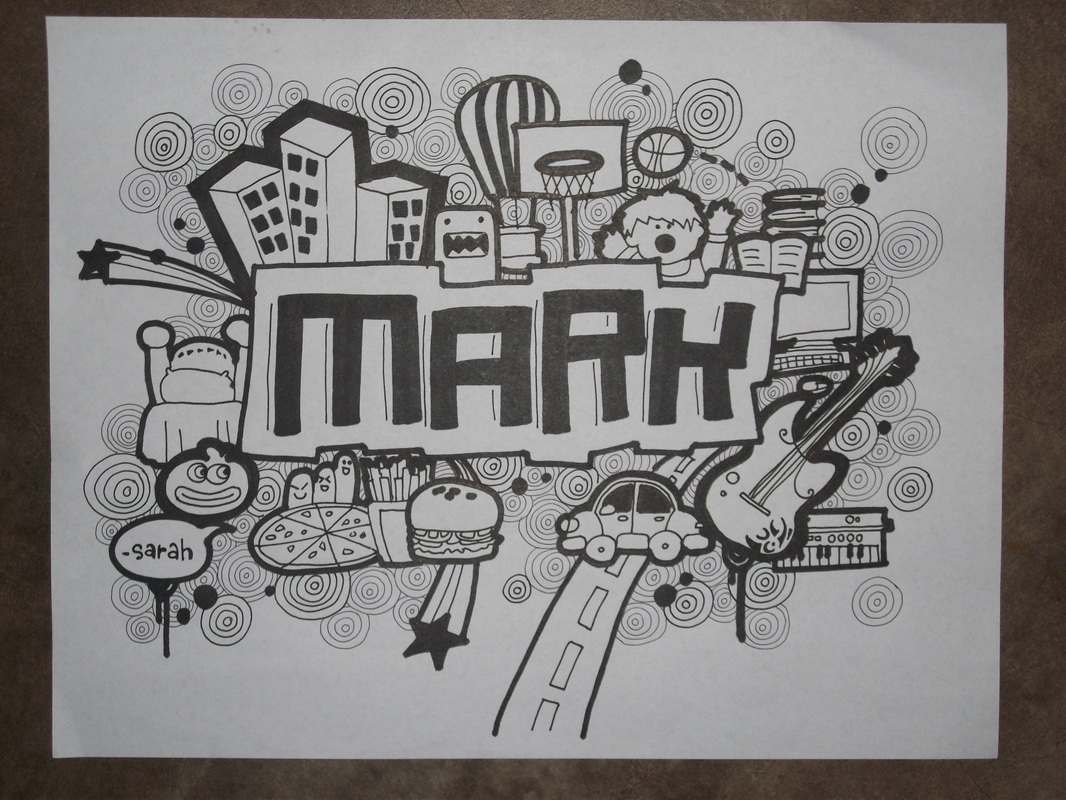
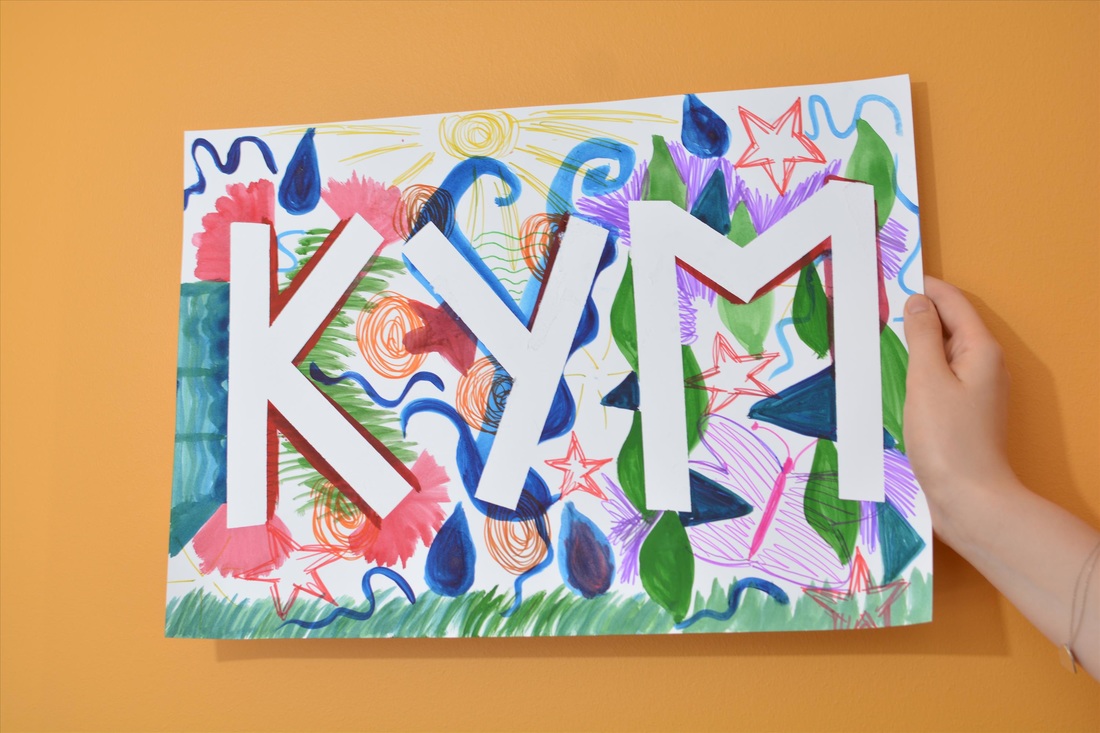
1. Create your own nameplate

|
|
Welcome to Freshman art.
I'd like to get to know you and your names and I want you to have fun at the same time.
Maybe you will consider:
taking AP Art in the future,
or maybe you want to pursue a career as an artist,
or as a painter,
or as a sculptor,
or as an illustrator of children's books.
Maybe you want to consider:
Graphic design,
or web design
or Architecture,
or Fashion design
or Advertising.
In this class you can explore your personal creativity and also learn a few things
So lets begin with getting to know you.
You will create a name plate using colored pencils and paper. You are required to design your first and last names, and you can decorate it with drawings of the things you love, or drawings of patterns.
Requirements:
1. 8 1/2 x 11 white paper
2. Colored pencils
3. 1-80 minute class to complete.
You will use your name plate for every class, until I get to know you. then you can take it home and have a party (you are paying for the party)
|

|
|
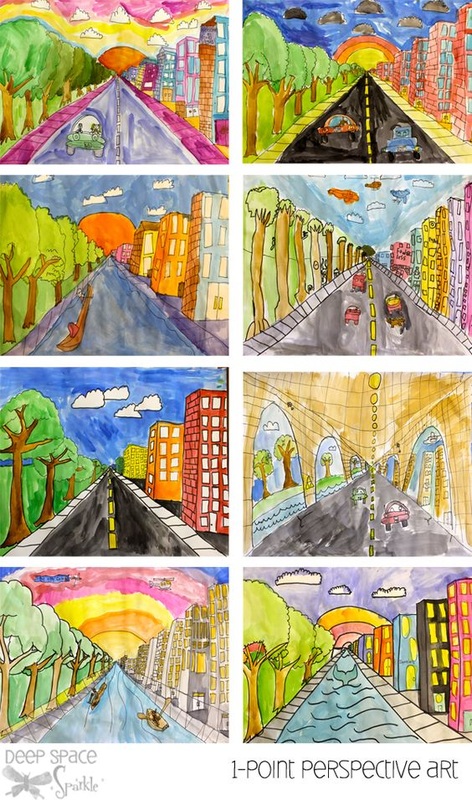
2. One Point Perspective
definitionDictionary.com define one point perspective as:
…a mathematical system for representing three-dimensional objects and space on a two-dimensional surface by means of intersecting lines that are drawn vertically and horizontally and that radiate from one point on a horizon line…
Although this definition sounds complicated, the concept is relatively simple. One point perspective is a drawing method that shows how things appear to get smaller as they get further away, converging towards a single ‘vanishing point’ on the horizon line. It is a way of drawing objects upon a flat piece of paper (or other drawing surface) so that they look three-dimensional and realistic.
Drawing in one point perspective is usually appropriate when the subject is viewed ‘front-on’ (such as when looking directly at the face of a cube or the wall of building) or when looking directly down something long, like a road or railway track. It is popular drawing method with architects and illustrators, especially when drawing room interiors. To understand more about the history of perspective in art, please read our accompanying Guide to Linear Perspective (coming soon).
Note: If you need to draw something that is not facing you directly, but rather has a corner nearest to you, two point perspective is likely to be more appropriate.
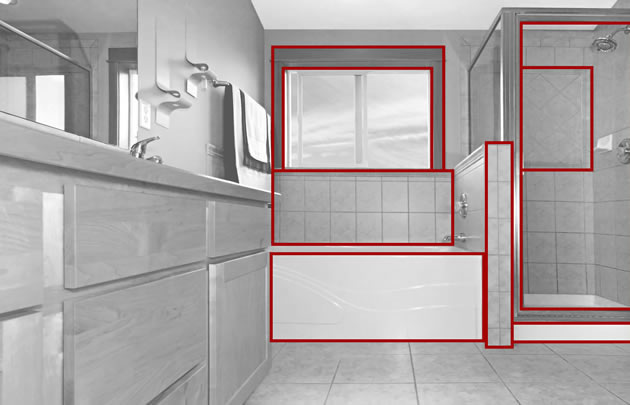
In this one point perspective photo, surfaces facing the viewer are undistorted and show their true shape. For example, we see the side of the bath, window and facing surfaces as ordinary squares and rectangles. Their sides are parallel with the edges of the photograph.
Surfaces that travel away from the viewer, on the other hand, converge towards a single ‘vanishing point‘. This is a point that is located directly in front of the viewer’s eyes, on a ‘horizon line’ (also known as an ‘eye level line’), as illustrated in the photo below
Surfaces that travel away from the viewer, on the other hand, converge towards a single ‘vanishing point‘. This is a point that is located directly in front of the viewer’s eyes, on a ‘horizon line’ (also known as an ‘eye level line’), as illustrated in the photo below
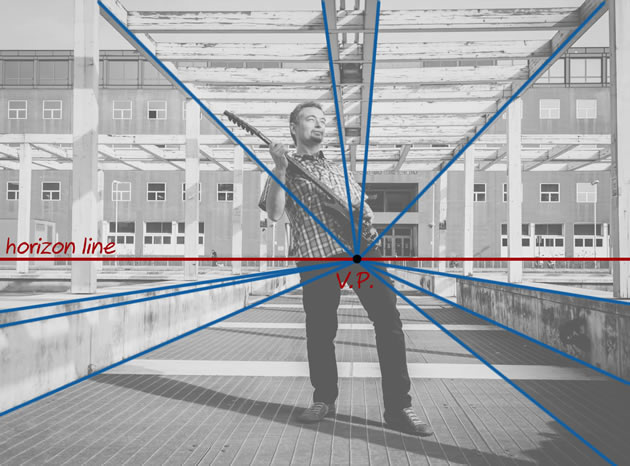
All receding edges of the buildings in this one point perspective photo angle towards the single vanishing point. The position of the vanishing point tells us that the photographer was crouching down, with his eye level lowered.
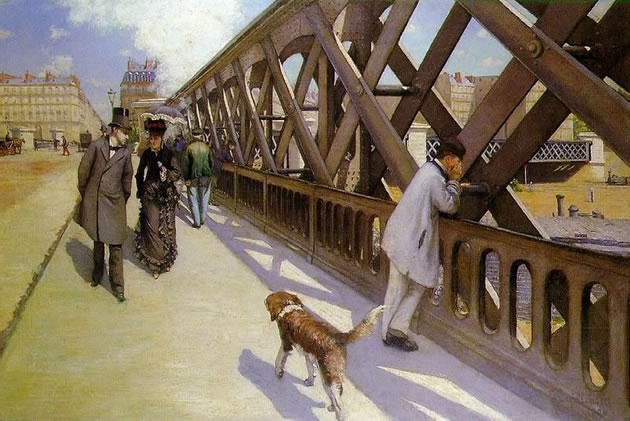
It is possible to draw over photographs to identify vanishing points, horizon lines and true shapes. Studying the work of famous artists can also help you gain an understanding of one point perspective, as shown in the example by Vincent van Gogh below.
It is possible to draw over photographs to identify vanishing points, horizon lines and true shapes. Studying the work of famous artists can also help you gain an understanding of one point perspective, as shown in the example by Vincent van Gogh below.

|
|

|

|
One point perspective tutorialThe following tutorial explains how to draw one point perspective step-by-step. The exercises are designed to be completed in the order given, with each one building upon the previous task.
Recommended Equipment:
- Mechanical or ‘clutch’ pencil (with an HB or 2H lead)
- Rulers
EXERCISE 1: CUBES AND RECTANGULAR BLOCKS
Drawing rectangular blocks is often the first one point perspective lesson given to students. It is a simple exercise that provides a solid foundation for things to come.
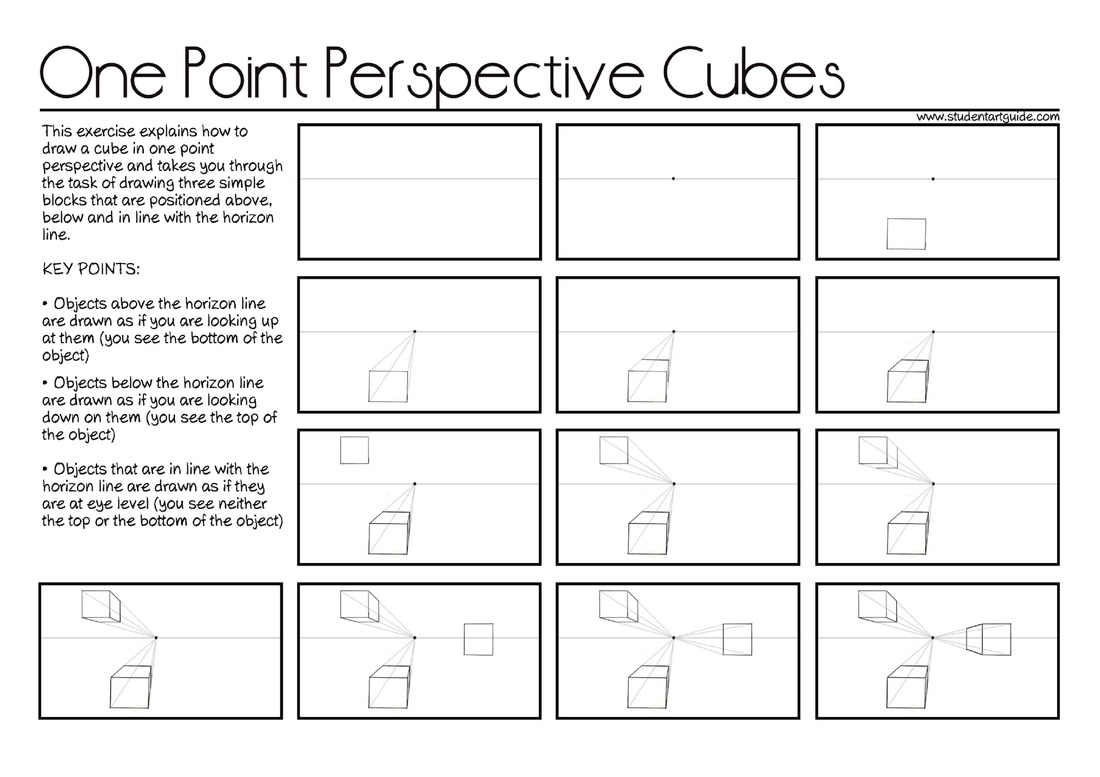
This worksheet explains how to draw a cube in one point perspective and takes you through drawing these above, below and in line with the horizon line. It introduces the importance of line weights and highlights the effect of positioning objects in relation to the horizon line.
By the completion of this exercise, you should be able to:
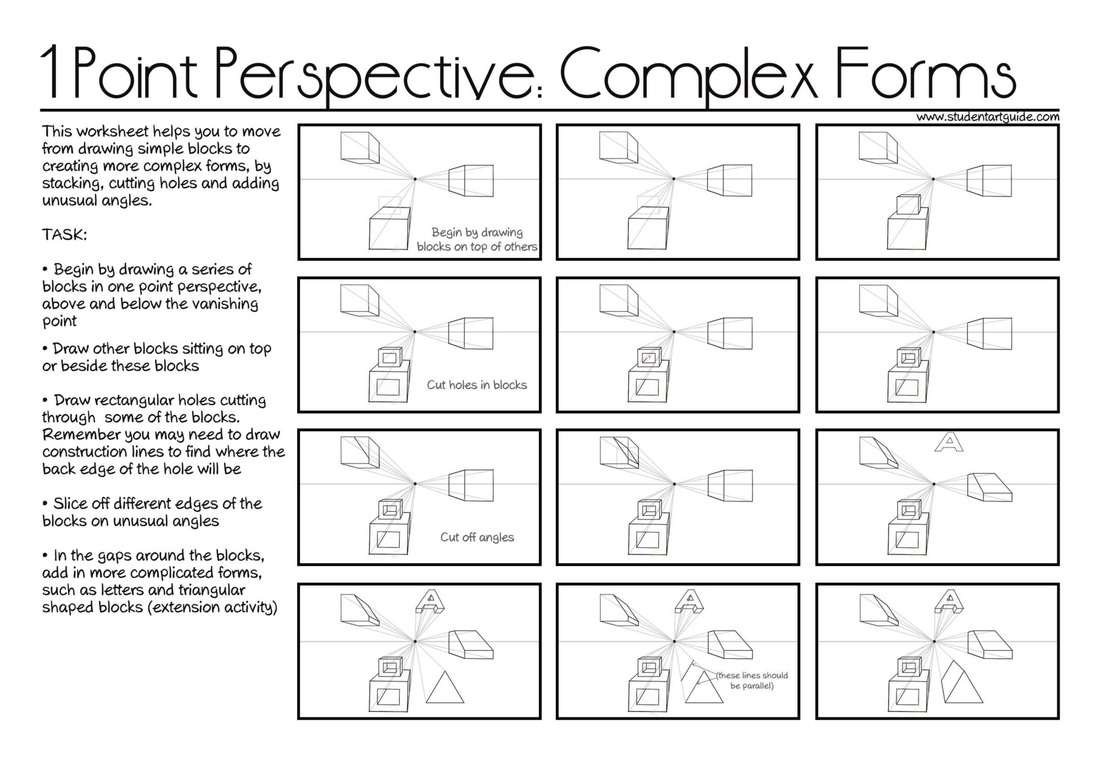
Exercise 2: stacking, holes and angles
By the completion of this exercise, you should be able to:
- Use appropriate line weights (light lines for construction lines; dark lines for outlines)
- Position a vanishing point and horizon line correctly
- Understand that:
- Objects above the horizon line are drawn as if you are looking up at them (you see the bottom of the object)
- Objects below the horizon line are drawn as if you are looking down at them (you see the top of the object)
- Objects that are neither above nor below the horizon line are drawn as if you are looking directly at them (you see neither the top or the bottom of the object)
Exercise 2: stacking, holes and angles
2. Create a 1pt perspective drawing, using colored pencils
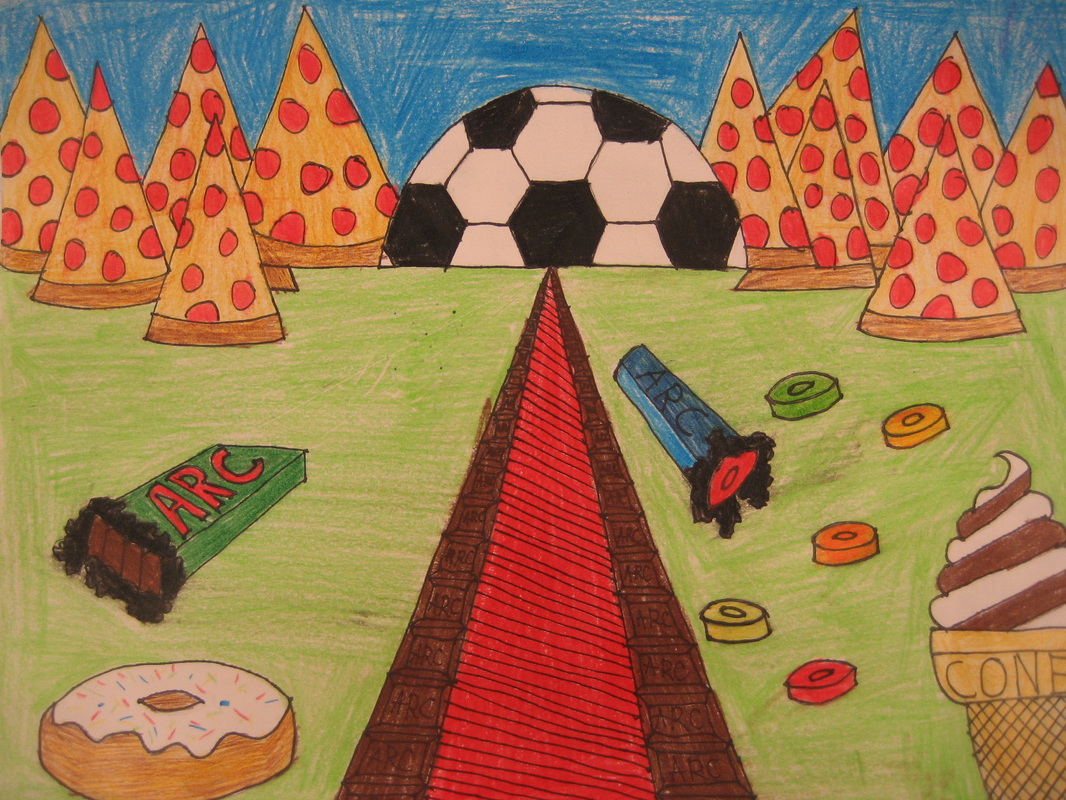
3 Basic One Point Perspective Designs: The Bird’s Eye Buildings, Landscape, and RoomThere are 3 specific designs that I teach my students using one-point perspective. After they have learned these 3 designs, we look at examples of how other artists have used these basic concepts and have added their own creativity to the process. Students then create a work of art of their own using one of the designs covered and their art supply or process of choice.
The Bird’s Eye Buildings:I use this design first because all you need is a vanishing point. Add squares and rectangles around the vanishing point in the center of the paper.
Begin with the square or rectangle closest to the vanishing point. Draw tangent lines from the corners of the square to the vanishing point.
The Landscape:Set this up on a plain piece of paper. Drawn a horizontal line across the top third of the paper. In the middle place a vanishing point.
The Room:The middle square or rectangle represents the back of the room or hallway. Whatever you draw on that square should appear as if you are looking directly at it. Those objects will not need the vanishing point.
Once students have experience with each of these lessons, look at some examples of artwork in one-point perspective with a variety of subject matter and using different art techniques or supplies. Look at photographs, paintings, collage, colorful and black and white artwork.
Have students pick a design and create an original work of art using the concepts. Adding choice to your classroom allows for automatic buy-in for students wanting to expand upon ideas and problem solve using their own creativity. The only thing is, it must show understanding of one-point perspective. The rest is up to them!
Tips and Tricks
The Bird’s Eye Buildings:I use this design first because all you need is a vanishing point. Add squares and rectangles around the vanishing point in the center of the paper.
Begin with the square or rectangle closest to the vanishing point. Draw tangent lines from the corners of the square to the vanishing point.
- Because these are solid objects, if you run into a building while drawing, stop.
- Repeat these steps until all the shapes are in one-point perspective.
- Add lines going down the sides of the buildings.
- All vertical lines go to the vanishing point.
- All horizontal lines are parallel to the tops of the building
- Add shading, or value, to your buildings. The darker values will be closer to the vanishing point.
- The original shapes will be the tops of the buildings, so you can add objects, like pools or helicopter pads as if you are looking at them from above. For example, a pool would look like a rectangle.
- Try making an “L” shape in perspective. Does it change the process? Do you add more lines to the vanishing point?
The Landscape:Set this up on a plain piece of paper. Drawn a horizontal line across the top third of the paper. In the middle place a vanishing point.
- To make a road, lines should start at the bottom of the page and meet at the vanishing point.
- Dividing lines in the road should be larger and further apart when they are lower on the paper and get smaller and closer together as they reach the vanishing point.
- Houses start with squares and rectangles and their sides should go to the vanishing point. They should then be cut down using right angles.
- Try overlapping the shapes.
- Street lights, fences, or power lines should be parallel to the edge of the paper, or straight up and down. These should also gradually get shorter and closer together as they reach the vanishing point. If they have lines attaching the poles together, like a fence or power lines, the horizontal portions of those objects should go toward the vanishing point.
The Room:The middle square or rectangle represents the back of the room or hallway. Whatever you draw on that square should appear as if you are looking directly at it. Those objects will not need the vanishing point.
- Everything on the walls, ceiling, or floor will line up to the vanishing point.
- Anything below the horizon line will include lines moving up toward the vanishing point.
- Anything above the horizon line will include lines moving down toward the vanishing point.
- Vertical Lines should be parallel to the edge of the paper or straight up and down.
- Horizontal Lines use the vanishing point to keep them in perspective.
Once students have experience with each of these lessons, look at some examples of artwork in one-point perspective with a variety of subject matter and using different art techniques or supplies. Look at photographs, paintings, collage, colorful and black and white artwork.
Have students pick a design and create an original work of art using the concepts. Adding choice to your classroom allows for automatic buy-in for students wanting to expand upon ideas and problem solve using their own creativity. The only thing is, it must show understanding of one-point perspective. The rest is up to them!
Tips and Tricks
- Everyone, no matter how long you have been drawing, will make mistakes. It is essential to tell your students this because there will be frustrated faces out there. It is ok. Failure equals learning. Our eyes can trick our brains sometimes, like optical illusions, and that is normal. We are going to try to rewire our thinking using basic “rules.”
- Place worksheets into clear plastic covers. Use dry erase markers to draw the designs in perspective. When the students complete one of the steps, have them hold up their drawings. This is an easy way to assess and erase, so students can make sure to get it right before they move on.
- “Draw Light Until You Know It’s Right.” Drawing lightly at first will make it easier to erase. It is a difficult thing for students to remember, so let them know that they will be erasing in the beginning of the lesson.
- Do the “Ruler Scoot.” Line up the ruler to the existing line that you want your new line to be parallel to… then nudge your ruler up or down from there, keeping the ruler aligned to the original.
- Ask yourself what you are really assessing and provide assistance with the extra skills like rectangles and squares. If you are asking them to master the concept of one-point perspective and not measuring the sides of a square, then provide students with square templates to make that process move faster and easier.
- There are many different designs to begin with and many resources out there with directions. Find what works for you.
- Try making a composition that shows all three designs in different sections of the paper. How would they interact?
- Add 3D elements like superheroes flying over the one-point perspective buildings.
- Take pictures of the students and have them add themselves to their artwork.
- Create a Surrealist work of art by adding a dream-like quality. Draw objects that do not usually go together in the same space. Link your lesson with an artist like Salvador Dali.

|
|

|
|
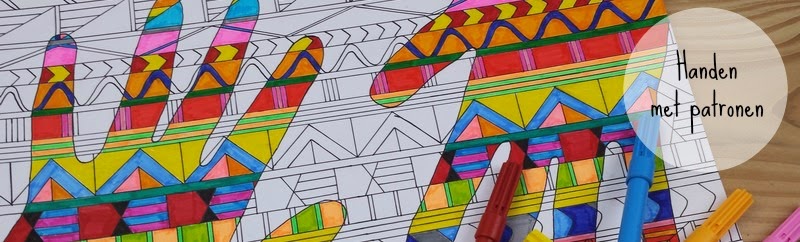
3. Mondrian Hands
|
|
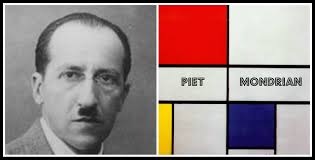
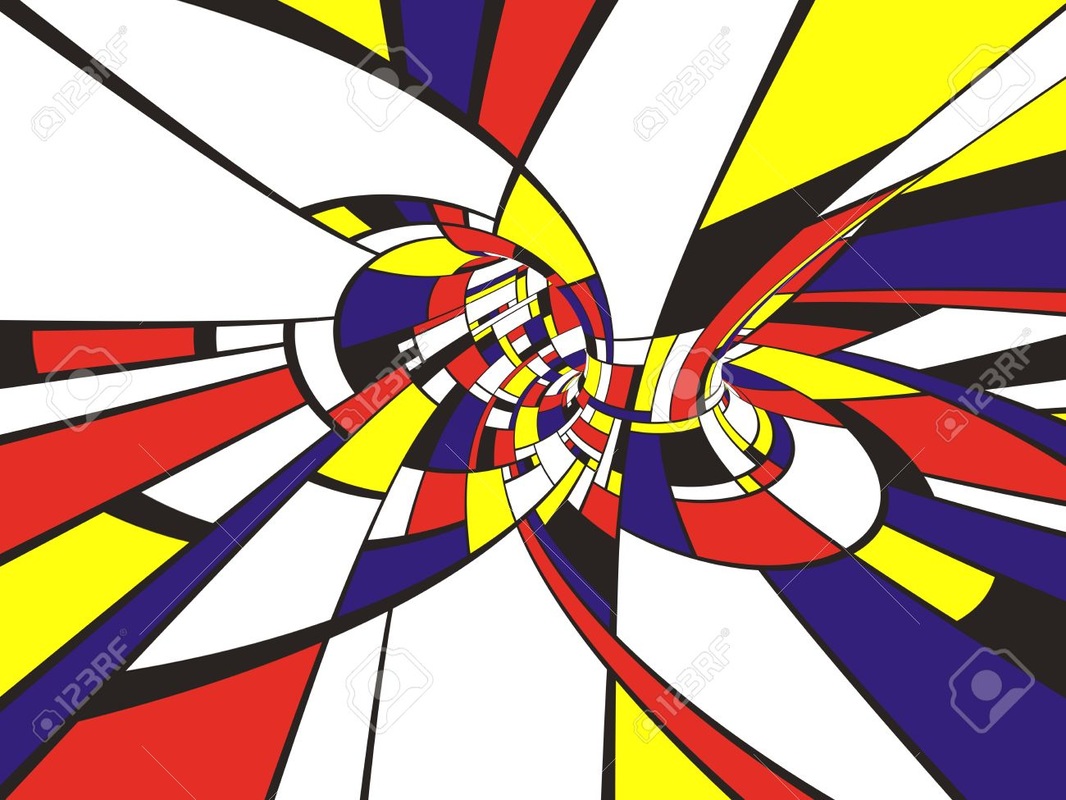
Piet Mondrian
Dutch, 1872–1944
Mondrian was a contributor to the De Stijl art movement and group, which was founded by Theo van Doesburg. He evolved a non-representational form which he termed neoplasticism. This consisted of white ground, upon which he painted a grid of vertical and horizontal black lines and the three primary colors.[2]
Mondrian's arrival in Paris from the Netherlands in 1911 marked the beginning of a period of profound change. He encountered experiments in Cubism and with the intent of integrating himself within the Parisian avant-garde removed an 'a' from the Dutch spelling of his name (Mondriaan).[3][4]
De Stijl (/də ˈstaɪl/; Dutch pronunciation: [də ˈstɛil]), Dutch for "The Style", also known as neoplasticism, was a Dutch artistic movement founded in 1917 in Amsterdam. The De Stijl consisted of artists and architects. The term De Stijlis used to refer to a body of work from 1917 to 1931 founded in the Netherlands.De Stijl advocated pure abstraction and by a reduction to the essentials of form and color; they simplified visual compositions to the vertical and horizontal directions, and used only primary colors along with black and white.
Requirements
- 9" x 12" paper
- ruler
- Black sharpie (or stylus with thin tip)
- Colored markers, or Tempera paint
-Pencil
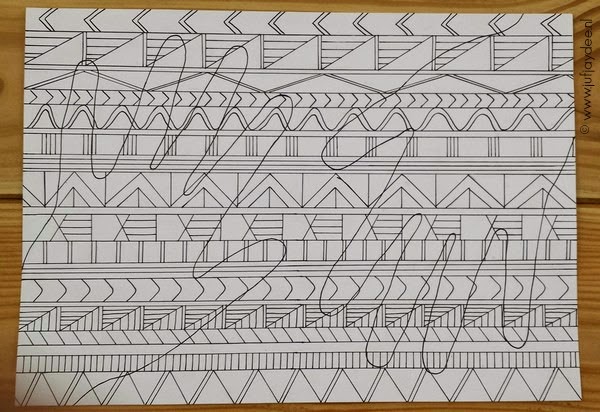
Start with the base.
1.Trace you hands from opposite sides of the paper. (1 clean line)
2. Using a ruler or straight edge,draw horizontal lines, vertical lines, circles, Triangles or flexible patternsare drawn with a ruler of different widths.
3. Do this until the page is completely filled with lines.
Be neat, and organized
4. Using a black sharpie, and go over all lines
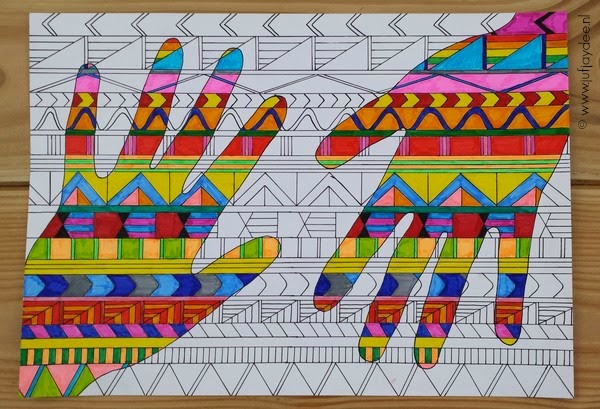
5. The coloring can begin. The only boxes to be colored are the inside of the hands.
As you can see is the pattern of one hand goes into the other. You must therefore ensure that the same pattern is in both hands and has the same color.
IMPORTANT: Be careful with color! Remember, the color only goes in the hands
Dutch, 1872–1944
Mondrian was a contributor to the De Stijl art movement and group, which was founded by Theo van Doesburg. He evolved a non-representational form which he termed neoplasticism. This consisted of white ground, upon which he painted a grid of vertical and horizontal black lines and the three primary colors.[2]
Mondrian's arrival in Paris from the Netherlands in 1911 marked the beginning of a period of profound change. He encountered experiments in Cubism and with the intent of integrating himself within the Parisian avant-garde removed an 'a' from the Dutch spelling of his name (Mondriaan).[3][4]
De Stijl (/də ˈstaɪl/; Dutch pronunciation: [də ˈstɛil]), Dutch for "The Style", also known as neoplasticism, was a Dutch artistic movement founded in 1917 in Amsterdam. The De Stijl consisted of artists and architects. The term De Stijlis used to refer to a body of work from 1917 to 1931 founded in the Netherlands.De Stijl advocated pure abstraction and by a reduction to the essentials of form and color; they simplified visual compositions to the vertical and horizontal directions, and used only primary colors along with black and white.
Requirements
- 9" x 12" paper
- ruler
- Black sharpie (or stylus with thin tip)
- Colored markers, or Tempera paint
-Pencil
Start with the base.
1.Trace you hands from opposite sides of the paper. (1 clean line)
2. Using a ruler or straight edge,draw horizontal lines, vertical lines, circles, Triangles or flexible patternsare drawn with a ruler of different widths.
3. Do this until the page is completely filled with lines.
Be neat, and organized
4. Using a black sharpie, and go over all lines
5. The coloring can begin. The only boxes to be colored are the inside of the hands.
As you can see is the pattern of one hand goes into the other. You must therefore ensure that the same pattern is in both hands and has the same color.
IMPORTANT: Be careful with color! Remember, the color only goes in the hands
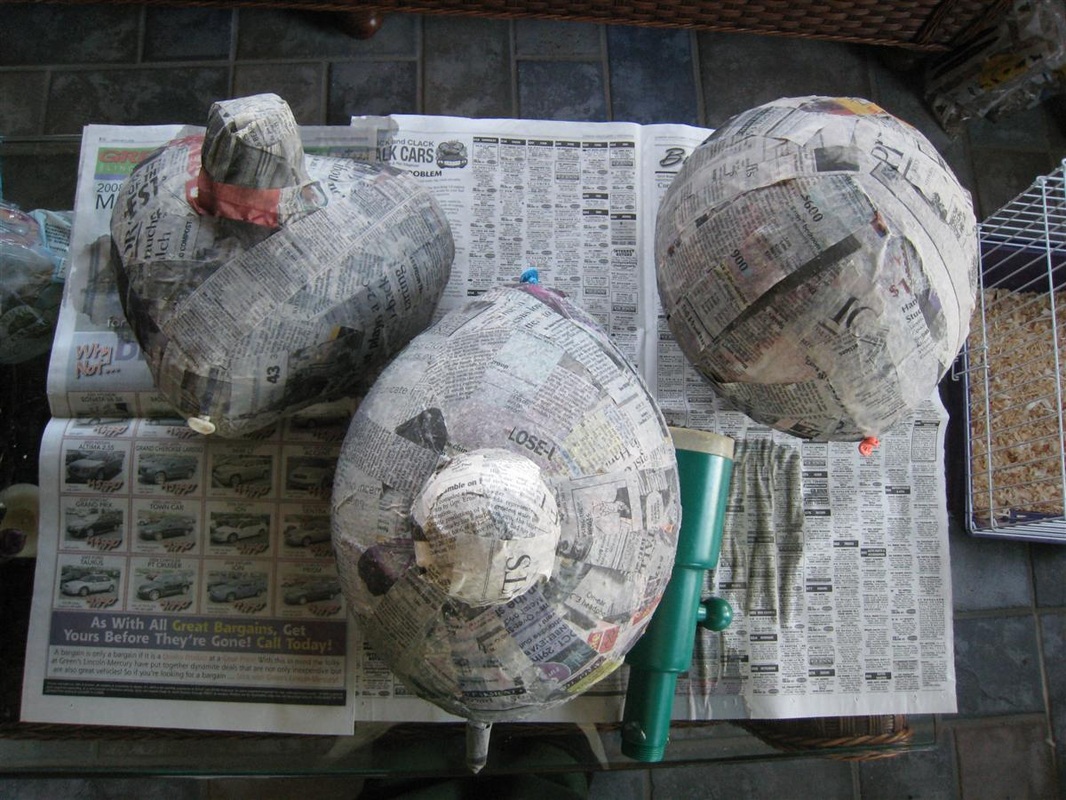
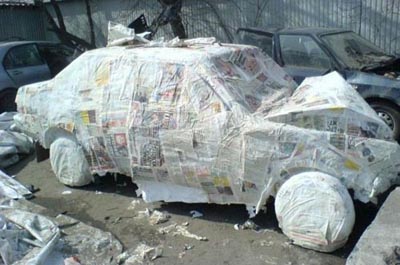
4. Papier Mache Freedom of Expression
Students will create a papier mache sculpture that represents, freedoms and expressions that are important to them.
Students will work in groups. Each student is responsible for equal participation in the project.
1. Students will work in 6 groups of 4 students
2. Students will collect the following items and bring to class. ALL Students MUST bring in items
-Newpapers
-Cardboard
-Wire
-Wood/ sticks / branches
-Plastic
-Chicken wire
-Flour
-Balloons
3. Required sketch books
4. Students will sketch their ideas and concepts before building their sculpture
5. Sketching/ Planning is VERY important and will account for 40% of your grade.
6. Framing your sculpture is very important
Examples:
Examples or Papier Mache:
http://www.videojug.com/film/papier-mache-monster
http://www.videojug.com/film/how-to-make-papier-mache-2
http://cockeyed.com/lessons/papermache/papermache01.shtml
Students will work in groups. Each student is responsible for equal participation in the project.
1. Students will work in 6 groups of 4 students
2. Students will collect the following items and bring to class. ALL Students MUST bring in items
-Newpapers
-Cardboard
-Wire
-Wood/ sticks / branches
-Plastic
-Chicken wire
-Flour
-Balloons
3. Required sketch books
4. Students will sketch their ideas and concepts before building their sculpture
5. Sketching/ Planning is VERY important and will account for 40% of your grade.
6. Framing your sculpture is very important
Examples:
- Capital punishment
- Corporal punishment
- Bullying
- Drug laws
- Alcohol laws
- Tobacco and smoking laws
- Gambling laws
- Prostitution laws
- Ageism / Youth rights
- Racism
- Age of consent
- School leaving age
- Adultism
- Immigration
- Corruption
- Unemployment
- Protests
- Riots
- Child Labor
- Poverty
- Homelessness
- Beggars
- Terrorism
- Old age
- Traffic
- Child abuse
- Abortion
- Suicide, Youth suicide, and Assisted suicide
- Censorship
- Illegal Immigration
- Teenage pregnancy
- Discrimination
- Class discrimination
- Tax exemptions
- Disability
- Spoiled children
- Labelling
- Fanaticism
- Mental disorder
- Social stigma
- Police brutality
- Bigotry
- Prejudice
- Power harassment
- Rankism
- Social outcasts
- Sharia law
- Social class
- Social inequality
- Gun rights
Examples or Papier Mache:
http://www.videojug.com/film/papier-mache-monster
http://www.videojug.com/film/how-to-make-papier-mache-2
http://cockeyed.com/lessons/papermache/papermache01.shtml

|

|
|
|
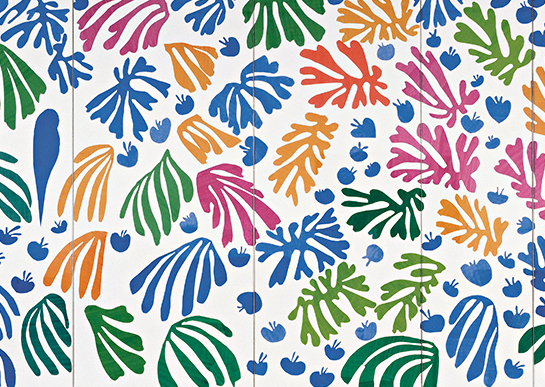
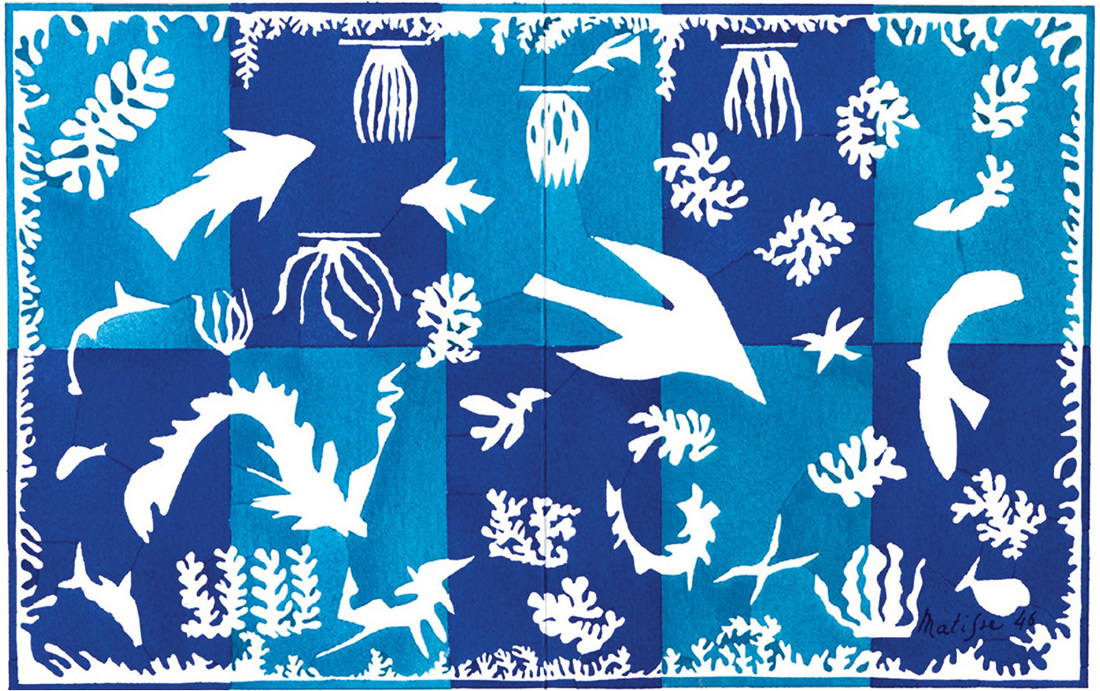
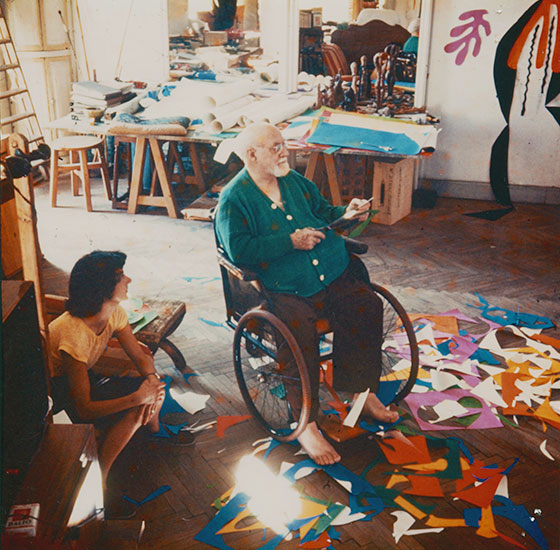
5. Henri Matisse-Painting with Paper
|
WHAT YOU WILL LEARN:
Cutting organic shapes and arranging them in a composition; learning about positive and negative shapes, unity and variety WHAT YOU WILL NEED: A variety of colored papers, including some textured ones (decorative papers); white construction paper; scissors; paste or glue. Getting Started: If you cut or draw any shape, the shape is called “positive”. The shape of the space around the shape is called “negative.” You will use both positive and negative organic shapes to create a composition of colored paper. A famous artist, Henri Matisse, made large art works of paper that he had painted with bright colors. Actually, he cut and arranged them on a background. He tried out many arrangements before he fastened them down. Look at as many of Matisse’s cut-outs as you can find. Study the variety of organic shapes he made. . . birds, leaves, fish, and, sometimes, just squiggles. Notice the strong colors he chose. See how the negative spaces of the background relate to the positive shapes he pasted onto it. He often repeated shapes to make a decorative pattern or a border for his compositions. The Process 1. Plan to cut interesting shapes of different colors and sizes, but choose one color to use several times around your composition. This will unify it and keep it from looking scattered. Practice cutting some shapes from scratch paper, if you like. 2. Notice that as you cut out a shape (positive), the leftover scrap of paper automatically makes a different sort of positive shape when you place it Annette Age 8 on the background paper! (You can find some examples of this in Matisse’s cut-outs if you look closely.) You can arrange both of these kinds of positive shapes on the negative space of your white paper. 3. When you have a variety of shapes, try to organize them so they do not touch one another on the white background. Cut more colored shapes if you need to. Be sure you have large, medium and small sizes for variety. Repeat some of the same color for unity. 4. Try several arrangements before you decide to glue everything down. Lift one piece at a time; put some glue on the back and put it back where it was. 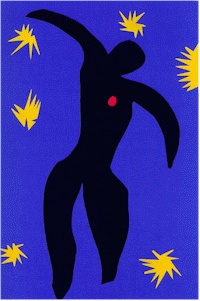
|
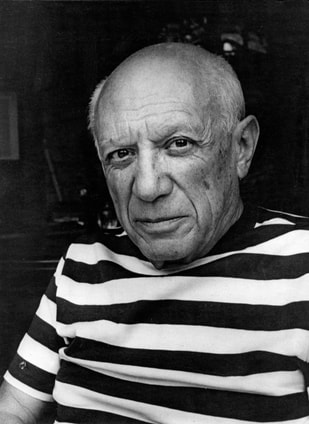
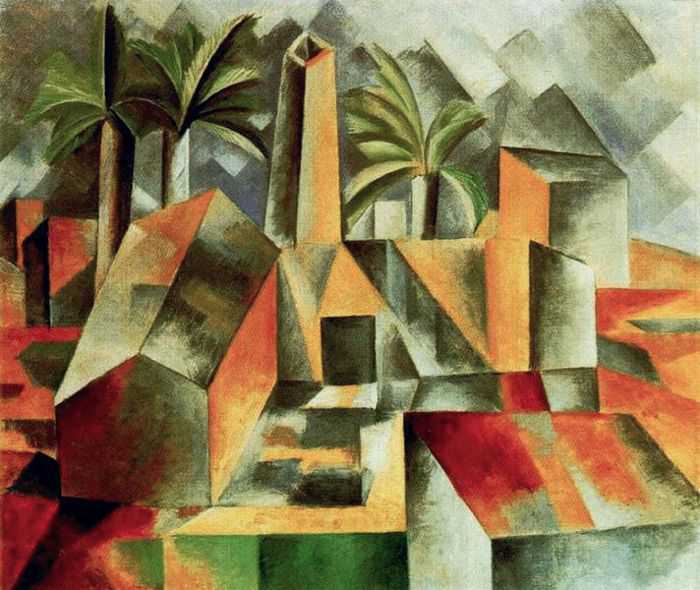
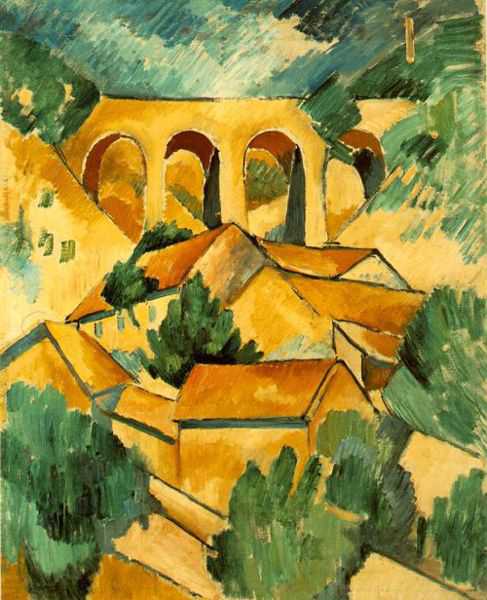
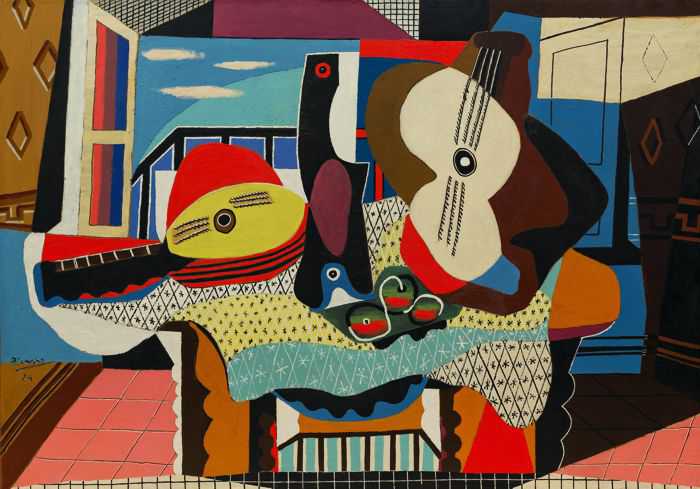
6. Picasso and Cubism
|
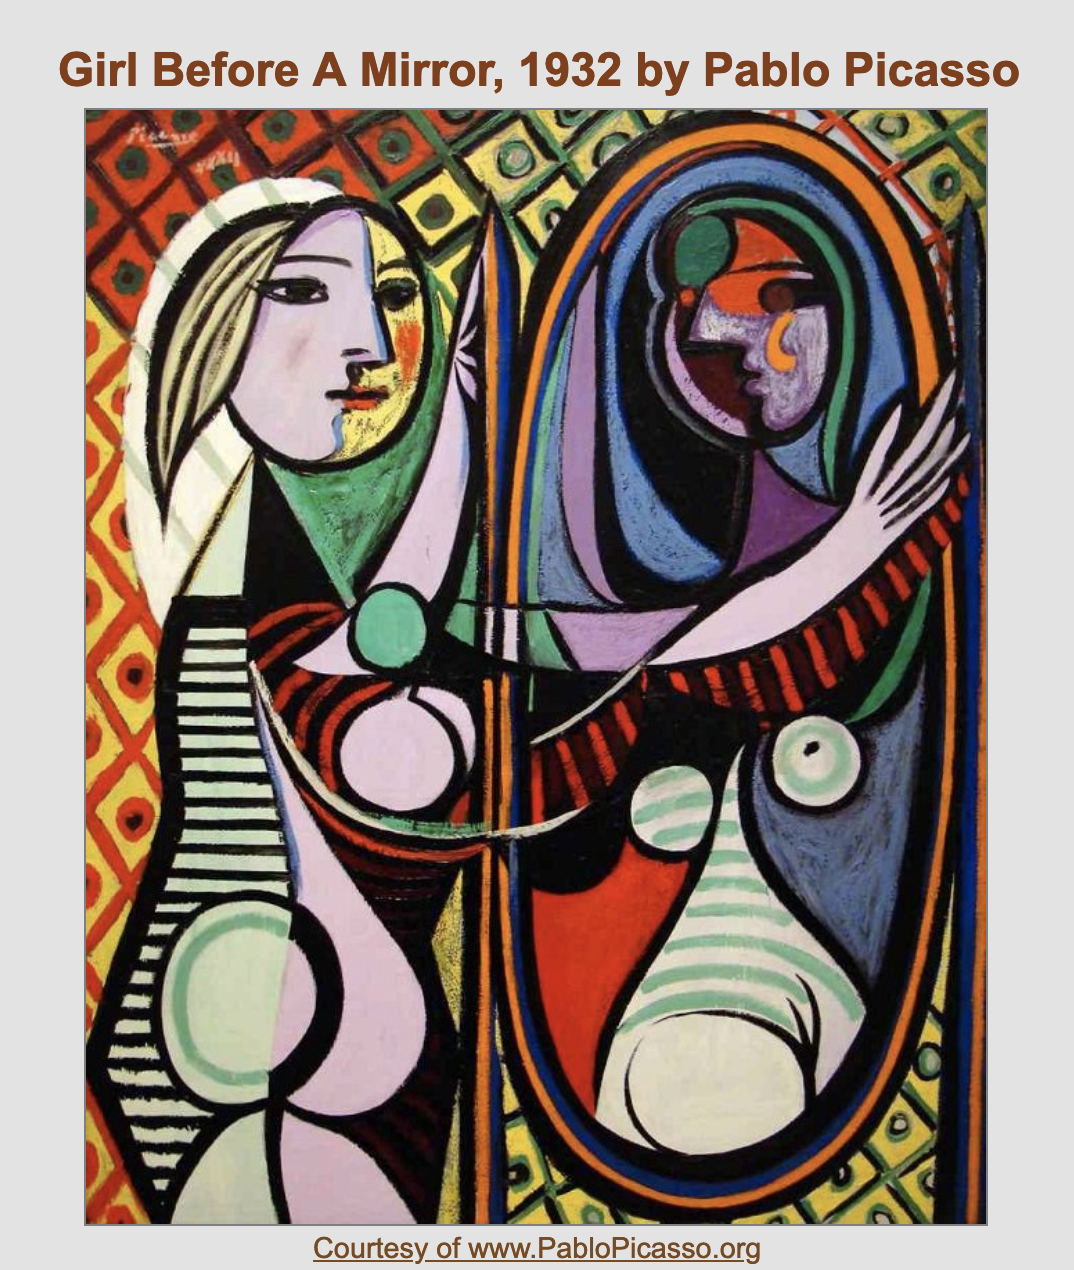
Students will understand the use of geometric shape, color, and pattern in a cubist composition of a reflective portrait.
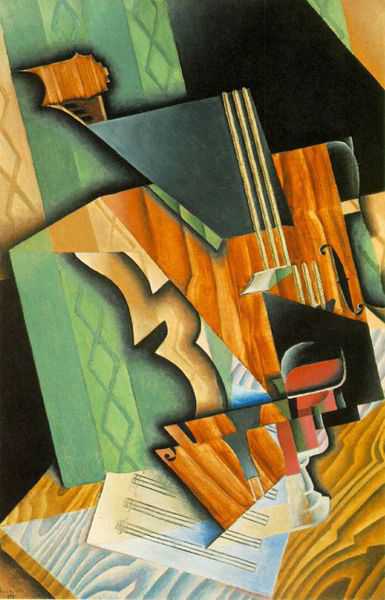
OBJECTIVE Understand the use of geometric shape, color, and pattern in a cubist composition of a reflective portrait. DAY 1. MATERIALS Image of the painting Girl Before a Mirror by Pablo Picasso, a mirror, paintbrushes, pencils, sketchpads, and acrylic color paints _________________________________________________________________________________ Who was Pablo Picasso? Pablo Picasso, also known as Pablo Ruiz y Picasso, was singular in the art world. Not only did he manage to become universally famous in his own lifetime, he was the first artist to successfully use mass media to further his name (and business empire). He also inspired or, in the notable case of Cubism, invented, nearly every art movement in the twentieth century. Picasso's father, fortuitously, was an art teacher who quickly realized he had a boy genius on his hands and (almost as quickly) taught his son everything he knew. At the tender age of 14, Picasso passed the entrance exam to the Barcelona School of Fine Arts - in just one day. By the early 1900s, Picasso had moved to Paris, the "capital of the arts." There he found friends in Henri Matisse, Joan Miró and George Braque, and a burgeoning reputation as a painter of note. Before, and shortly after, moving to Paris, Picasso's painting was in its "Blue Period" (1900-1904), which eventually gave way to his "Rose Period" (1905-1906). It wasn't until 1907, though, that Picasso really raised a commotion in the art world. His painting Les Demoiselles d'Avignon marked the beginning of Cubism. Having caused such a stir, Picasso spent the next 15 years seeing what, exactly, could be done with Cubism (such as putting paper and bits of string in a painting, thus inventing the collage). The Three Musicians (1921), pretty much summed up Cubism for Picasso. For the rest of his days, no one style could maintain a hold on Picasso. In fact, he was known to use two or more different styles, side by side, within a single painting. One notable exception is his surrealistic painting Guernica (1937), arguably one of the greatest pieces of social protest ever created. Picasso lived long and, indeed, prospered. He grew fabulously wealthy from his phenomenal output (including erotically themed ceramics), took up with younger and younger women, entertained the world with his outspoken remarks, and painted almost right up until he died at the age of 91. What is Cubism? Cubism was a truly revolutionary style of modern art developed by Pablo Picasso and Georges Braques. It was the first style of abstract art which evolved at the beginning of the 20th century in response to a world that was changing with unprecedented speed. Cubism was an attempt by artists to revitalise the tired traditions of Western art which they believed had run their course. The Cubists challenged conventional forms of representation, such as perspective, which had been the rule since the Italian Renaissance. Their aim was to develop a new way of seeing which reflected the modern age. In the four decades from 1870-1910, western society witnessed more technological progress than in the previous four centuries. During this period, inventions such as photography, cinematography, sound recording, the telephone, the automobile and the airplane heralded the dawn of a new age. The problem for artists at this time was how to reflect the modernity of the era using the tired and trusted traditions that had served art for the last four centuries. Photography had begun to replace painting as the tool for documenting the age and for artists to sit illustrating cars, planes and images of the new technologies was not exactly rising to the challenge. Artists needed a more radical approach - a 'new way of seeing' that expanded the possibilities of art in the same way that technology was extending the boundaries of communication and travel. This new way of seeing was called Cubism - the first abstract style of modern art. Picasso and Braque developed their ideas on Cubism around 1907 in Paris and their starting point was a common interest in the later paintings of Paul Cézanne. _____________________________________________________________________________ 2. Describe the shapes they see in the left-side figure. Then find them again in the right-side figure. Are they exactly the same, a mirror image? 3. Identify the body position in both figures. How did Picasso create two sides to the images of each figure? Note that they appear to be side and three-quarter views. Note the use of shapes and angles that utilize a value change or contrasting color, and the use of center side body line and use of pattern. 4. This is a reflective portrait of Marie-Therese Walter, a favorite subject of Picasso in the early 1930s. She was often his model. Explain that when Picasso looked at a human being, he broke up the body into the shapes and angles that he presents on the canvas. Marie-Therese is standing before a mirror, but seeing a reflection of reality. Key questions about the painting: What do you think the woman is seeing in Picasso's reflective image? Note the use of Picasso's style of face, which includes a profile view and a three-quarter view of the face. This style is somewhat smaller in the reflection, where more of the three-quarter view is visible. This placement gives the viewer the illusion of flat planes or sides seen in the same perspective view. Note: that from the neck through the shoulder we see a center line that continues to a hip joint and on through the thigh. This helps us see the side and frontal view of the figure. Note the use of the oval around the head, much like a glow. Ask students how the reflection uses the same shape. Ask students if both figures look happy or sad. How did Picasso use color to help them come to that observation? Ask students what they think Picasso is saying here in this dual image. Is the girl seeing the future? Looking inside herself? Seeing a loss of innocence? Herself at an old age? At the beginning of the cubist movement, Picasso and other artists used a muted color palette to help show sides and angles. Point out that in this work, he uses color to help convey feeling and meaning. Textures and patterns are arranged to help the viewer see the accented body parts. The diamond pattern in the background represents Picasso himself, in his favorite harlequin patterning. Draw attention to the red stripes that connect both images. DIRECTIONS 1. Two students about the same height stand facing each other. Ask them to play "mirror image" striking reflective poses. These are 5 minute poses Do this 3 times, so the students are comfortable with the experience 2. Students sketch the volunteers in quick-gesture drawings or contour-line sketches to understand body placement. Then ask one model to portray a happy emotion, and the other to portray a sad emotion. Student models should show the emotion through their body postures in additions to their faces. DAY's 2 to 4 You will be creating a work in the style of Picasso's Girl Before a mirror. Using their sketches from class, students will draw themselves before a mirror and have one of the following options for how to portray themselves in the mirror reflection: a). An emotional image using color to represent feelings (color has many meanings-they will have to define how they use color) b). A future image or ideal of what they hope to become in the future (career or goal) c). A fantasy image or alter ego Include only geometric shapes and planes, as well as to add textures and patterns to support their concept. The figures and the edge of the mirror should be clearly seen, as in Picasso's work. 5. Do a rough-draft sketch or two in your sketch pads organizing the composition. When you have completed an acceptable rough draft, Try now in Tempera paints 6. Lightly sketch their composition on the paper or canvas, making sure to account for the enlargement of paper or canvas. The figures should fill the area. The frame of the mirror should be the line of symmetrical balance in the center of the work, helping to define the real figure and the reflected image. Be sure to use profile and three-quarter views for the faces and bodies. Remember!! The body placement need not be exact in reflection but close enough to convey the concept of reflection. 7. Display finished work and have students discuss positively what they see in each work. Have each artist present their concept of Girl Before a mirror, explaining what their image represents and why they chose their color palette. |